Indulge in Homemade Rocky Road Cookies: A Sweet Treat for All!
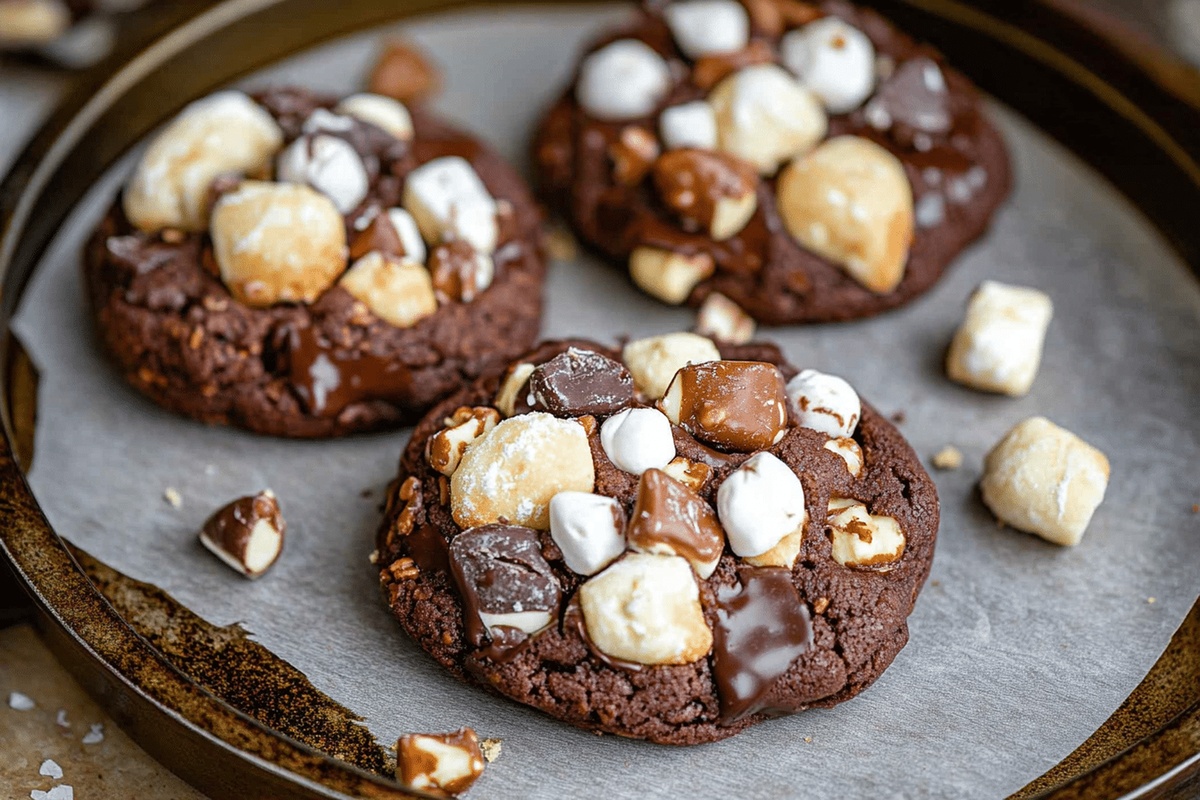
Rocky road, a beloved dessert flavor, has transformed into a delightful cookie experience that captures hearts and taste buds.
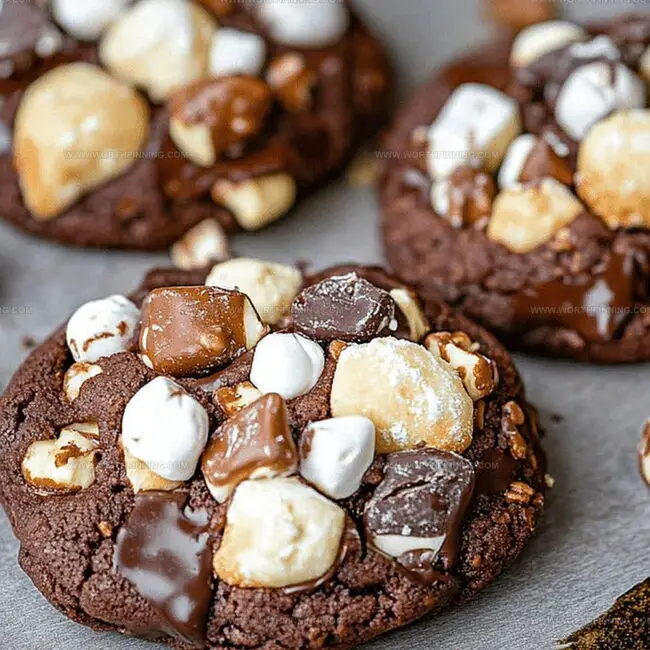
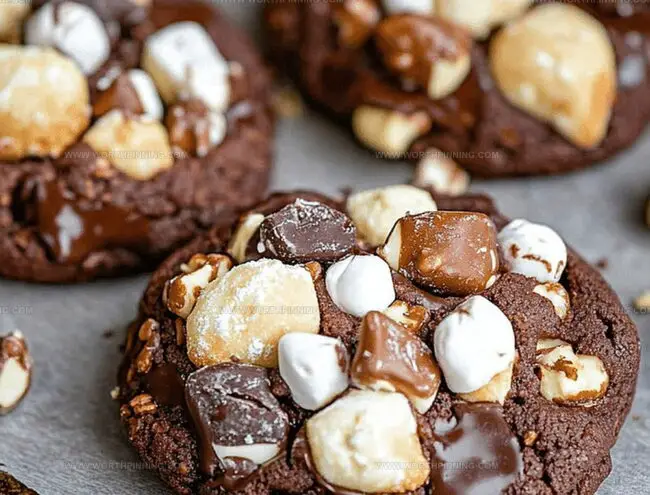
These indulgent treats blend rich chocolate with soft, chewy textures and delectable mix-ins.
Sweet marshmallows and crunchy nuts create a nostalgic harmony within every delicious morsel.
Home bakers and cookie enthusiasts adore the playful combination of ingredients that make these cookies stand out from traditional recipes.
The decadent dessert embraces comfort and excitement in a single, irresistible package.
Chocolate lovers will find these cookies to be a perfect balance of classic flavors and unexpected delights.
Why Rocky Road Cookies Are So Addictive
What Goes In Rocky Road Cookies
Base Ingredients:Fat and Sweeteners:Mix-Ins and Toppings:Binding Ingredient:How To Make Rocky Road Cookies
Step 1: Warm Up the Oven
Preheat the oven to 400°F (200°C).
Line two baking sheets with parchment paper.
Step 2: Create the Cookie Base
In a large mixing bowl, cream together:Use an electric mixer until smooth and fluffy.
Add egg and blend until fully incorporated.
In a separate bowl, combine dry ingredients:Whisk thoroughly.
Step 3: Blend and Form the Dough
Mix dry ingredients into wet ingredients on low speed until soft cookie dough develops.
Fold in:Scoop dough into ¼ to ⅓ cup portions.
Roll each portion into smooth balls.
Step 4: Bake to Perfection
Place cookie dough balls on prepared baking sheets, leaving space between each.
Optionally decorate tops with:Bake for 9-11 minutes.
Allow cookies to cool completely on baking sheet for 30 minutes.
Step 5: Optional Marshmallow Magic
Sprinkle extra mini marshmallows on top of baked cookies.
Use a kitchen torch to lightly caramelize marshmallows for a golden, campfire-inspired finish.
Tips For Better Rocky Road Cookies
How To Store And Warm Rocky Road Cookies
Best Pairings For Rocky Road Cookies
Variations For Rocky Road Cookies
Questions About Rocky Road Cookies
Absolutely! You can swap milk, dark, or white chocolate chips depending on your preference. Just ensure the total amount remains consistent with the recipe.
Cold butter helps create a more structured cookie texture and prevents spreading too quickly during baking. Using room temperature butter might result in flatter cookies.
The edges will look set and slightly firm, while the center might appear slightly soft. They’ll continue cooking as they cool on the baking sheet, so don’t overbake.
No worries! You can briefly place the cookies under the broiler for 30-60 seconds, watching carefully to prevent burning. Alternatively, you can skip the toasting step entirely.
Print
Incredible Rocky Road Cookies Recipe
- Total Time: 26 minutes
- Yield: 12 1x
Description
Indulgent Rocky Road Cookies bring together classic chocolate, marshmallows, and nuts in a delightful dessert that promises pure comfort. Sweet meets crunchy in this irresistible treat you’ll want to savor with a cold glass of milk.
Ingredients
Primary Ingredients:
- 1 cup (240 ml) granulated sugar
- 1 ½ cups (180 grams) all-purpose flour
- 1 cup (170 grams) chocolate chips
- 1 cup (100 grams) mini marshmallows
Butter and Binding Ingredients:
- 1 stick (113 grams or ½ cup) cold unsalted butter, chopped
- 1 large cold egg
Dry Seasonings and Nuts:
- ½ cup (50 grams) cocoa powder
- ½ teaspoon baking soda
- ¼ teaspoon salt
- ½ cup (60 grams) chopped nuts (cashews, walnuts, almonds, pecans, or pistachios)
Instructions
- Prepare the baking workspace by heating the oven to 400°F (200°C) and lining two baking sheets with parchment paper.
- Create the cookie base by thoroughly creaming cold butter and sugar in a large mixing bowl using an electric mixer until smooth and fluffy.
- Incorporate the egg into the butter mixture, blending until fully integrated and uniform in texture.
- In a separate bowl, carefully combine and sift flour, cocoa powder, baking soda, and salt to ensure even distribution of dry ingredients.
- Gently fold the dry ingredient mixture into the wet ingredients, mixing on low speed until a soft, cohesive cookie dough emerges.
- Fold chocolate chips and chopped nuts into the dough, distributing them evenly throughout the mixture.
- Form the cookie dough into rounded portions, using ¼ to ⅓ cup measurements, and roll into smooth balls.
- Arrange the dough balls on prepared baking sheets, leaving adequate space between each for spreading during baking.
- Enhance the cookie’s appearance by strategically pressing additional chocolate chips, nuts, and marshmallows onto the surface of each dough ball.
- Bake the cookies for 9-11 minutes, watching carefully to achieve the perfect texture and color.
- Allow the cookies to rest and set on the baking sheet for 30 minutes, which helps them maintain structure and develop a rich flavor.
- For an optional finishing touch, add extra mini marshmallows on top and use a kitchen torch to lightly caramelize them, creating a delightful campfire-inspired aesthetic.
Notes
- Chill the dough for 30 minutes before baking to prevent excessive spreading and create a thicker, chewier cookie texture.
- Swap out regular chocolate chips for dark chocolate or dairy-free chocolate chips to accommodate different dietary preferences.
- Use gluten-free flour blend to make these cookies suitable for those with gluten sensitivities, ensuring the same rich, decadent flavor.
- Toast nuts beforehand to enhance their nutty flavor an
- Prep Time: 15 minutes
- Cook Time: 11 minutes
- Category: Desserts, Snacks
- Method: Baking
- Cuisine: American
Nutrition
- Serving Size: 12
- Calories: 210
- Sugar: 18 g
- Sodium: 100 mg
- Fat: 10 g
- Saturated Fat: 6 g
- Unsaturated Fat: 4 g
- Trans Fat: 0 g
- Carbohydrates: 30 g
- Fiber: 1 g
- Protein: 2 g
- Cholesterol: 20 mg
Sophia Rivera
Recipe Developer & Kitchen Tips Specialist
Expertise
Education
Austin Community College
San Antonio Culinary Institute
Sophia’s passion for baking began in her family kitchen, where she spent hours experimenting with new recipes. With a background in baking and pastry arts, she loves making desserts that are as visually stunning as they are delicious.
Sophia is all about using seasonal, locally sourced ingredients to create treats that everyone will enjoy. When she’s not creating mouth-watering desserts, you can find her gardening, making new recipes, or enjoying a relaxing afternoon with her family.