
Delicious Homemade Pierogi Recipe: A Taste of Comfort
Pierogies are delightful Eastern European dumplings that bring comfort to people worldwide.
These tender dough pockets can be stuffed with a range of tasty or sweet fillings, showcasing deep-rooted food traditions.
Making pierogies at home is a heartfelt process, linking generations through shared kitchen moments and cherished recipes.
Crafting these delicious treats requires careful steps, precise folding, and a love for creating something special.
Family stories and cultural ties often find their way into the soft layers of these traditional bites.
Pierogies offer an ideal mix of basic ingredients and rich tastes that continue to please palates and warm souls everywhere.
Perks Of Making Pierogi Recipe At Home
Ingredients List For Pierogi Recipe
Pierogi Ingredients:
Dough Ingredients:Filling Ingredients:Topping and Garnish Ingredients:How To Prepare Pierogi Recipe Simply
Step 1: Prepare Potato Filling
Boil peeled potatoes in water until fork-tender. Drain and cool briefly. Mash potatoes until smooth and combine with:Set aside the mixture.
Step 2: Create Pierogi Dough
In a mixing bowl, blend:Add flour gradually, mixing until dough becomes smooth and non-sticky. Knead for 2-3 minutes. Cover and rest for 30 minutes.
Step 3: Shape Pierogi Pockets
Roll out dough on floured surface to 1/8-inch thickness. Cut circles using a cookie cutter. Place potato filling in center of each circle. Fold dough over filling, pinching edges tightly to seal. Crimp edges with pinch-and-twist technique.
Step 4: Prepare Bacon Drizzle
Crisp chopped bacon in a skillet. Melt butter into bacon and set aside.
Step 5: Boil Pierogi
Bring salted water to rolling boil. Add pierogi in batches. Cook until they float and water returns to boil (about 2 minutes). Remove with slotted spoon.
Step 6: Serve and Enjoy
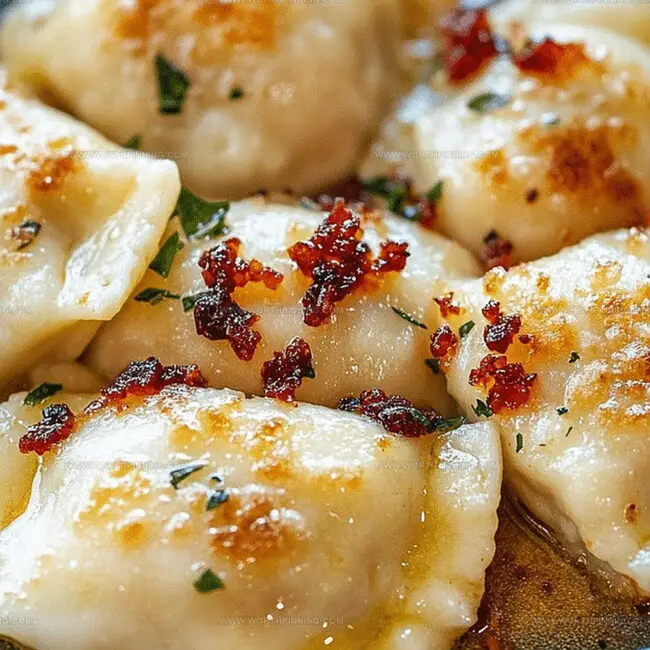
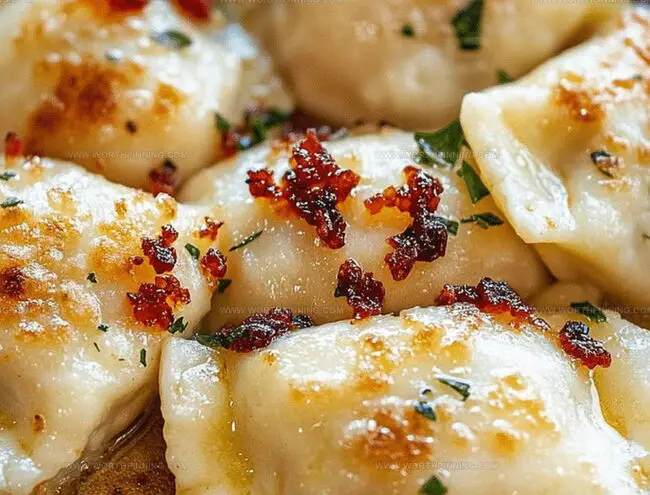
Layer pierogi in serving dish, drizzling bacon butter between layers. Serve with sour cream on the side. Enjoy your homemade pierogi!
Useful Advice For Pierogi Recipe
The Right Way To Store And Reheat Pierogi Recipe
What Goes Great With Pierogi Recipe
Fun Variations For Pierogi Recipe
FAQs About Pierogi Recipe
Making pierogi requires some practice but isn’t complicated. The dough is simple to prepare, and filling assembly becomes easier with each batch you make. With patience and basic cooking skills, anyone can master homemade pierogi.
Yes, you can freeze uncooked pierogi. Place them on a baking sheet lined with parchment paper, ensuring they don’t touch each other. Once frozen, transfer to a freezer bag. They’ll keep for about 3 months and can be boiled directly from frozen, adding 1-2 minutes to cooking time.
Starchy potatoes like Russet or Yukon Gold are ideal. They mash smoothly and provide a creamy, consistent filling. Avoid waxy potatoes, which can result in a lumpy texture.
After boiling, gently drizzle the buttery bacon mixture between layers to prevent pierogi from clumping. Also, avoid overcrowding them when cooking and serve immediately after boiling.
Print
Scrumptious Pierogi Recipe
- Total Time: 2 hours
- Yield: 6 1x
Description
Polish pierogi celebrate comfort with handcrafted dumplings stuffed with creamy potato, sharp cheddar, and caramelized onions. Tender pasta-like dough wraps tender fillings, offering hearty warmth that connects generations of family recipes from Eastern European kitchens.
Ingredients
Potato Filling:
- 2 lbs (907 grams) russet potatoes
- ½ teaspoon salt
- 2 tablespoons unsalted butter, melted
- 2 ounces (57 grams) cream cheese, softened
- ¾ cup mozzarella cheese, shredded
Pierogi Dough:
- 1 large egg
- 4 cups (480 grams) all-purpose flour
- 1 ½ teaspoons fine sea salt
- 1 cup warm water
- ¼ cup whole milk
- 2 tablespoons sour cream
- 3 tablespoons extra light olive oil (or vegetable oil)
Bacon Topping:
- 4 ounces (113 grams) bacon, chopped
- 2 tablespoons unsalted butter
- Sour cream (optional, for serving)
Instructions
- Prepare potatoes by boiling them in water until fork-tender, approximately 25 minutes. Ensure complete submersion during cooking.
- Drain and allow potatoes to cool briefly, then thoroughly mash into a smooth consistency.
- Incorporate salt, melted butter, cream cheese, and mozzarella into the potato mixture. Blend until well combined and set aside.
- Create dough by whisking warm water, milk, sour cream, egg, oil, and salt in a mixing bowl.
- Gradually introduce flour to the liquid mixture, mixing until a cohesive dough forms. Adjust flour quantity to prevent stickiness.
- Knead the dough for 2-3 minutes until achieving a smooth, elastic texture. Allow to rest, covered, for half an hour.
- Divide dough into two portions, working with one section at a time on a floured surface.
- Roll out dough to approximately ⅛-inch thickness and cut into 3-inch circular shapes.
- Place potato filling in the center of each dough circle, ensuring precise placement.
- Carefully fold dough over filling, sealing edges completely with a pinching motion to prevent leakage.
- Crimp edges using a twist technique for additional security.
- Render bacon in a skillet until crispy, then incorporate melted butter. Set aside for later use.
- Bring a large pot of salted water to a vigorous boil.
- Gently lower pierogi into boiling water, cooking until they float and water returns to a rolling boil.
- Extract pierogi using a slotted spoon, layering with bacon-butter mixture to prevent adhesion.
- Serve immediately, accompanied by a dollop of sour cream for enhanced flavor.
Notes
- Customize the potato filling by experimenting with different cheeses like sharp cheddar or gouda for extra flavor complexity.
- Ensure dough elasticity by kneading thoroughly and allowing proper resting time, which helps develop gluten and makes pierogi more tender.
- Prevent pierogi from sticking during boiling by adding a splash of oil to the water and stirring gently.
- Freeze uncooked pierogi on a baking sheet before
- Prep Time: 1 hour 30 minutes
- Cook Time: 30 minutes
- Category: Snacks
- Method: Boiling
- Cuisine: Polish
Nutrition
- Serving Size: 6
- Calories: 307
- Sugar: 2 g
- Sodium: 462 mg
- Fat: 14 g
- Saturated Fat: 7 g
- Unsaturated Fat: 6 g
- Trans Fat: 0 g
- Carbohydrates: 38 g
- Fiber: 2 g
- Protein: 8 g
- Cholesterol: 45 mg
Sophia Rivera
Recipe Developer & Kitchen Tips Specialist
Expertise
Education
Austin Community College
San Antonio Culinary Institute
Sophia’s passion for baking began in her family kitchen, where she spent hours experimenting with new recipes. With a background in baking and pastry arts, she loves making desserts that are as visually stunning as they are delicious.
Sophia is all about using seasonal, locally sourced ingredients to create treats that everyone will enjoy. When she’s not creating mouth-watering desserts, you can find her gardening, making new recipes, or enjoying a relaxing afternoon with her family.