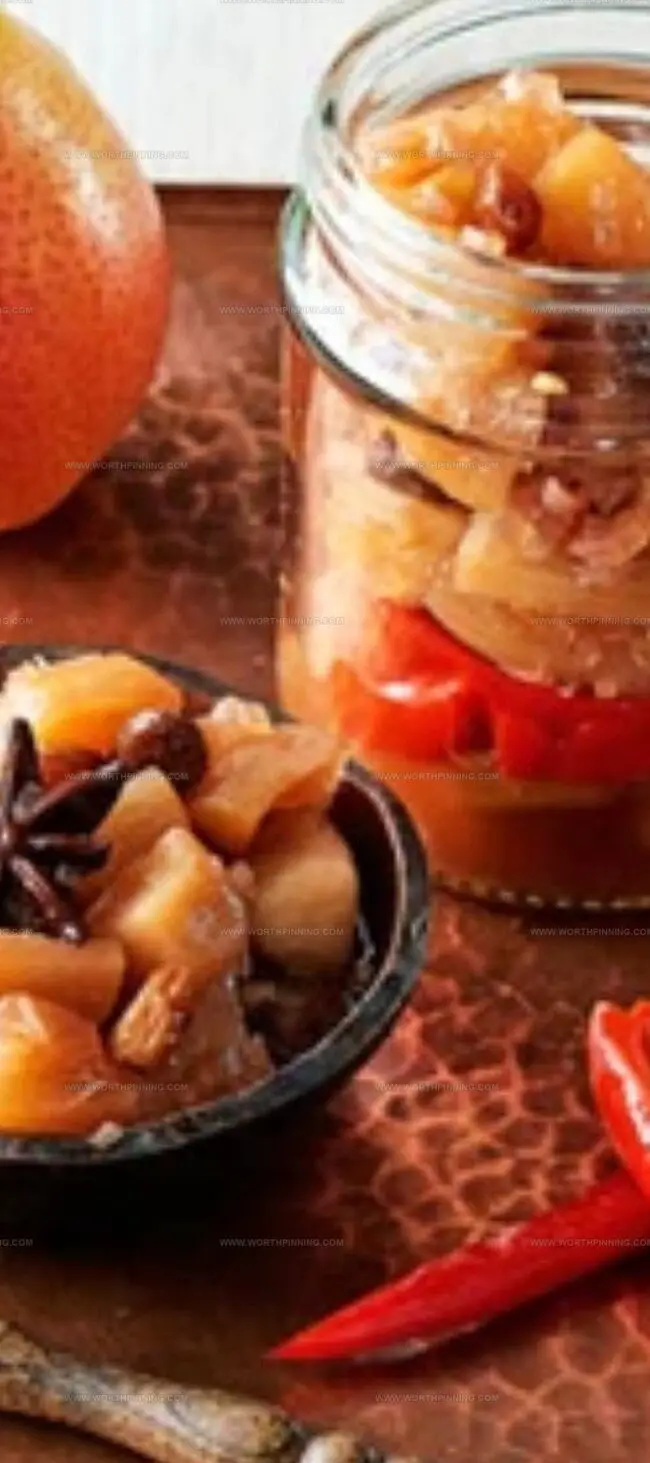
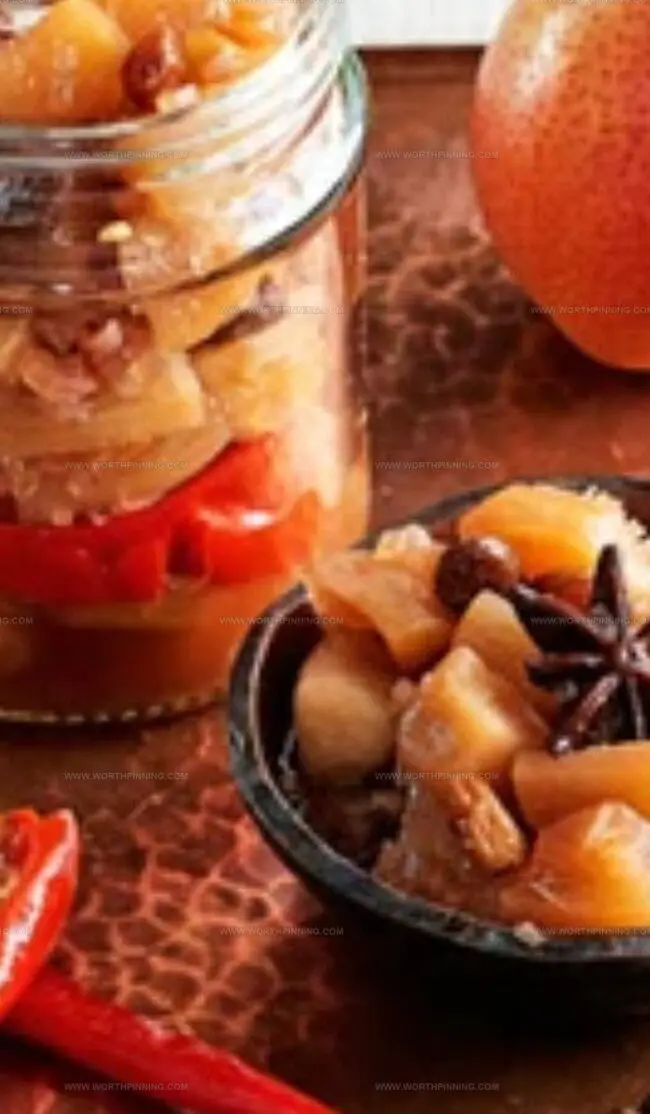
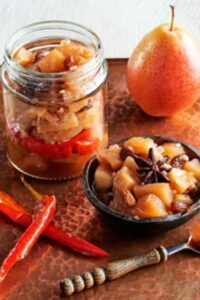
Pear chutney bursts with an electrifying symphony of flavors that transforms mundane meals into gourmet experiences.
This culinary gem marries sweet and spicy elements in a delectable dance of taste sensations.
Ripe pears mingle with aromatic spices, creating a condiment that sings with complexity and depth.
Every spoonful tells a story of carefully balanced ingredients simmering together in harmonious brilliance.
Fragrant herbs and warming spices weave magic through the chutney, elevating even the simplest dishes to extraordinary heights.
The robust blend of textures and tastes promises to awaken your palate and spark culinary excitement.
Each jar of this homemade treasure holds the potential to turn an ordinary meal into an unforgettable gastronomic adventure.
Prepare to be seduced by this irresistible flavor sensation that will become your new kitchen staple.
Quick Recipe Overview
Prep Time: 15 minutes
Cook Time: 40 minutes
Total Time: 55 minutes
Calories: 75 kcal
Servings: 20
Jamie Oliver Pear Chutney: What You’ll Need
For Flavor Foundation:
Sugar: Select pure, granulated sugar for balanced sweetness.
Cider Vinegar: Choose high-quality, unpasteurized variety for bright tang.
Pear Cider: Opt for artisanal, crisp local cider with robust fruit notes.
Star Anise: Pick whole, fragrant pods with deep mahogany color.
Cumin: Use freshly ground spice for maximum aromatic intensity.
For Aromatic Vegetables:
Red Onions, Fresh Ginger: Select firm onions with deep purple skin and plump, smooth ginger root for maximum zesty punch.
For Fruity Complexity:
Ripe Pears, Red Chilies, Sultanas: Choose pears with slight give, vibrant chilies with intense color, and golden sultanas for bursting sweetness and texture.
Tools Required for Pear Chutney Prep
Large pot: Spacious, heavy-bottomed cooking vessel for combining ingredients and simmering chutney.
Wooden spoon: Perfect for stirring and mixing ingredients without scratching the pot.
Cutting board: Clean surface for chopping onions, pears, and chilies.
Sharp knife: Essential for finely slicing and chopping ingredients.
Grater: Great for breaking down fresh ginger into fine, flavorful pieces.
Measuring cups: Helps accurately measure sugar, vinegar, and other ingredients.
Glass jars: Clean, sterilized containers for storing your delicious homemade chutney.
Ladle: Useful for transferring hot chutney into jars safely.
Step-by-Step Pear Chutney Recipe from Jamie Oliver
Craft Tangy Pear Chutney
Kickstart the Flavor Fusion Combine vinegar, pear cider, sugar, star anise, and cumin in a large pot. Chop red onions and grate fresh ginger into the bubbling mixture. Bring everything to a lively boil, stirring occasionally to blend the exciting flavors.
Unleash Fruity Excitement Toss in roughly chopped ripe pears and finely sliced red chilies. Lower the heat, letting the ingredients dance and mingle slowly. Watch as the chutney transforms, developing a rich and complex personality.
Simmer to Perfection Allow the mixture to simmer gently for about 40 minutes. The liquid will thicken into a glossy syrup, pears will soften while keeping a delightful texture, and aromas will fill your kitchen with mouthwatering anticipation. The chutney should look luxuriously rich and inviting.
Add Sweet Surprise Sprinkle sultanas into the pot, gently folding them through the chutney. These little bursts of sweetness will add delightful unexpected moments to each spoonful.
Preserve Your Culinary Masterpiece Remove the pot from heat and let the chutney cool completely. Carefully transfer the vibrant mixture into clean, sterilized glass jars. Seal tightly and store in a cool, dark spot. Your homemade chutney will be ready to elevate meals for up to three months – a delicious reminder of your cooking adventure.
Helpful Tips for Jamie Oliver Pear Chutney
Boost Flavor Fusion: Experiment with different pear varieties like Bosc or Anjou to create unique taste profiles that dance on your palate.
Spice It Up: Swap red chilies for jalapeños or habaneros to dial up the heat intensity and add a personal twist to your chutney adventure.
Preserve Like a Pro: Let the chutney rest for 2-3 weeks before serving to allow flavors to meld and develop a deeper, more complex taste that will wow your guests.
Serving Suggestions: Pair this vibrant chutney with sharp cheeses, roasted meats, or use as a gourmet sandwich spread to elevate everyday meals from ordinary to extraordinary.
Serving Pear Chutney with Style
Serve Alongside Savory Delights: Pair this spicy-sweet pear chutney with roasted meats like chicken, pork, or duck for an explosion of flavor that brightens up your main course.
Cheese Board Companion: Create a stunning appetizer spread by dolloping this chutney next to aged cheddar, creamy brie, or tangy goat cheese to elevate your cheese platter.
Gourmet Sandwich Upgrade: Spread a generous layer of this chutney on grilled sandwiches, cold cuts, or artisan bread to transform ordinary lunch into a culinary adventure.
Gift-Worthy Gourmet Treat: Package the chutney in decorative jars with a ribbon, making it a perfect homemade gift for food-loving friends and family during holiday seasons.
Pear Chutney Storage Instructions
Store with Care: Keep your homemade pear chutney in sterilized glass jars, ensuring airtight sealing to preserve its vibrant flavors and prevent contamination.
Refrigerate Right: Once opened, store the chutney in the refrigerator and consume within 2-3 weeks for optimal taste and quality.
Flavor Maturation: Allow the chutney to rest for 1-2 weeks before serving, letting the spices and ingredients meld together, creating a more complex and rich taste profile.
Preservation Pointer: Check jar seals periodically and discard immediately if you notice any signs of mold, unusual color changes, or off-putting odors to maintain food safety.
Jamie Oliver’s pear chutney delivers a sweet and tangy condiment perfect for cheese platters and sandwiches. Rich spices and caramelized pears create a memorable preserve you’ll want to share with friends and family.
Ingredients
Scale
10 pears (firm, peeled, chopped into bite-sized pieces)
2 red onions (chopped)
1 red chilies (halved, optional: deseeded)
200g (7 oz) demerara sugar
200ml (6.8 fl oz) cider vinegar
100ml (3.4 fl oz) pear cider (perry)
50g (1.8 oz) sultanas
1 star anise
1 tsp ground cumin
1 tsp grated ginger
Instructions
Preparation: Combine granulated sugar, apple cider vinegar, pear cider, whole star anise, ground cumin, red onions, and fresh ginger in a heavy-bottomed saucepan, creating an aromatic flavor base.
Boiling Stage: Elevate heat to high and bring the liquid mixture to a robust boil, stirring intermittently to promote uniform heating and prevent scorching.
Fruit Integration: Gently incorporate diced pears and red chilies, immediately reducing temperature to a gentle simmer, allowing the ingredients to meld and develop complex flavors.
Reduction Process: Maintain a low simmer for 35-45 minutes, stirring periodically, until the liquid transforms into a thick, glossy syrup and pears soften while maintaining their structural texture.
Final Enhancement: Introduce golden sultanas into the simmering mixture, stirring thoroughly to distribute evenly and add depth to the chutney’s flavor profile.
Cooling and Preservation: Remove from heat and allow the chutney to cool completely to room temperature, enabling flavor intensification and harmonization.
Storage: Carefully transfer the finished chutney into sterilized glass jars, ensuring clean rims for proper sealing, and store in a cool, dark location or refrigerator to maintain optimal taste and texture.
Notes
Spice Sensitivity Check: Ground cumin and star anise provide robust flavor, so adjust quantities based on personal heat and spice tolerance.
Fruit Selection Matters: Choose ripe, firm pears that hold shape during cooking to maintain texture and prevent mushy consistency.
Stirring Strategy: Regular, gentle stirring prevents bottom burning and ensures even caramelization of sugars and fruits.
Storage and Shelf Life: Properly sealed jars can preserve chutney for 2-3 months in refrigerator, developing deeper flavor complexity over time.
Degree: Associate of Applied Science in Baking and Pastry Arts
Focus: Techniques in baking, pastry creation, and dessert presentation.
San Antonio Culinary Institute
Program: Diploma in Farm-to-Table Culinary Practices
Focus: Emphasis on utilizing locally sourced ingredients and understanding seasonal flavors.
Sophia’s passion for baking began in her family kitchen, where she spent hours experimenting with new recipes. With a background in baking and pastry arts, she loves making desserts that are as visually stunning as they are delicious.
Sophia is all about using seasonal, locally sourced ingredients to create treats that everyone will enjoy. When she’s not creating mouth-watering desserts, you can find her gardening, making new recipes, or enjoying a relaxing afternoon with her family.


Sophia Rivera
Recipe Developer & Kitchen Tips Specialist
Expertise
Education
Austin Community College
San Antonio Culinary Institute
Sophia’s passion for baking began in her family kitchen, where she spent hours experimenting with new recipes. With a background in baking and pastry arts, she loves making desserts that are as visually stunning as they are delicious.
Sophia is all about using seasonal, locally sourced ingredients to create treats that everyone will enjoy. When she’s not creating mouth-watering desserts, you can find her gardening, making new recipes, or enjoying a relaxing afternoon with her family.