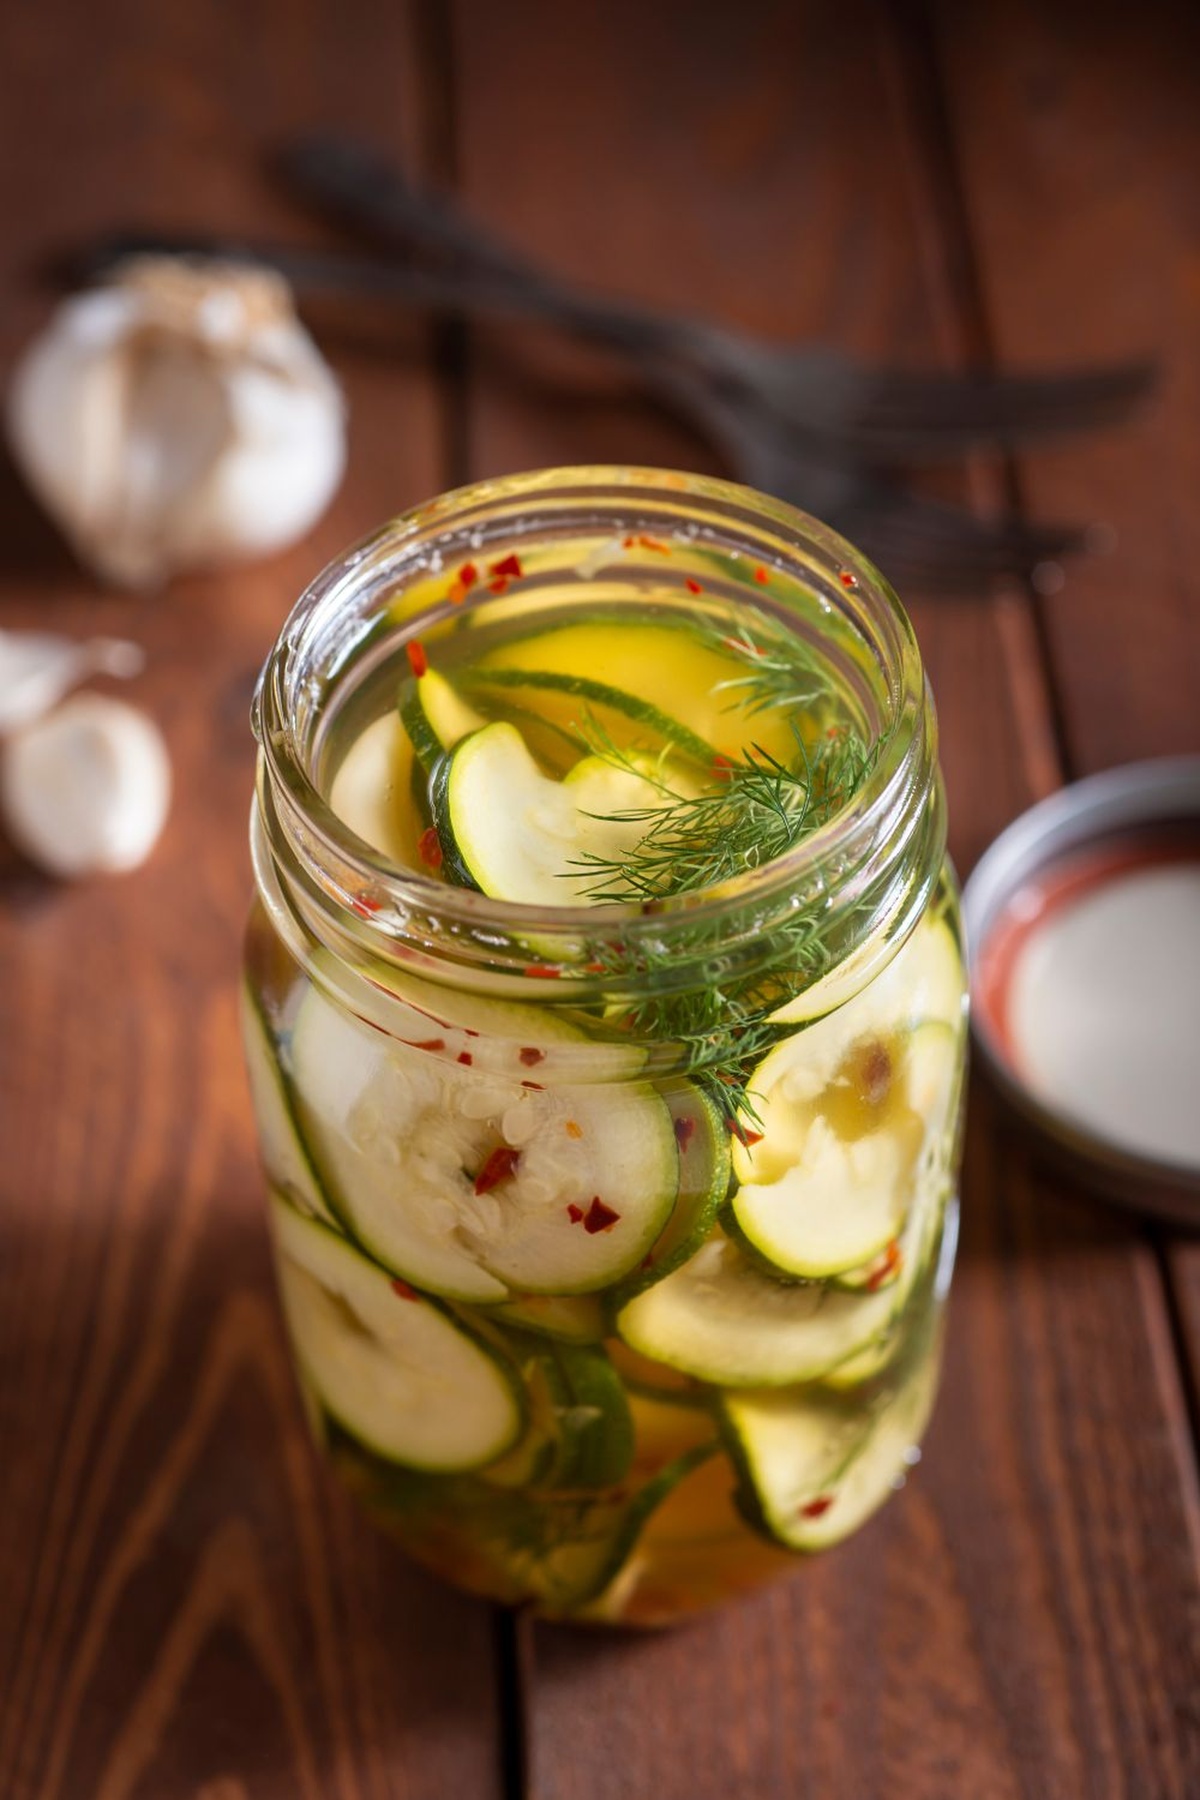
Zingy Jamie Oliver Pickled Courgette Recipe for Summer
Pickled courgette serves up a zesty culinary transformation that electrifies ordinary vegetables with vibrant flavor.
Summer’s bounty bursts from each crisp, tangy bite, capturing garden-fresh essence in a single jar.
Crafting these emerald pickles requires minimal effort but promises maximum taste excitement.
Vinegar and spices work their enchanting alchemy, turning humble courgettes into a gourmet sensation.
Sharp, bright notes cut through rich dishes, adding unexpected complexity to every meal.
These pickled morsels elevate simple ingredients from mundane to magnificent.
Get ready to unleash a flavor revolution that will make your taste buds dance with pure delight.
Quick Recipe Overview
Everything for Jamie Oliver Pickled Courgette
For Vegetables:For Pickling Brine:For Preservation:Equipment to Prep Pickled Courgettes
Quick Pickling Steps to Follow

Grab your sharpest knife and slice zucchini into delicate rounds. Mix with chopped shallots and sprinkle a pinch of salt. Cover with cold water and let the mixture relax for an hour, releasing excess liquid.
Drain water completely and gently pat zucchini and shallots dry using clean kitchen towels. Ensure the vegetables are completely moisture-free for perfect pickling.
Combine white and apple cider vinegars in a saucepan with sugar, mustard seeds, and black peppercorns. Heat until the mixture bubbles and sugar dissolves, creating a flavorful brine. Let it cool down to a warm temperature.
Pour the aromatic warm liquid over your dried zucchini mixture. Gently stir to coat every slice with the zesty pickling solution.
Thoroughly clean glass jars with hot soapy water. Warm them in the oven at 340°F for 10 minutes to sterilize. Carefully spoon the pickled zucchini and brine into jars, sealing tightly with clean lids.
Tuck the jars into the refrigerator. Allow the pickles to mingle and develop their tangy personality for 2-3 days before diving in. Enjoy within two weeks for maximum freshness and crunch.
Adjusting Brine for Courgette Flavor
Plating and Serving Pickled Veggies
Storage Tips for Courgette Pickles
Print
Tangy Jamie Oliver Pickled Courgette Recipe
- Total Time: 20 minutes
- Yield: 4 1x
Description
Pickled courgette by Jamie Oliver brings zesty Mediterranean flavors to simple summer salads. Italian-inspired preservation methods infuse crisp zucchini with tangy herbs and spices, offering you a quick and delicious condiment.
Ingredients
- 500 g (17.6 oz) courgettes (zucchinis)
- 3 shallots, finely chopped
- 500 ml (16.9 fl oz) apple cider vinegar
- 140 g (4.9 oz) golden caster sugar
- 2 tbsps pure salt
- 1 tsp mustard powder
- 1 tsp mustard seeds
- 1 tsp celery seeds
- 1 tsp ground turmeric
- ½ dried chili, crumbled
Instructions
- Preparation: Slice zucchinis into ultra-thin, translucent rounds using a mandoline or sharp chef’s knife, ensuring consistent thickness.
- Salting: Combine zucchini slices with shallots in a large bowl, generously coating with kosher salt to extract moisture. Cover with cold water and let rest for one hour to soften and season vegetables.
- Draining: Strain vegetables in a colander, meticulously pressing out excess liquid using clean kitchen towels until completely dry.
- Brine Creation: Craft a flavor-packed pickling liquid by simmering white vinegar, sugar, mustard seeds, coriander seeds, and water in a saucepan. Allow mixture to dissolve and reach a gentle bubble, then cool to a comfortable handling temperature.
- Infusion: Submerge dried zucchini and shallots in the warm, aromatic brine, ensuring complete coverage of each delicate slice.
- Jarring: Sterilize glass mason jars by washing in hot, soapy water and drying in a 340°F (170°C) oven for 10 minutes. Carefully transfer pickled vegetables and brine into jars, leaving minimal headspace.
- Preservation: Seal jars tightly and refrigerate, allowing flavors to meld and intensify over 48-72 hours before serving.
Notes
- Slice Uniformly: Use a mandoline or sharp knife to create consistent 1/8-inch thick zucchini rounds for even pickling and texture.
- Salt Technique: Let salted zucchini sit for an hour to draw out moisture, ensuring crisp and flavorful pickles with enhanced texture.
- Brine Temperature Matters: Cool brine to warm (not hot) before adding vegetables to prevent overcooking and maintain zucchini’s delicate crunch.
- Patience Pays Off: Refrigerate pickles for 48-72 hours to allow flavors to develop and fully infuse, creating a more complex and delicious result.
- Prep Time: 15 minutes
- Cook Time: 5 minutes
- Category: Appetizer, Snacks
- Method: Simmering
- Cuisine: UK
Nutrition
- Serving Size: 4
- Calories: 70
- Sugar: 20 g
- Sodium: 10000 mg
- Fat: 0 g
- Saturated Fat: 0 g
- Unsaturated Fat: 0 g
- Trans Fat: 0 g
- Carbohydrates: 25 g
- Fiber: 1 g
- Protein: 1 g
- Cholesterol: 0 mg
Sophia Rivera
Recipe Developer & Kitchen Tips Specialist
Expertise
Education
Austin Community College
San Antonio Culinary Institute
Sophia’s passion for baking began in her family kitchen, where she spent hours experimenting with new recipes. With a background in baking and pastry arts, she loves making desserts that are as visually stunning as they are delicious.
Sophia is all about using seasonal, locally sourced ingredients to create treats that everyone will enjoy. When she’s not creating mouth-watering desserts, you can find her gardening, making new recipes, or enjoying a relaxing afternoon with her family.