
Savor West Virginia’s Pepperoni Roll: Homemade Comfort Goodness
The pepperoni roll is a treasured snack with deep roots in West Virginia’s culture.
Miners and workers first turned to this portable and filling treat during their long hours underground.
Born in the early 1900s, it showcases the creativity of Italian immigrants who made their way to the Appalachian area.
The working-class communities of West Virginia quickly embraced the pepperoni roll as a staple food that could endure tough conditions while offering much-needed nourishment.
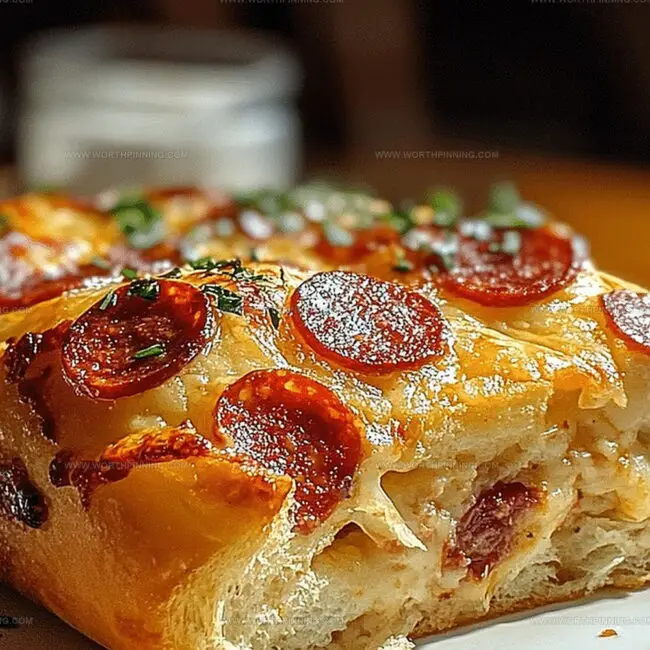
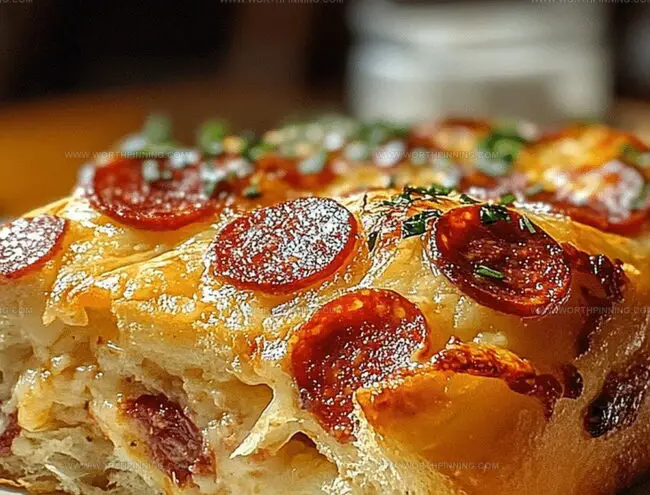
Its soft white bread filled with spicy pepperoni became a source of local pride, going beyond its simple beginnings.
Today, both regional bakeries and everyday cooks keep this beloved snack alive, preserving a tasty tradition that ties generations of West Virginians to their rich history.
Why West Virginia Pepperoni Roll Hits The Spot
All You Need For West Virginia Pepperoni Roll
Dough Ingredients:Filling Ingredients:Finishing Ingredients:How To Make West Virginia Pepperoni Roll At Home
Step 1: Whip Up the Dough
In a spacious mixing bowl, blend:Pour in warm water and olive oil, mixing until a soft dough emerges. Knead vigorously for 5-7 minutes until the texture becomes smooth and springy. Transfer the dough to a greased bowl, drape with a kitchen towel, and let it rise in a cozy spot for one hour until it doubles in volume.
Step 2: Craft the Pepperoni Parcels
Fire up the oven to 375°F. Gently deflate the risen dough and divide into 8 equal sections. Roll each piece into a rectangular shape. Layer with:Sprinkle generously with garlic powder and Italian seasoning. Carefully roll the dough around the filling, sealing the edges tightly to prevent leaks.
Step 3: Bake to Golden Perfection
Arrange the rolls on a parchment-lined baking sheet, ensuring the sealed side faces down. Brush the tops with an egg wash to create a beautiful golden crust. Slide into the preheated oven and bake for 18-22 minutes until they transform into a gorgeous amber color.
Step 4: Serve and Savor
Allow the rolls to cool slightly, creating anticipation for the first bite. Serve warm or at room temperature for a delightful West Virginia classic that celebrates simple, hearty flavors.
Pro Tips For West Virginia Pepperoni Roll
Storing And Reheating West Virginia Pepperoni Roll
What Goes Well With West Virginia Pepperoni Roll
Fun Ways To Switch West Virginia Pepperoni Roll
West Virginia Pepperoni Roll Q&A
The pepperoni roll originated in West Virginia during the 1920s, created by Italian immigrants working in coal mines as a portable, hearty lunch that didn’t require refrigeration.
Yes, you can use various styles of pepperoni including stick pepperoni or pre-sliced pepperoni. Traditional rolls often use stick pepperoni for a more authentic taste.
No, this is a meat-based recipe featuring pepperoni. Vegetarians would need to substitute the pepperoni with a plant-based alternative or remove it entirely.
Use bread flour instead of all-purpose flour, which has higher protein content. Additionally, ensure you knead the dough thoroughly and let it rise in a warm, draft-free environment to develop better gluten structure.
Print
Scrumptious West Virginia Pepperoni Roll Recipe
- Total Time: 35 minutes
- Yield: 12 1x
Description
Mountain miners’ favorite snack, West Virginia Pepperoni Roll, weaves Appalachian culinary heritage into a simple yet irresistible handheld treat. Crusty bread embracing spicy pepperoni slices delivers pure comfort that connects generations of hungry locals.
Ingredients
Dough Ingredients:
- 4 cups (480 grams) all-purpose flour
- 2 teaspoons salt
- 2 tablespoons sugar
- 1 packet (2 ¼ teaspoons) active dry or instant yeast
- 1 ½ cups (360 milliliters) warm water
- ¼ cup (60 milliliters) olive oil
Filling Ingredients:
- 8 ounces (226 grams) sliced pepperoni
- 1 cup (113 grams) shredded mozzarella or provolone cheese
Seasoning Ingredients:
- 1 teaspoon garlic powder
- 1 teaspoon Italian seasoning
- 1 egg (for egg wash)
Instructions
- Craft the foundational dough mixture by combining flour, salt, sugar, and yeast in a spacious mixing vessel, creating a seamless dry ingredient blend.
- Introduce warm water and olive oil into the dry ingredients, gently stirring until a cohesive dough emerges, transforming the mixture into a workable consistency.
- Transfer the developing dough onto a clean surface and engage in a rhythmic kneading process for 5-7 minutes, developing its elasticity and smooth texture.
- Nestle the kneaded dough into a lightly greased bowl, drape with a clean kitchen towel, and allow it to rise in a draft-free environment for approximately one hour until it substantially expands.
- Preheat the culinary workspace to 375°F, preparing a baking sheet with parchment paper for optimal roll placement.
- Deflate the risen dough with a gentle punch, then partition it into eight uniform segments for consistent roll sizing.
- Methodically transform each dough segment into a rectangular shape, creating a canvas for pepperoni and optional cheese placement.
- Strategically layer pepperoni slices across the dough’s center, complementing with cheese and sprinkling garlic powder and Italian seasoning for enhanced flavor complexity.
- Carefully roll the dough around the filling, meticulously sealing the edges to prevent ingredient escape during baking.
- Position the assembled rolls seam-side down on the prepared baking sheet, ensuring adequate spacing between each roll.
- Delicately brush the exterior with egg wash, promoting a lustrous golden-brown finish during baking.
- Slide the baking sheet into the preheated oven, allowing the rolls to bake for 18-22 minutes until they achieve a rich, appetizing coloration.
- Remove from the oven and permit the pepperoni rolls to cool momentarily, allowing internal temperatures to stabilize before serving.
- Present the rolls warm or at ambient temperature, ready to delight eager palates with their savory West Virginia charm.
Notes
- Choose high-protein bread flour for extra chewiness and structure in your pepperoni rolls.
- Proofing dough in a warm, draft-free spot ensures consistent rising and soft texture.
- Experiment with different cheese varieties like provolone or sharp cheddar to customize flavor profile.
- Cold pepperoni straight from refrigerator helps prevent grease bleeding through dough during baking.
- Prep Time: 15 minutes
- Cook Time: 20 minutes
- Category: Lunch, Snacks
- Method: Baking
- Cuisine: American
Nutrition
- Serving Size: 12
- Calories: 300
- Sugar: 1 g
- Sodium: 400 mg
- Fat: 14 g
- Saturated Fat: 3 g
- Unsaturated Fat: 10 g
- Trans Fat: 0 g
- Carbohydrates: 36 g
- Fiber: 2 g
- Protein: 10 g
- Cholesterol: 30 mg
Sophia Rivera
Recipe Developer & Kitchen Tips Specialist
Expertise
Education
Austin Community College
San Antonio Culinary Institute
Sophia’s passion for baking began in her family kitchen, where she spent hours experimenting with new recipes. With a background in baking and pastry arts, she loves making desserts that are as visually stunning as they are delicious.
Sophia is all about using seasonal, locally sourced ingredients to create treats that everyone will enjoy. When she’s not creating mouth-watering desserts, you can find her gardening, making new recipes, or enjoying a relaxing afternoon with her family.