
Jamie Oliver Rissoles Recipe: Speedy & Scrumptious Comfort Food
Jamie Oliver’s rissoles burst with culinary creativity, transforming humble ground beef into a flavor-packed sensation.
These mouthwatering patties blend robust protein with crisp, colorful vegetables in one irresistible package.
Each carefully crafted rissole tells a story of texture and taste, promising a delightful dining experience.
Fresh ingredients intermingle, creating a harmonious blend that feels both comforting and innovative.
Simple techniques elevate these meat parcels from ordinary to extraordinary, making weeknight cooking feel like a gourmet adventure.
Home cooks will adore how effortlessly these rissoles come together, delivering maximum satisfaction with minimal effort.
Grab your ingredients and get ready to turn an everyday meal into a memorable feast that will have everyone asking for seconds!
Quick Recipe Overview

All Items in Jamie Oliver Rissoles Recipe
For Protein Base:For Veggie Mix:For Flavor Enhancers:Tools for Shaping and Cooking Rissoles
How to Make Rissoles Step-by-Step
Whip Up Tasty Beef Rissoles
Grab a big mixing bowl and toss in ground beef, grated veggies, chopped onions, and minced garlic. Crumble breadcrumbs into the mix and crack an egg for binding. Splash in some Worcestershire sauce and sprinkle herbs to create a flavor explosion that’ll make taste buds dance.
Dive in with clean hands and mash everything together. Squeeze and blend until the ingredients become a cohesive mix that sticks together perfectly. Don’t be shy – mix like you mean it! Your goal is a uniform texture that promises deliciousness.
Form small, flat patties with your hands, making sure they’re roughly the same size. Pop them onto a plate and slide into the refrigerator for a quick 15-minute cool-down. This helps them hold their shape and keeps the flavors melding together.
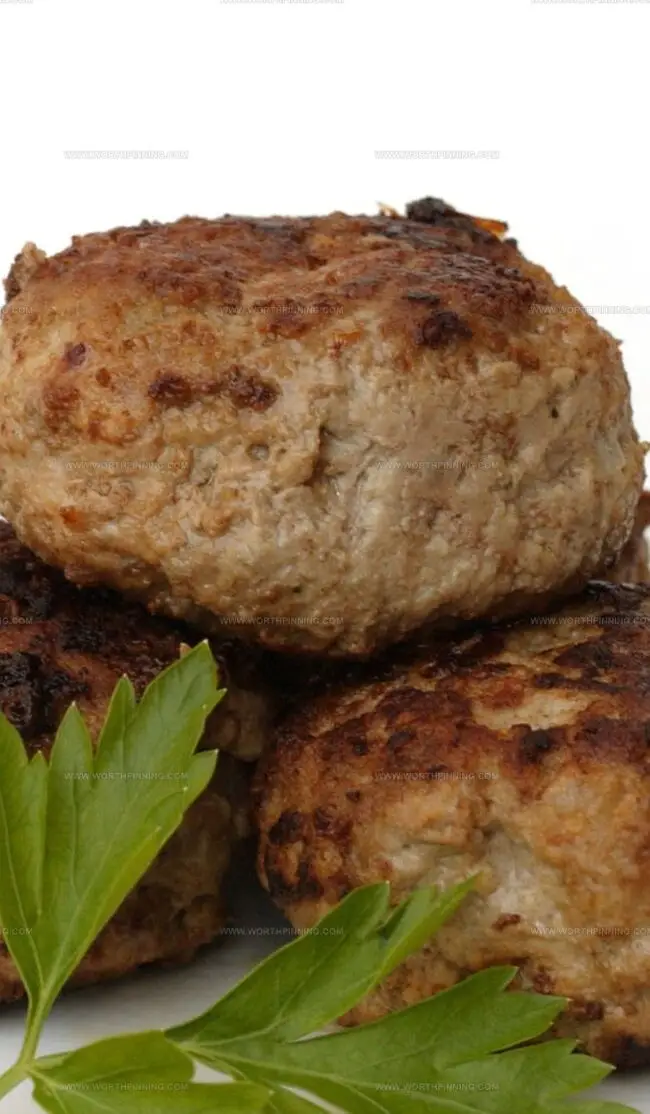
Heat a pan with a splash of vegetable oil over medium-low heat. Gently place your rissoles into the pan, letting them sizzle and develop a gorgeous golden-brown crust. Cook for about 3-4 minutes on each side, ensuring they’re cooked through and juicy.
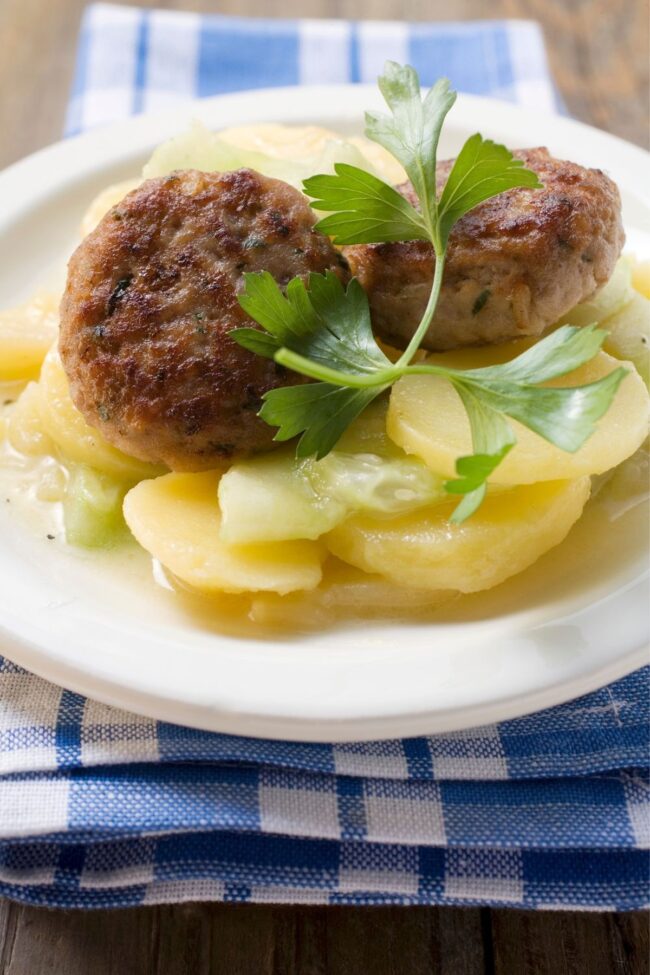
Transfer the rissoles to a plate and let them rest for a moment. Serve these flavor-packed beauties with your favorite sides or tucked into soft burger buns. Get ready for a meal that’ll have everyone asking for seconds!
Adjust Flavor and Filling in Rissoles

Explore Delicious Variations and Pro Cooking Tips
Experiment with ground turkey, lamb, or chicken for different flavor profiles and nutritional variations. Each protein brings unique taste and texture to your rissoles.
Add extra grated vegetables like zucchini, sweet potato, or beetroot to increase nutritional value and moisture. Grate veggies finely to ensure even distribution throughout the meat mixture.
Replace breadcrumbs with gluten-free alternatives like almond meal, crushed gluten-free crackers, or quinoa flakes. These substitutes maintain binding properties while catering to dietary restrictions.
Enhance flavor complexity by incorporating international spice blends like Moroccan ras el hanout, Mexican chili powder, or Indian garam masala. Small spice additions transform classic rissoles into globally inspired culinary experiences.
Serve Rissoles with the Right Pairings
Storage and Prep Tips for Rissoles
Print
Rustic Jamie Oliver Rissoles Recipe
- Total Time: 25 minutes
- Yield: 4 1x
Description
Jamie Oliver’s hearty Rissoles blend Australian beef traditions with Mediterranean flair. Home cooks quickly master this simple, satisfying dish perfect for weeknight dinners.
Ingredients
- 400 g (14.1 oz) beef mince
- 1 onion, grated
- 1 courgette, trimmed and grated
- 1 carrot, grated
- 1 garlic clove, crushed or finely grated
- 50 g (1.8 oz) panko breadcrumbs
- 1 egg, beaten
- 2 tsps dried mixed herbs
- 1 tsp Worcestershire sauce
- 2 tsps vegetable oil
- Peas (optional)
- Mash (optional)
Instructions
- Mixture Preparation: In a spacious mixing bowl, combine ground beef, onion, breadcrumbs, courgette, carrot, garlic, dried herbs, Worcestershire sauce, egg, salt, and pepper. Thoroughly blend ingredients using hands to ensure even distribution of flavors and consistent texture.
- Patty Shaping: Craft 14-16 uniformly sized, slightly flattened mini patties, maintaining equal thickness to guarantee consistent cooking. Chill patties in refrigerator for 15 minutes to firm up and prevent potential disintegration during cooking.
- Cooking Process: Heat vegetable oil in a non-stick skillet over medium-low temperature. Carefully arrange patties in the pan, allowing each side to sear for 3-4 minutes. Use a meat thermometer to verify internal temperature reaches 65 degrees Celsius, ensuring complete and safe culinary preparation.
Notes
- Chill Before Cooking: Refrigerating patties for 15 minutes helps bind ingredients, preventing crumbling and maintaining shape during cooking.
- Mix Thoroughly: Hand-mix ingredients gently but completely to distribute seasonings and ensure consistent flavor in every bite.
- Control Heat Carefully: Use medium-low temperature to achieve even browning without burning the delicate rissole exterior.
- Check Internal Temperature: Always use a meat thermometer to verify 65°C (149°F) for safe consumption and perfectly cooked meat.
- Prep Time: 15 minutes
- Cook Time: 10 minutes
- Category: Dinner, Snacks
- Method: Frying
- Cuisine: UK
Nutrition
- Serving Size: 4
- Calories: 300
- Sugar: 2 g
- Sodium: 400 mg
- Fat: 15 g
- Saturated Fat: 5 g
- Unsaturated Fat: 8 g
- Trans Fat: 0 g
- Carbohydrates: 20 g
- Fiber: 3 g
- Protein: 22 g
- Cholesterol: 70 mg
Sophia Rivera
Recipe Developer & Kitchen Tips Specialist
Expertise
Education
Austin Community College
San Antonio Culinary Institute
Sophia’s passion for baking began in her family kitchen, where she spent hours experimenting with new recipes. With a background in baking and pastry arts, she loves making desserts that are as visually stunning as they are delicious.
Sophia is all about using seasonal, locally sourced ingredients to create treats that everyone will enjoy. When she’s not creating mouth-watering desserts, you can find her gardening, making new recipes, or enjoying a relaxing afternoon with her family.