
Master Jamie Oliver’s Ciabatta Bread Recipe at Home
Ciabatta bread whispers tales of rustic Italian kitchens, where simple ingredients become extraordinary culinary poetry.
This beloved loaf emerges from a delicate dance of flour, water, yeast, and salt, transforming into a heavenly creation.
Skilled bakers understand the magical alchemy that turns basic components into a breathtaking bread experience.
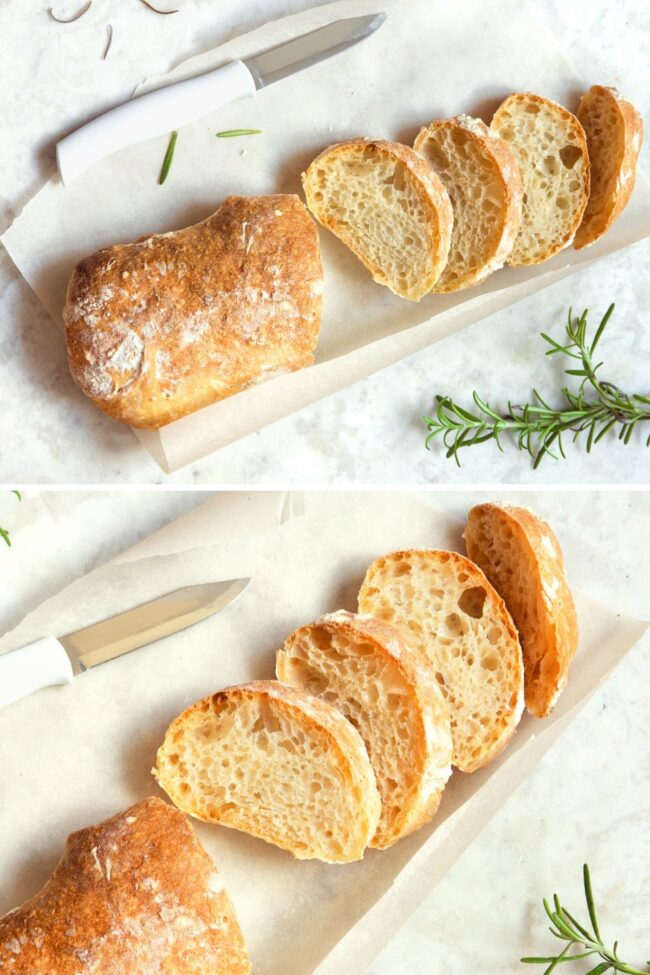
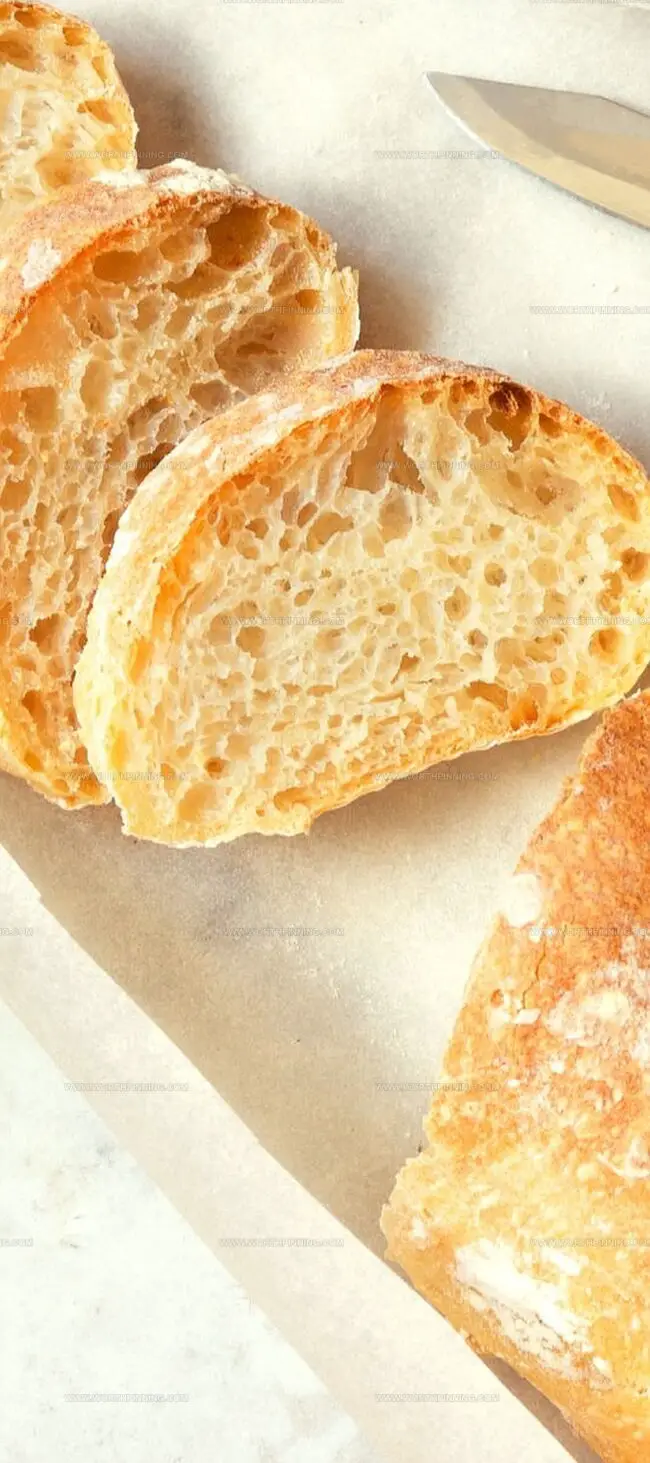
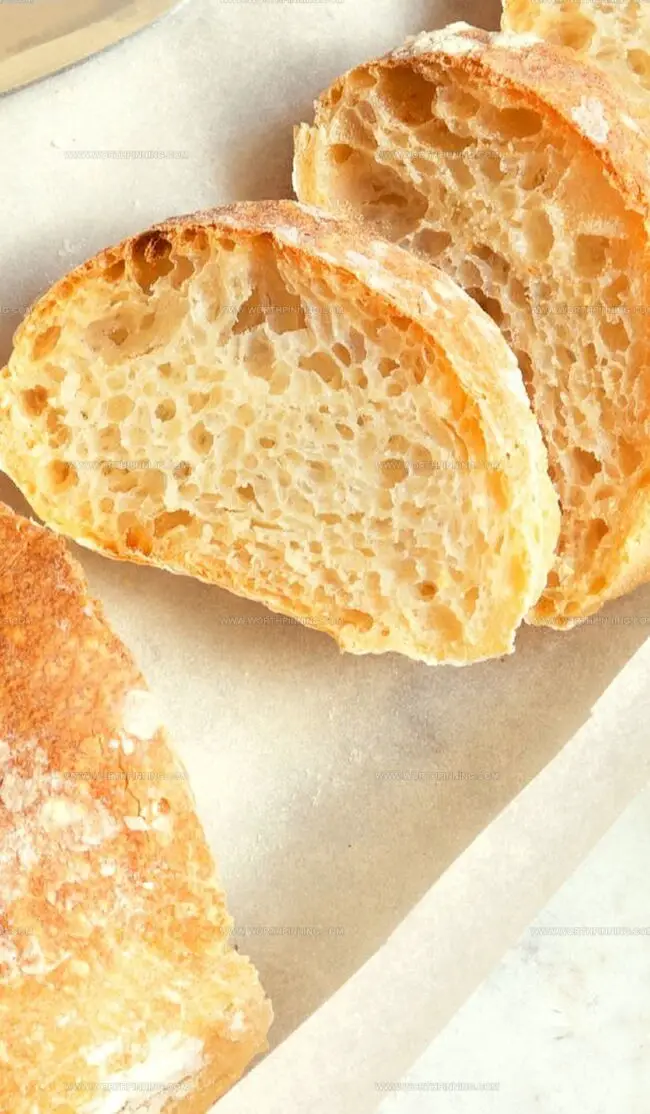
Each slice reveals a landscape of airy pockets and golden crust, telling a story of patience and craft.
The irregular, bubbly texture speaks of tradition and expertise, inviting bread lovers into its delicious world.
Home cooks can unlock this artisan secret with careful technique and passion.
You’ll fall in love with the art of creating this stunning, soul-warming bread that connects generations of culinary passion.
Quick Recipe Overview
Jamie Oliver’s Ciabatta Bread Ingredients
For Fermentation Base:For Dough Foundation:For Baking Preparation:Equipment for Jamie Oliver’s Ciabatta Bread
How to Make Ciabatta Bread Step-by-Step

Mix warm water with yeast in a spacious bowl. Let it sit quietly until tiny bubbles dance across the surface, signaling the yeast is coming to life.
Blend flour and salt into the frothy yeast mixture. Stir with a wooden spoon until a shaggy, soft mass emerges, promising delicious potential.
Drape a clean towel over the bowl and find a cozy, warm spot for the dough. Allow it to expand and grow for 1.5 to 2 hours, transforming into a puffy cloud of potential bread.
Dust a clean surface with flour. Gently transfer the risen dough, using fingertips to stretch and mold it into a relaxed rectangle. Handle with care to keep all the beautiful air bubbles intact.
Place the shaped dough on a parchment-lined baking sheet. Let it rest and puff up for 30 to 45 minutes. Slide into a 425°F oven and bake until the crust turns a gorgeous golden brown, about 25 to 30 minutes.
Rescue the bread from the oven and transfer to a cooling rack. Give it a full hour to settle and cool completely. Listen for the hollow sound when tapped, a sign of perfect bread. Slice and savor the crispy exterior and soft, airy interior of your homemade ciabatta.
Variations for Ciabatta Bread Recipe
Serving Tips for Ciabatta Bread
Storing Jamie Oliver’s Ciabatta Bread
Print
Rustic Jamie Oliver Ciabatta Bread Recipe
- Total Time: 40 minutes
- Yield: 4 1x
Description
Jamie Oliver’s ciabatta bread emerges as a rustic Italian classic that brings Mediterranean warmth to home kitchens. Crusty exterior and pillowy interior highlight this simple yet sophisticated loaf that connects bakers with authentic culinary traditions.
Ingredients
- 4 cups (960 ml/32 oz) all-purpose flour
- 2 cups (480 ml/16 oz) warm water
- 1 tsp (5 ml) active dry yeast
- 1 tsp (5 ml) salt
Instructions
- Yeast Activation: Dissolve yeast in warm water (105-115°F) within a large mixing bowl. Let the mixture rest until it becomes foamy and alive with bubbling activity.
- Dough Formation: Blend all-purpose flour and kosher salt into the activated yeast mixture. Mix thoroughly with a wooden spoon, ensuring complete ingredient integration and no dry spots remain.
- First Fermentation: Cover the bowl with a clean kitchen towel and place in a warm, undisturbed location. Allow the dough to rise and expand for 1.5 to 2 hours until it nearly doubles in volume, developing complex flavor and airy texture.
- Dough Shaping: Generously flour a work surface and gently transfer the risen dough. Carefully stretch and fold into a loose rectangular shape, preserving the delicate air pockets that provide characteristic ciabatta texture.
- Second Proofing: Transfer the shaped dough onto a parchment-lined baking sheet. Let it rest and rise for an additional 30 to 45 minutes, allowing final expansion and relaxation of the dough’s structure.
- Baking Preparation: Preheat the oven to 425°F, positioning the rack in the center. Ensure the oven reaches full temperature before baking to create optimal cooking conditions.
- Baking Process: Slide the baking sheet into the heated oven and bake for 25 to 30 minutes. Monitor the bread’s surface, looking for a rich golden-brown color that indicates perfect doneness and caramelization.
- Cooling and Serving: Remove the ciabatta from the oven and transfer to a wire cooling rack. Allow the bread to rest for a minimum of 30 minutes, enabling internal moisture to redistribute and creating the ideal serving texture.
Notes
- Yeast Activation Tip: Ensure water temperature falls precisely between 105-115°F for optimal yeast performance, as incorrect temperature can kill or under-activate the yeast.
- Minimal Handling Technique: Treat dough gently during shaping to preserve air bubbles, which create ciabatta’s signature light, airy texture and irregular crumb structure.
- Proofing Environment: Select a consistently warm, draft-free location during rising stages to support proper dough development and prevent uneven fermentation.
- Cooling Protocol: Allow bread to rest completely for 30 minutes after baking, enabling internal moisture redistribution and preventing premature crumbling when sliced.
- Prep Time: 10 minutes
- Cook Time: 30 minutes
- Category: Snacks, Breakfast, Lunch, Dinner
- Method: Baking
- Cuisine: American
Nutrition
- Serving Size: 4
- Calories: 220
- Sugar: 0.4 g
- Sodium: 380 mg
- Fat: 1 g
- Saturated Fat: 0.2 g
- Unsaturated Fat: 0.8 g
- Trans Fat: 0 g
- Carbohydrates: 46 g
- Fiber: 1.5 g
- Protein: 7 g
- Cholesterol: 0 mg
Sophia Rivera
Recipe Developer & Kitchen Tips Specialist
Expertise
Education
Austin Community College
San Antonio Culinary Institute
Sophia’s passion for baking began in her family kitchen, where she spent hours experimenting with new recipes. With a background in baking and pastry arts, she loves making desserts that are as visually stunning as they are delicious.
Sophia is all about using seasonal, locally sourced ingredients to create treats that everyone will enjoy. When she’s not creating mouth-watering desserts, you can find her gardening, making new recipes, or enjoying a relaxing afternoon with her family.