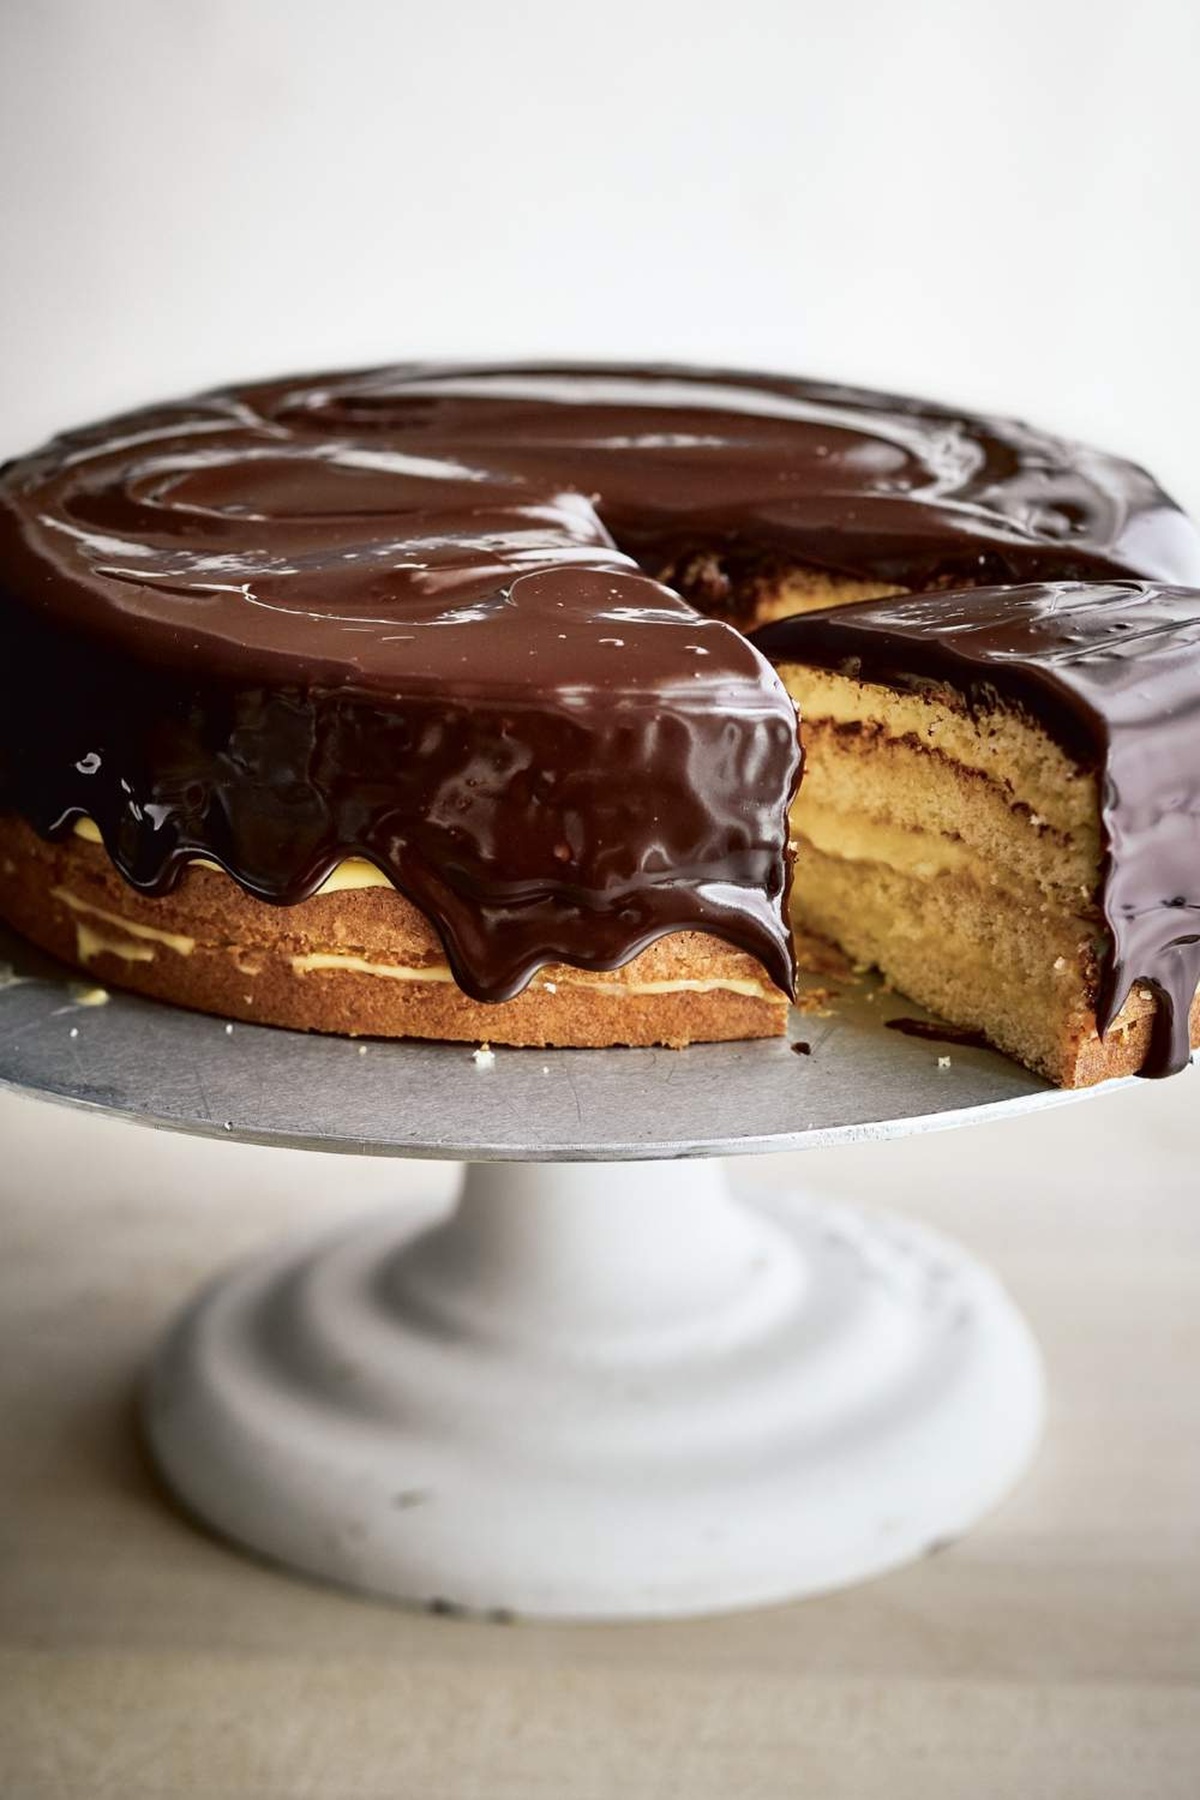
Decadent desserts have a special way of capturing hearts, and this Ina Garten Boston cream pie recipe stands as a classic testament to sweet indulgence.
Rich custard layers nestled between tender cake create a harmonious dance of flavors.
The creamy filling whispers promises of pure delight with every bite.
Silky vanilla pastry cream transforms simple ingredients into a masterpiece of culinary art.
Each slice promises a journey through smooth textures and balanced sweetness.
Delicate yet luxurious, this dessert brings restaurant-quality elegance right to your kitchen table.
You’ll fall in love with the first heavenly forkful of this irresistible pie.
Quick Recipe Overview
Prep Time: 30 minutes
Cook Time: 25 minutes
Total Time: 55 minutes
Calories: 400 kcal
Servings: 8
What Goes Into Ina Garten’s Boston Cream Pie
For Cake Base:
All-Purpose Flour: Provides structure and tender crumb, choose unbleached flour for best texture.
Granulated Sugar: Sweetens and helps create light, airy cake, look for fine-crystal sugar.
Eggs: Binding agent that adds richness and helps cake rise, select fresh, room-temperature eggs.
Baking Powder: Leavening agent that helps cake become fluffy, ensure it’s fresh and not expired.
For Liquid Components:
Whole Milk: Adds moisture and richness, use full-fat milk for best flavor.
Parchment Paper: Ensures easy cake removal and prevents sticking.
Small Saucepan: Used for scalding milk and butter, preparing the soak.
Heatproof Bowl: Perfect for melting chocolate over simmering water.
Cooling Rack: Allows cakes to cool evenly and prevent soggy bottoms.
Whisk: Helps incorporate ingredients smoothly and break up lumps.
Toothpick: Checks cake doneness by testing for moist crumbs.
Serving Plate: Provides a beautiful presentation for the finished dessert.
Sharp Knife: Needed to slice cake layers horizontally.
Pastry Brush: Helps evenly distribute orange soak on cake layers.
How to Bake a Boston Cream Pie the Ina Way
Cake Creation
Oven Preparation Warm up the kitchen space by setting the oven to a cozy temperature. Gently coat two circular baking pans with a light layer of butter and dust with flour.
Batter Magic Combine milk and butter in a soft simmer, letting their flavors dance together. Whisk eggs and sugar until they transform into a silky, pale golden mixture. Fold in flour with gentle, loving strokes.
Baking Transformation Pour the velvety batter into prepared pans. Slide into the waiting oven and let the magic happen. Watch for golden edges and a springy center that signals perfect doneness.
Moisture Enhancement Create a delicate orange-infused liquid by heating juice and a touch of sweetener. This secret weapon will breathe life into each cake layer.
Chocolate Elegance Melt chocolate with cream in a gentle water bath. Allow the mixture to become smooth and glossy, developing a luxurious shine that will cascade over the cake.
Layered Symphony Carefully slice each cake into two delicate layers. Brush each section with the aromatic orange liquid. Spread a cloud-like cream between layers, building a dreamy tower of flavor.
Final Flourish Drape the cake in a silky chocolate glaze, letting it flow gracefully down the sides. Let the cake rest and settle, allowing flavors to mingle and create a harmonious dessert experience.
Classic Touches and New Spins for Ina’s Pie
Personalize your Boston Cream Pie with these expert tips and creative twists.
Swap orange zest for lemon or almond extract to create a unique taste profile that surprises your guests.
Make your pastry cream ahead of time and refrigerate for up to 3 days, saving precious preparation time before serving.
Ensure your chocolate glaze is silky smooth by using a digital thermometer to check the temperature, aiming for a perfect 90-95°F for optimal drizzling consistency.
Cover the assembled cake loosely with plastic wrap and store in the refrigerator for up to 3 days, allowing flavors to meld and intensify. Let the cake sit at room temperature for 30 minutes before serving to restore its delightful texture.
Serving Tips for Ina Garten’s Custard-Filled Cake
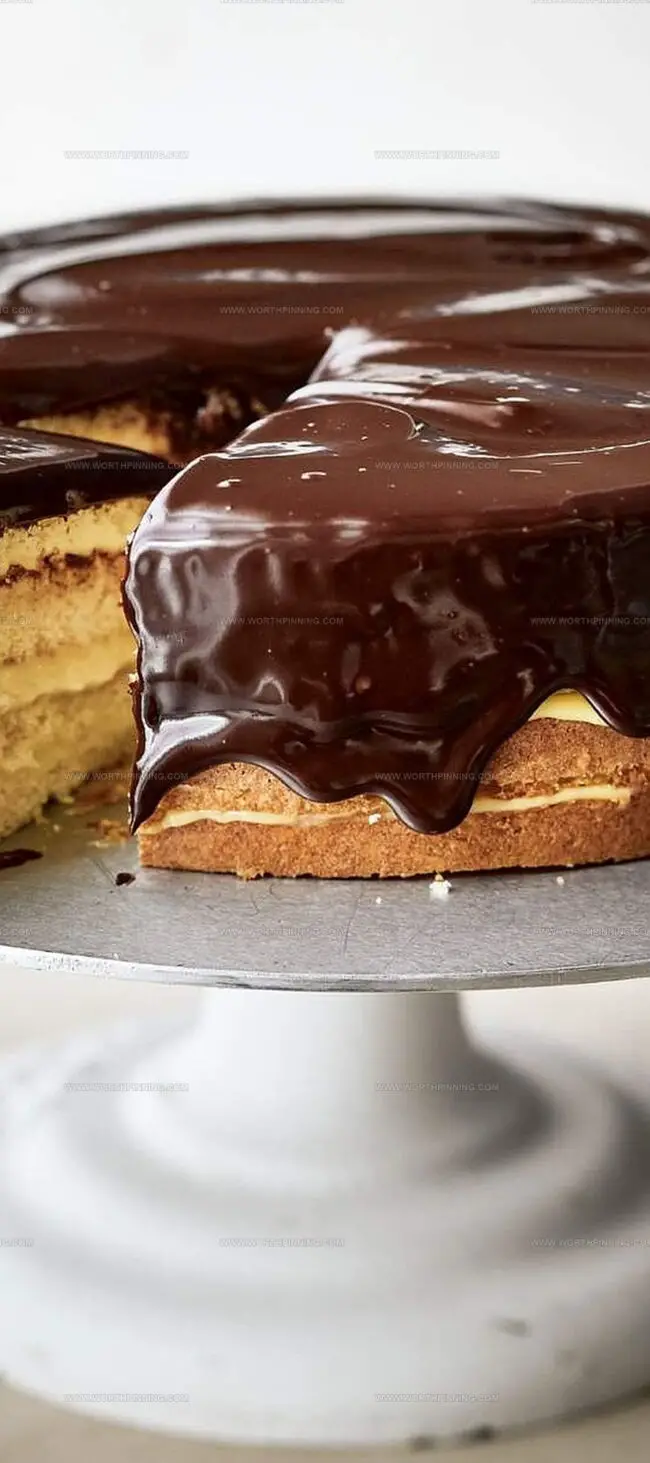
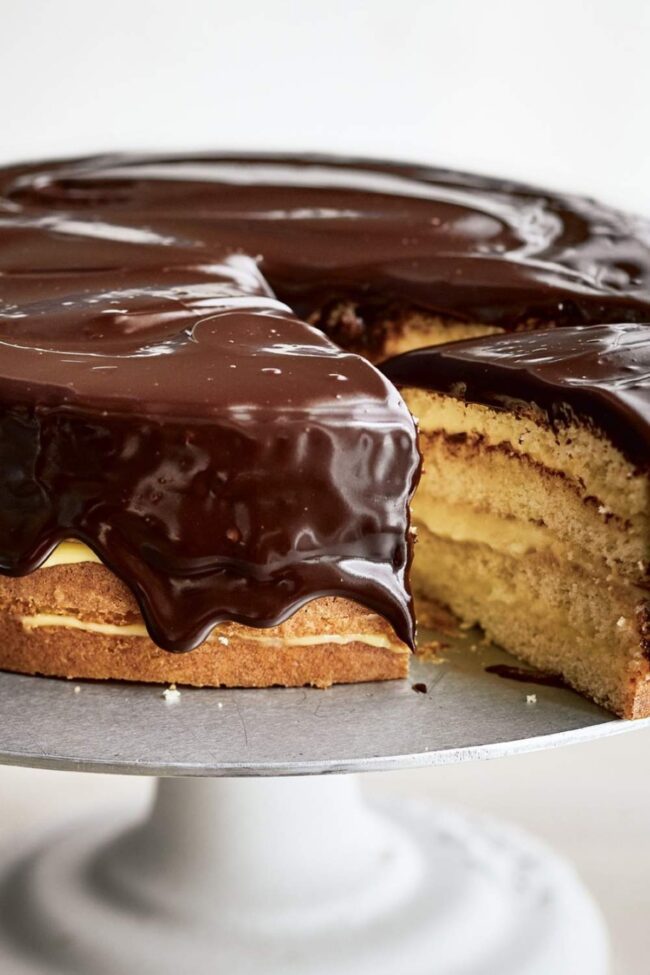
Serve Up a Slice of Elegance: Beautifully slice the Boston cream pie on elegant dessert plates to showcase its stunning layers and glossy chocolate glaze. Each slice reveals a luxurious cross-section of tender cake, creamy filling, and rich chocolate.
Pair with Complementary Drinks: Enhance the dessert experience by serving alongside a steaming cup of espresso or a chilled glass of orange-infused champagne. These beverages perfectly complement the cake’s delicate orange and chocolate notes.
Create a Stunning Presentation: Garnish the cake with delicate orange zest curls, fresh mint leaves, or a light dusting of powdered sugar. These subtle touches elevate the visual appeal and add a refined finishing detail to this classic dessert.
Make It a Centerpiece: Display the Boston cream pie on a beautiful cake stand or vintage platter to transform it into a stunning dessert centerpiece. Invite guests to admire the cake’s elegant layers and glossy chocolate glaze before indulging.
Storage Guide for Ina Garten’s Boston Cream
Refrigerate Wisely: Store the Boston cream pie covered in the refrigerator for up to 3 days. Use a cake carrier or wrap the cake loosely with plastic wrap to prevent moisture loss and maintain its delicate texture.
Freeze for Future Enjoyment: Carefully wrap individual cake slices or the entire cake in plastic wrap, then aluminum foil. Freeze for up to 2 weeks. Thaw overnight in the refrigerator before serving to preserve the cake’s original quality.
Prevent Soggy Layers: Keep the cake at room temperature for no more than 2 hours. The pastry cream and chocolate glaze are perishable, so refrigeration is crucial to maintain food safety and prevent bacterial growth.
Serve at Perfect Temperature: Remove the cake from the refrigerator 30 minutes before serving. This allows the flavors to develop and the texture to soften, giving you the most delicious Boston cream pie experience.
Ina Garten’s boston cream pie blends classic New England dessert charm with sophisticated pastry techniques. Creamy vanilla custard and rich chocolate ganache create a delightful contrast between layers of delicate sponge cake you’ll savor with each elegant bite.
Ingredients
Scale
1½ cups all-purpose flour
1½ teaspoons baking powder
1½ teaspoons kosher salt
1½ cups sugar
3 extra large eggs (room temperature)
0.75 cup whole milk
6 tbsps unsalted butter
1½ tsps pure vanilla extract
0.5 tsp grated orange zest
0.33 cup freshly squeezed orange juice
0.33 cup sugar
1 tbsp Grand Marnier
0.75 cup heavy cream
1¼ cups semisweet chocolate chips (7.5 oz), such as Nestlé’s
2 oz bittersweet chocolate (such as Lindt), broken in pieces
2 tbsps light corn syrup
1 tsp pure vanilla extract
0.5 tsp instant coffee granules (such as Nescafé)
Instructions
Preparation: Preheat oven to 160°C (325°F). Butter two 9-inch circular pans, line with parchment, and dust with flour for easy cake release.
Liquid Infusion: Warm milk and butter in a saucepan, remove from heat, and blend with vanilla and orange zest. Simultaneously, sift flour, baking powder, and salt in a separate bowl.
Batter Creation: Whip eggs and sugar using an electric mixer until thick and pale yellow. Gently incorporate warm milk mixture and fold in sifted flour blend, maintaining delicate air pockets.
Baking Process: Evenly distribute batter between prepared pans. Bake for 22-25 minutes, testing with a toothpick. Rest cakes in pans for 15 minutes, then transfer to a wire rack.
Syrup Preparation: Simmer orange juice and sugar until dissolved. Remove from heat and enhance with Grand Marnier. Set aside for cake layering.
Chocolate Glaze Development: Use double-boiler to combine heavy cream, semisweet and bittersweet chocolate, corn syrup, vanilla, and instant coffee. Stir until smooth, then rest for 25-30 minutes to thicken.
Cake Assembly: Slice each cake horizontally into two layers. Place bottom layer on serving plate, brush with orange syrup, spread pastry cream, and repeat layering. Finish with top layer facing down.
Final Presentation: Drape chocolate glaze over assembled cake, allowing it to flow down sides. Let dessert stabilize for one hour before serving.
Notes
Precise Oven Preparation: Ensure exact temperature and proper pan coating to prevent cake sticking and guarantee even baking.
Temperature Control for Milk Mixture: Gentle heating prevents ingredient separation and supports smooth batter integration.
Egg Whipping Technique: Whip eggs and sugar until pale and thick to create optimal cake volume and delicate texture.
Chocolate Glaze Consistency: Allow glaze to rest and thicken for perfect draping and professional-looking finish.
Degree: Associate of Applied Science in Baking and Pastry Arts
Focus: Techniques in baking, pastry creation, and dessert presentation.
San Antonio Culinary Institute
Program: Diploma in Farm-to-Table Culinary Practices
Focus: Emphasis on utilizing locally sourced ingredients and understanding seasonal flavors.
Sophia’s passion for baking began in her family kitchen, where she spent hours experimenting with new recipes. With a background in baking and pastry arts, she loves making desserts that are as visually stunning as they are delicious.
Sophia is all about using seasonal, locally sourced ingredients to create treats that everyone will enjoy. When she’s not creating mouth-watering desserts, you can find her gardening, making new recipes, or enjoying a relaxing afternoon with her family.

Sophia Rivera
Recipe Developer & Kitchen Tips Specialist
Expertise
Education
Austin Community College
San Antonio Culinary Institute
Sophia’s passion for baking began in her family kitchen, where she spent hours experimenting with new recipes. With a background in baking and pastry arts, she loves making desserts that are as visually stunning as they are delicious.
Sophia is all about using seasonal, locally sourced ingredients to create treats that everyone will enjoy. When she’s not creating mouth-watering desserts, you can find her gardening, making new recipes, or enjoying a relaxing afternoon with her family.