
Dreamy Banana Pudding Crunchy Cheesecake: A Heavenly Treat!
Banana pudding and cheesecake unite in a delightful dessert that celebrates Southern comfort and sweet indulgence.
This creamy culinary creation combines the classic flavors of ripe bananas with the rich, velvety texture of traditional cheesecake.
The recipe transforms familiar banana pudding elements into an innovative and luxurious dessert experience that tantalizes taste buds.
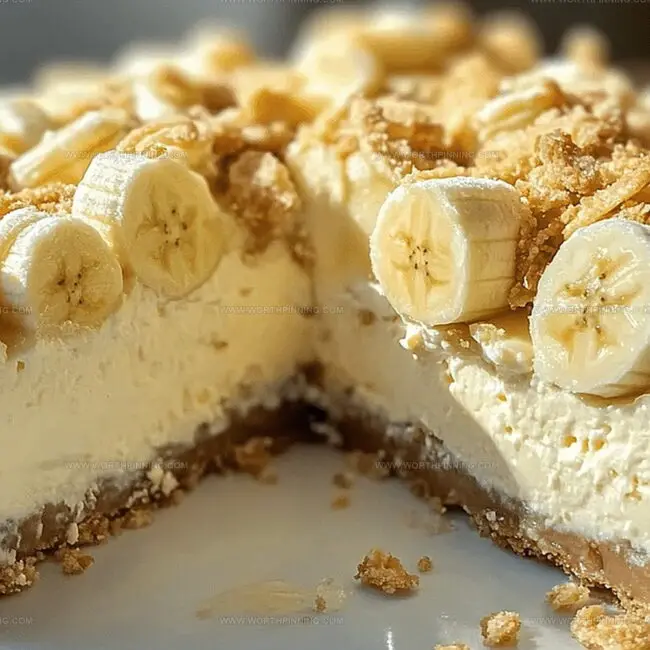
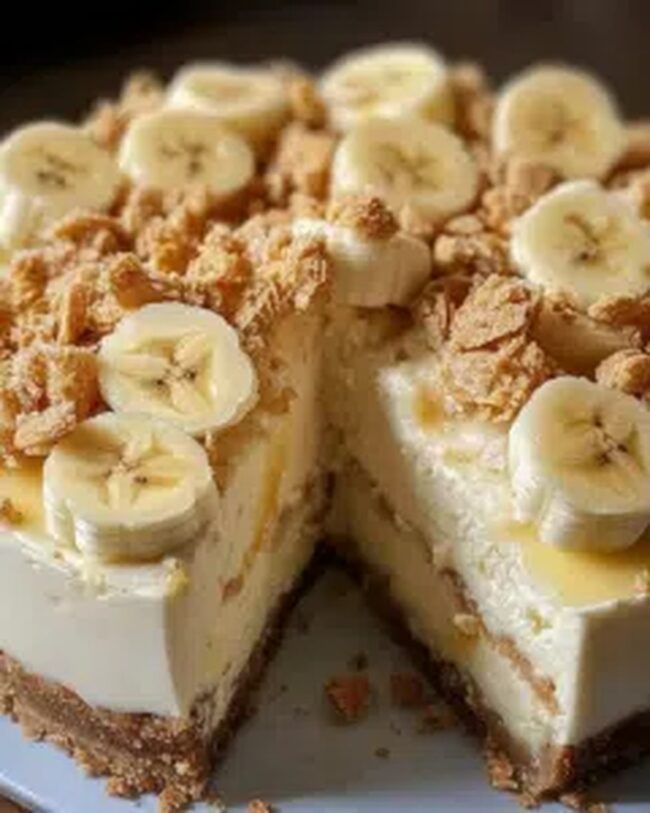
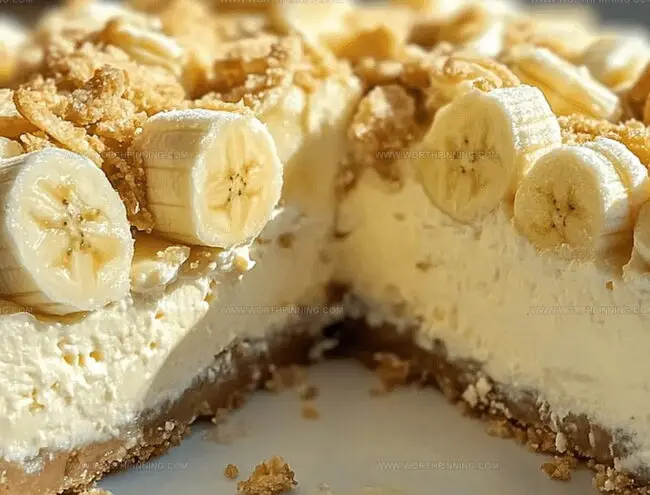
Layers of smooth cheesecake filling intertwine with classic banana pudding components, creating a harmonious blend of textures and flavors.
Crunchy elements add a surprising twist to the classic dessert, providing a delightful contrast to the silky smooth base.
Dessert lovers and comfort food enthusiasts will find this reimagined treat an irresistible masterpiece that bridges nostalgic memories with modern culinary creativity.
Why Banana Pudding Crunchy Cheesecake Is A Treat
Banana Pudding Crunchy Cheesecake Ingredients
Crust Ingredients:Fat and Sweetener Ingredients:Flavor Enhancer Ingredients:How To Make Banana Pudding Crunchy Cheesecake
Step 1: Warm Up the Oven
Crank up your oven to a toasty 350°F (175°C) and get ready for a delicious adventure.
Step 2: Whip Up the Base
In a spacious mixing bowl, grab your butter and sugar and beat them together until they transform into a fluffy cloud of deliciousness.
Step 3: Add Some Flavor Magic
Splash in the vanilla extract and mix until everything is beautifully combined.
Step 4: Create the Dry Mixture
In another bowl, whisk together:Gently fold this dry mixture into your butter-sugar blend, stirring until a soft, dreamy dough emerges.
Step 5: Shape Your Treats
Roll the dough into adorable little balls and place them on a parchment-covered baking sheet, giving each ball some personal space.
Step 6: Flatten with Flair
Use your hands or a fork to gently press down each ball, creating a rustic, homemade look.
Step 7: Bake to Golden Perfection
Slide the baking sheet into the oven and bake for 12-15 minutes until the edges turn a beautiful golden brown.
Step 8: Cool Down
Let the biscuits chill on the baking sheet for a few moments, then transfer them to a wire rack to cool completely.
Step 9: Serve and Celebrate
Enjoy your delightful banana pudding crunch cheesecake treats with friends and family!
Best Tips For Banana Pudding Crunchy Cheesecake
How To Store And Reheat Banana Pudding Crunchy Cheesecake
Top Pairings With Banana Pudding Crunchy Cheesecake
Tasty Twists On Banana Pudding Crunchy Cheesecake
Banana Pudding Crunchy Cheesecake FAQs
Fresh bananas, cream cheese, vanilla wafer cookies, and sweetened condensed milk are the primary ingredients that create the classic flavor profile.
Yes, this recipe is quite simple and requires basic baking skills. The step-by-step instructions make it easy for home bakers of all experience levels to successfully create the dessert.
You can substitute regular flour with gluten-free flour blend and use gluten-free vanilla wafer cookies to make the entire recipe suitable for those with gluten sensitivities.
Always bake the cheesecake in a water bath, avoid overmixing the batter, and let it cool gradually at room temperature to minimize the risk of surface cracks.
Print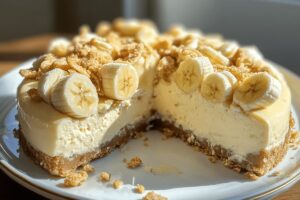
Dreamy Banana Pudding Crunchy Cheesecake Recipe
- Total Time: 25 minutes
- Yield: 8 1x
Description
Creamy banana pudding meets crunchy cheesecake in this Southern-inspired dessert masterpiece that brings comfort and indulgence to your table. Rich layers of vanilla wafer crust, smooth cheesecake filling, and fresh banana slices create a delightful experience you’ll crave again and again.
Ingredients
Crust:
- 2 cups (250 grams) all-purpose flour
- 1 cup (200 grams) sugar
- 1 cup (230 grams / 8 ounces) butter, softened
- 2 teaspoons baking powder
- ½ teaspoon salt
Flavor Enhancers:
- 2 teaspoons vanilla extract
Instructions
- Craft a smooth, velvety butter and sugar mixture by vigorously blending until achieving a cloud-like consistency and pale yellow hue.
- Introduce vanilla extract and incorporate thoroughly, ensuring an even aromatic distribution throughout the mixture.
- In a separate vessel, meticulously combine flour, baking powder, and salt, creating a uniform dry ingredient blend.
- Gradually fold the dry ingredients into the butter mixture, gently stirring until a tender, malleable dough emerges.
- Delicately form small, uniform spheres of dough using gentle rolling motions between palms.
- Arrange the dough balls on a parchment-lined baking sheet, maintaining adequate spacing to prevent merging during baking.
- Gently press each sphere using fingertips or a fork, creating a slight indentation and promoting even baking.
- Position the baking sheet in a preheated oven set at 350°F (175°C), allowing the cookies to transform into golden-edged delicacies.
- Bake for approximately 12-15 minutes, monitoring until edges acquire a warm, bronzed appearance.
- Allow the freshly baked biscuits to rest momentarily on the baking sheet, enabling subtle cooling and structural stabilization.
- Carefully transfer the cookies to a wire rack, permitting complete cooling and achieving a crisp, delicate texture.
- Serve and savor the delightful, homemade treats.
Notes
- Customize the texture by adjusting the baking time, shorter for softer cookies and longer for crispier edges.
- Swap all-purpose flour with gluten-free flour blend for a celiac-friendly version without compromising taste.
- Add crushed vanilla wafers or graham crackers to the dough for extra crunch and traditional banana pudding flavor profile.
- Experiment with brown sugar instead of white sugar to introduce deeper caramel undertones
- Prep Time: 10 minutes
- Cook Time: 12-15 minutes
- Category: Desserts
- Method: Baking
- Cuisine: American
Nutrition
- Serving Size: 8
- Calories: 560
- Sugar: 40 g
- Sodium: 300 mg
- Fat: 36 g
- Saturated Fat: 22 g
- Unsaturated Fat: 14 g
- Trans Fat: 0 g
- Carbohydrates: 62 g
- Fiber: 2 g
- Protein: 4 g
- Cholesterol: 90 mg
Sophia Rivera
Recipe Developer & Kitchen Tips Specialist
Expertise
Education
Austin Community College
San Antonio Culinary Institute
Sophia’s passion for baking began in her family kitchen, where she spent hours experimenting with new recipes. With a background in baking and pastry arts, she loves making desserts that are as visually stunning as they are delicious.
Sophia is all about using seasonal, locally sourced ingredients to create treats that everyone will enjoy. When she’s not creating mouth-watering desserts, you can find her gardening, making new recipes, or enjoying a relaxing afternoon with her family.