
The Zippy Tuna & Hummus Sandwich Recipe by Ina Garten
Sandwiches reach new heights of deliciousness with Ina Garten tuna & hummus magic.
Her culinary genius transforms simple ingredients into something extraordinary.
Fresh tuna meets creamy hummus in a delectable combination that sings with Mediterranean flavors.
The blend of textures creates a lunch that’s both satisfying and elegant.
Every bite promises a burst of zesty, protein-packed goodness.
We love how these sandwiches come together quickly without sacrificing taste.
Grab your ingredients and get ready to experience a lunch that will make your taste buds dance with joy.
Quick Recipe Overview
Ingredient Guide for Ina Garten Tuna & Hummus Sandwiches
For Base Ingredients:For Flavor Enhancers:For Texture Adjustment:Tools You’ll Need for Ina Garten Tuna & Hummus Sandwiches
How to Layer Ina Garten Tuna & Hummus Sandwiches
Create a creamy base by combining chickpeas, tahini, olive oil, lemon juice, garlic, and salt in a food processor. Pulse and blend until the mixture transforms into a smooth, silky spread.
Gradually introduce water to the hummus, carefully adjusting until you achieve a perfectly creamy consistency that spreads effortlessly across your bread.
Sample the hummus and fine-tune the seasoning, ensuring a delightful balance of tangy and rich flavors that will elevate your sandwich experience.
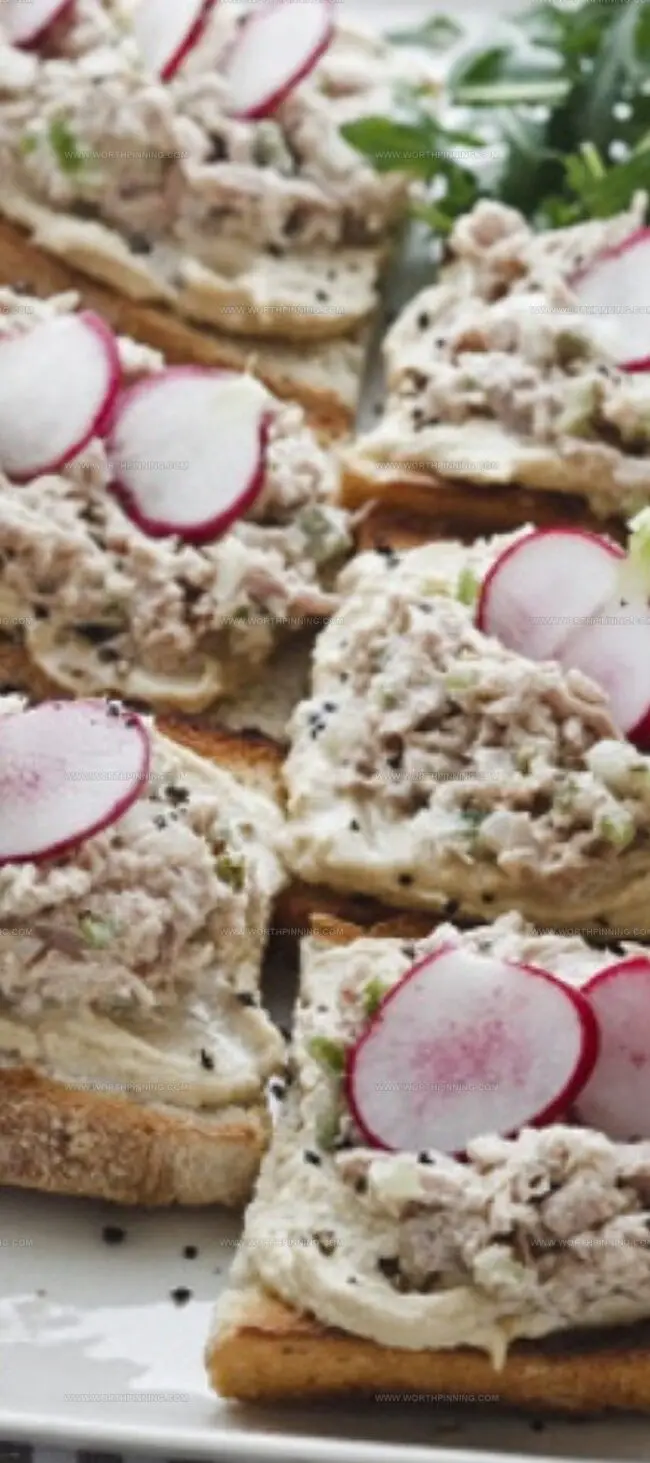
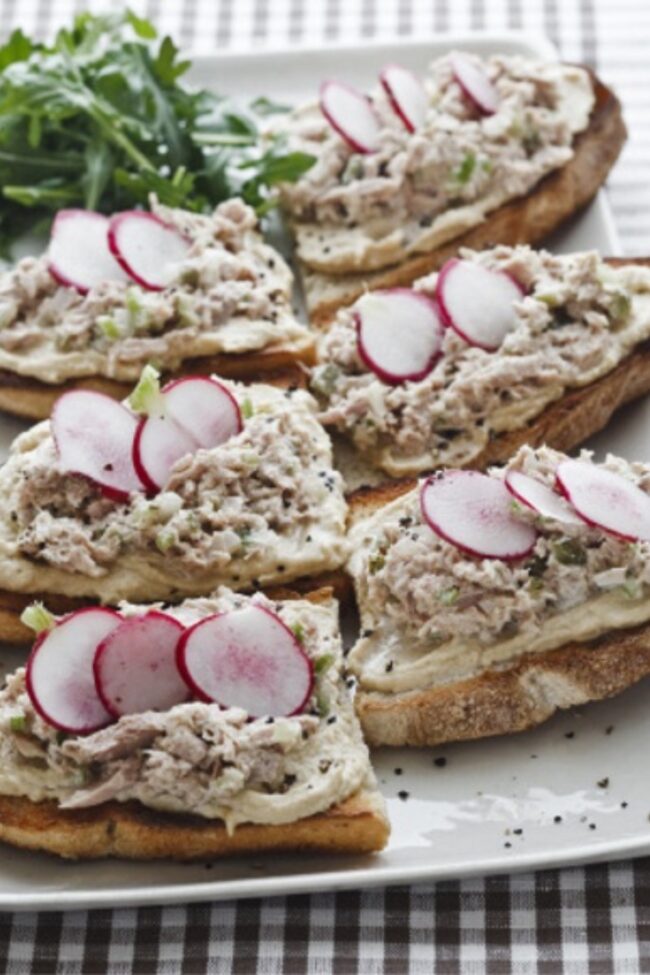
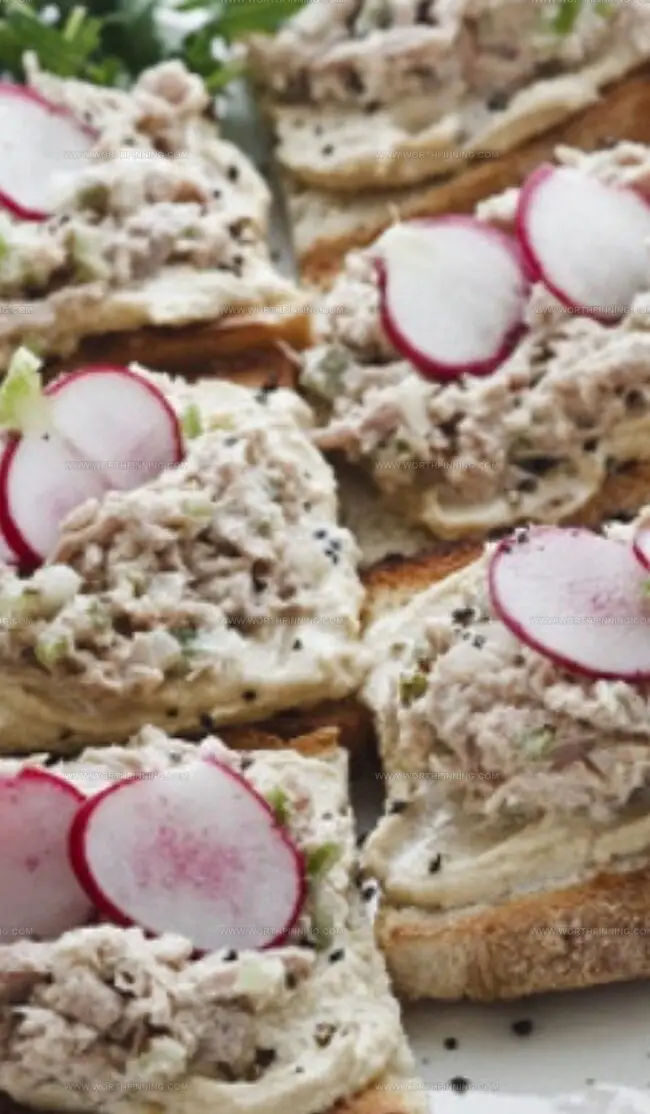
Layer the freshly made hummus with high-quality tuna on your favorite bread. For an extra burst of flavor, consider adding crisp vegetables or a sprinkle of herbs to complement the creamy texture.
Slice the sandwich diagonally and plate it with a side of fresh greens or crunchy pickles to create a satisfying and nutritious meal that looks as good as it tastes.
Tips to Boost Ina Garten Tuna & Hummus Sandwiches
Serve Ina Garten Tuna & Hummus Sandwiches with Flair
Storage Tips for Ina Garten Tuna & Hummus Sandwiches
Print
Zesty Ina Garten Tuna & Hummus Sandwiches Recipe
- Total Time: 50 minutes
- Yield: 4 1x
Description
Ina Garten’s tuna & hummus sandwiches elevate simple ingredients into a Mediterranean-inspired delight. Creamy hummus, flaky tuna, and crisp vegetables create a quick, satisfying lunch you’ll crave again and again.
Ingredients
- 14 oz (397 g) Italian tuna in olive oil, jarred or canned
- Sourdough bread, halved and sliced ½ inch thick
- Hummus, store-bought or homemade
- 2 tbsps (30 ml) good mayonnaise
- 2 tbsps (30 ml) freshly squeezed lemon juice
- ¼ cup (60 ml) minced celery
- 2 tbsps (30 ml) minced yellow onion
- 2 tbsps (30 ml) minced cornichons
- 1 tsp (5 ml) Dijon mustard
- ½ tsp (2.5 ml) kosher salt
- ¼ tsp (1.25 ml) freshly ground black pepper
- Fresh radishes, sliced
Instructions
- Preparation: Sanitize food processor and gather all ingredients for seamless hummus creation.
- Blend Base: Combine chickpeas, tahini, olive oil, lemon juice, garlic, and salt in processor, pulsing initially to break down components.
- Processing: Continuously blend mixture for 2-3 minutes, transforming ingredients into silky, uniform texture while periodically scraping processor walls.
- Consistency Adjustment: Incrementally introduce cold water during processing, monitoring smoothness and achieving ideal creamy consistency.
- Flavor Refinement: Taste and calibrate seasoning, potentially incorporating additional salt, lemon juice, or olive oil to elevate flavor profile.
- Presentation: Transfer hummus to serving dish, using spatula to create elegant surface texture and optional garnish with olive oil drizzle, paprika, or chopped parsley.
Notes
- Precision Matters: Measure ingredients carefully to maintain the perfect hummus consistency and flavor balance.
- Texture Technique: Pulse ingredients initially, then process continuously to achieve a smooth, creamy texture without lumps.
- Flavor Adjustment: Taste and adjust seasoning gradually, adding salt, lemon juice, or olive oil to enhance the overall taste profile.
- Serving Style: Create visual appeal by swirling hummus in the serving dish and garnishing with a drizzle of olive oil and optional herbs or spices.
- Prep Time: 20 minutes
- Cook Time: 30 minutes
- Category: Lunch, Snacks
- Method: Blending
- Cuisine: American
Nutrition
- Serving Size: 4
- Calories: 450
- Sugar: 2 g
- Sodium: 700 mg
- Fat: 25 g
- Saturated Fat: 4 g
- Unsaturated Fat: 20 g
- Trans Fat: 0 g
- Carbohydrates: 38 g
- Fiber: 3 g
- Protein: 30 g
- Cholesterol: 50 mg
Sophia Rivera
Recipe Developer & Kitchen Tips Specialist
Expertise
Education
Austin Community College
San Antonio Culinary Institute
Sophia’s passion for baking began in her family kitchen, where she spent hours experimenting with new recipes. With a background in baking and pastry arts, she loves making desserts that are as visually stunning as they are delicious.
Sophia is all about using seasonal, locally sourced ingredients to create treats that everyone will enjoy. When she’s not creating mouth-watering desserts, you can find her gardening, making new recipes, or enjoying a relaxing afternoon with her family.