Festive Turkey & Stuffing Roll Ups Recipe: Cozy Holiday Bites
Mouthwatering turkey and stuffing roll ups offer a delightful twist on classic holiday leftovers.
Comfort food gets a playful makeover with this simple yet ingenious dish.
Crispy edges and soft interiors create a perfect texture combination that’ll make you smile.
Leftover ingredients become a surprisingly fresh meal in mere minutes.
Savory herbs and tender meat combine to deliver maximum flavor in each bite.
Quick assembly means you can enjoy a satisfying meal without spending hours in the kitchen.
Ready to transform your post-feast remnants into something spectacular?
You’ll want to make extra turkey just to craft these irresistible roll ups.
Turkey & Stuffing Roll Ups You’ll Crave
What Goes into Turkey & Stuffing Roll Ups
Main Protein:Seasoning Blend:Sauce and Finishing Touches:Rolling Up a Savory Classic
Step 1: Warm Up the Oven
Fire up your oven to a toasty 375 degrees Fahrenheit. Grab a baking dish and give it a quick swipe of butter or cooking spray to prevent sticking.
Step 2: Create Delicious Bundles
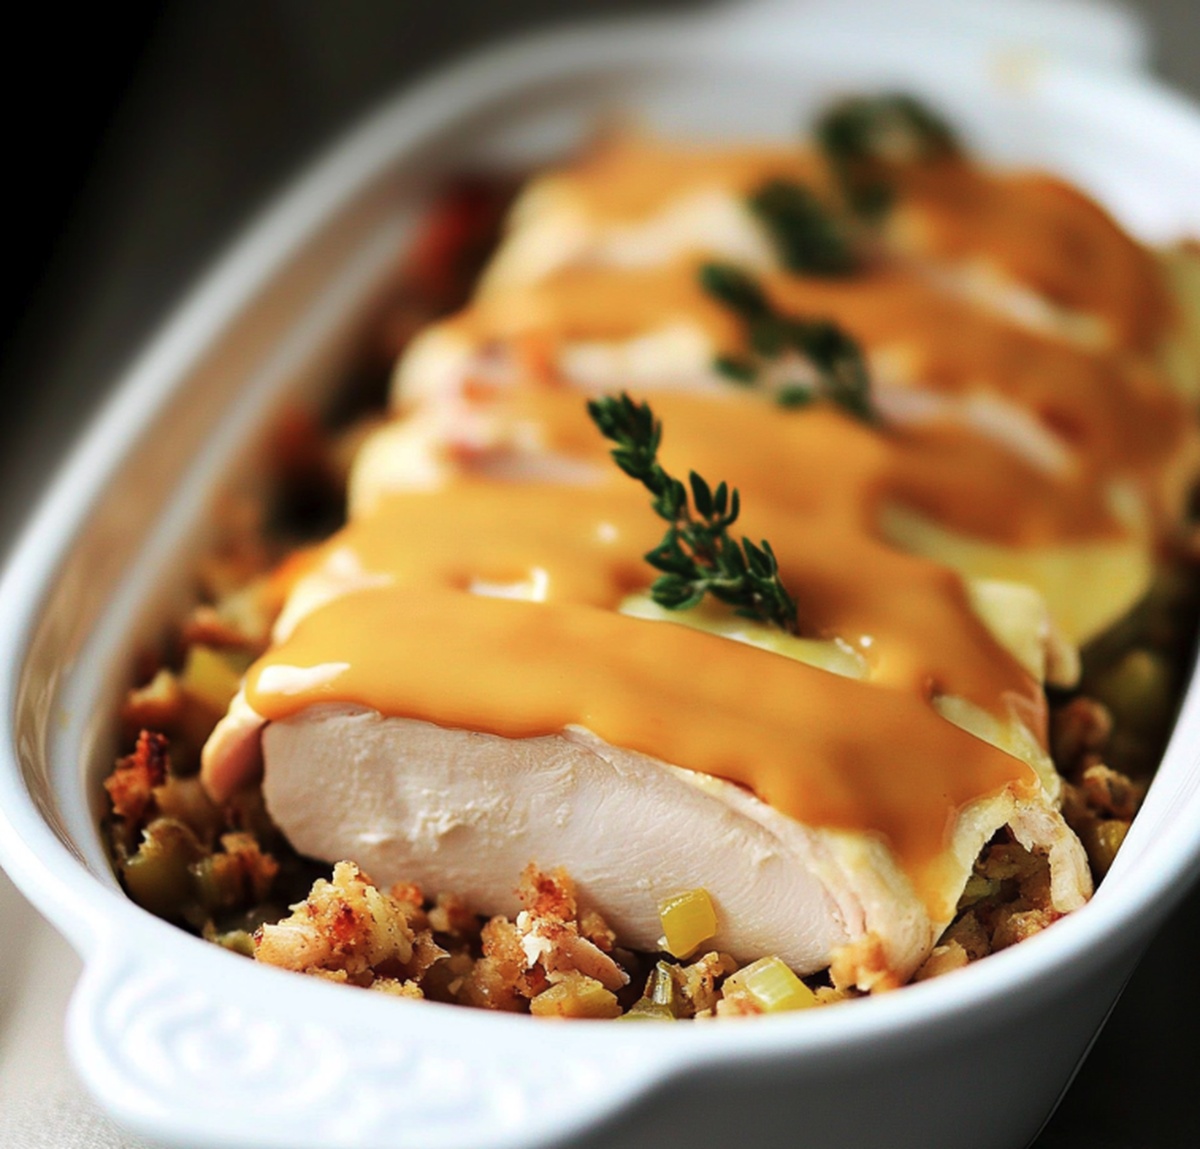
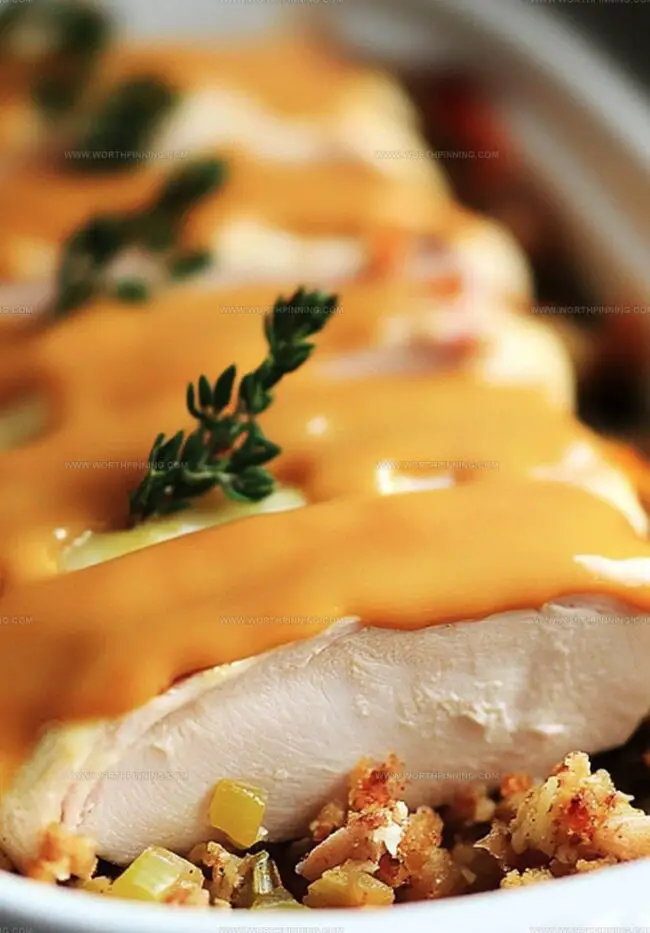
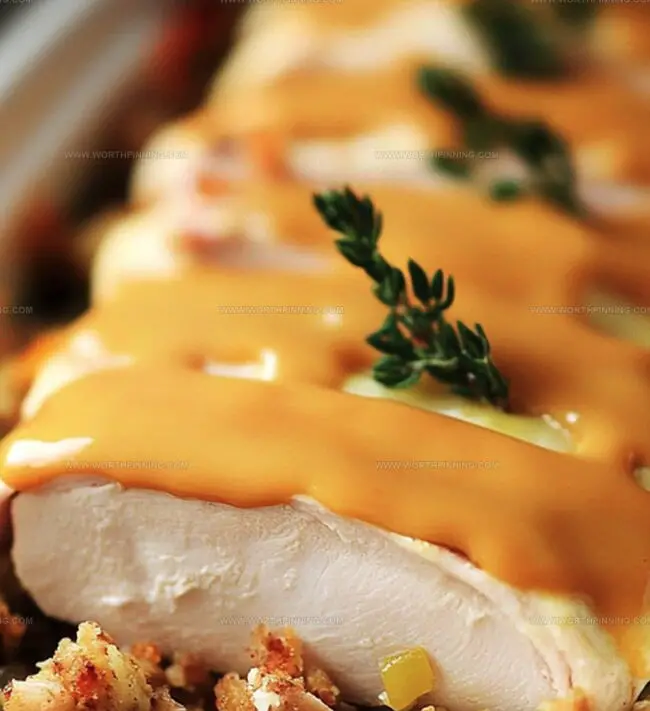
Spread a generous dollop of stuffing across each turkey slice. Carefully roll the slice into a tight little bundle, tucking the edges in neatly. Place each bundle seam-side down in the prepared baking dish, creating a cozy row of delectable rolls.
Step 3: Sprinkle and Drench with Flavor
Dust the turkey bundles with a magical blend of seasonings:Pour a river of rich gravy over the top, making sure each bundle gets a delicious coating.
Step 4: Bake to Perfection
Cover the baking dish with aluminum foil and slide it into the preheated oven. Let the bundles bake for 20 minutes, allowing the flavors to mingle and the turkey to become tender. If you’re adding cheese, remove the foil, sprinkle cheese generously, and return to the oven for an additional 5 minutes until the cheese melts into a golden blanket.
Step 5: Serve and Savor
Allow the bundles to cool slightly so they’re easy to handle. Plate these mouthwatering rolls alongside creamy mashed potatoes or a colorful medley of roasted vegetables. Enjoy your culinary creation!
Roll Up Tips for Better Results
Stash and Warm Turkey Roll Ups Without Fuss
Flavor Friends for Turkey Roll Ups
Roll Up Recipe Tweaks You’ll Enjoy
All Your Roll Up Questions Covered
Yes! Leftover roasted turkey works perfectly. Just slice it thinly and use it as a base for your roll-ups.
Absolutely! You can prepare the roll-ups and refrigerate them, covered, for up to 24 hours before baking. This makes meal prep easier.
Traditional bread-based stuffing is ideal, but you can also use cornbread stuffing or a gluten-free alternative. Just ensure it’s not too dry.
Yes, you can freeze them before baking. Wrap tightly in plastic wrap and aluminum foil. Thaw in the refrigerator overnight before baking as directed.
Print
Turkey & Stuffing Roll Ups Recipe
- Total Time: 35 minutes
- Yield: 4 1x
Description
Savory turkey & stuffing roll ups combine classic holiday flavors in a handy, portable package. Crisp edges and tender meat wrapped with herbed stuffing create a delightful twist on traditional comfort cuisine you’ll crave again and again.
Ingredients
Main Protein:
- 8 slices deli-style turkey (or leftover roasted turkey slices)
Seasoning and Herbs:
- ½ teaspoon garlic powder
- ½ teaspoon onion powder
- ½ teaspoon dried thyme
- ½ teaspoon black pepper
Supporting Ingredients:
- 2 cups prepared stuffing (homemade or store-bought)
- 1 cup turkey or chicken gravy
- ½ cup shredded mozzarella or Swiss cheese (optional)
- 1 tablespoon butter (for greasing the dish)
Instructions
- Prepare the baking environment by heating the oven to 375F (190C) and lightly coating a baking dish with butter or cooking spray to prevent sticking.
- Create individual roll-ups by spreading a precise portion of stuffing across each turkey slice, carefully rolling the meat into compact cylindrical shapes, and positioning them seam-side down within the prepared baking dish.
- Enhance flavor profiles by generously sprinkling a combination of garlic powder, onion powder, thyme, and freshly ground black pepper over the tightly rolled turkey bundles.
- Pour gravy evenly across the surface of the roll-ups, ensuring each piece receives an equal coating of rich, savory liquid.
- Cover the baking dish completely with aluminum foil, creating a sealed environment that helps retain moisture during the initial cooking phase.
- Bake the covered dish for approximately 20 minutes, allowing the turkey and stuffing to heat thoroughly and meld flavors.
- If utilizing cheese, remove the foil covering, delicately sprinkle cheese over the top of the roll-ups, and return to the oven for an additional 5 minutes until the cheese melts into a golden, appetizing layer.
- Remove from the oven and allow the roll-ups to rest briefly, which helps stabilize their structure and prevents immediate heat-related burns.
- Serve alongside complementary side dishes such as creamy mashed potatoes or perfectly roasted seasonal vegetables for a complete, satisfying meal.
Notes
- Ensure turkey slices are evenly pounded to guarantee consistent cooking and easy rolling.
- Prevent dry roll-ups by using freshly made or moist leftover stuffing with added moisture like broth or butter.
- Customize the dish for gluten-free diets by using gluten-free stuffing mix and checking gravy ingredients.
- Experiment with different herb combinations like rosemary or sage to elevate the flavor profile and add personal touch.
- Prep Time: 10 minutes
- Cook Time: 25 minutes
- Category: Lunch, Dinner, Appetizer
- Method: Baking
- Cuisine: American
Nutrition
- Serving Size: 4
- Calories: 200
- Sugar: 10 g
- Sodium: 180 mg
- Fat: 12 g
- Saturated Fat: 5 g
- Unsaturated Fat: 7 g
- Trans Fat: 0 g
- Carbohydrates: 22 g
- Fiber: 1 g
- Protein: 3 g
- Cholesterol: 20 mg
Ethan Miller
Founder & Lead Content Writer
Expertise
Education
Portland Community College
Culinary Institute of the Pacific
Ethan’s culinary journey began in his grandmother’s kitchen, where he first learned to play with flavors and ingredients. With formal training in culinary arts and a deep love for international cuisines, Ethan’s goal is to share the joy of cooking with others.
He believes food is all about creativity and bringing people together, one meal at a time. When he’s not experimenting with new dishes, he enjoys hiking in the Oregon wilderness and discovering fresh, local ingredients.