
Spicy Jamie Oliver Pickled Chillies Recipe for Bold Acidity
Jamie Oliver pickled chillies are a fiery culinary gem that transforms mundane meals into flavor explosions.
These vibrant peppers marinate in a zesty brine, promising to awaken your taste buds with their electrifying personality.
Bursting with tangy heat, these preserved chillies elevate everything from sandwiches to salads with their bold character.
Traditional pickling methods blend seamlessly with fresh ingredients, creating a condiment that’s both rustic and contemporary.
Spice lovers will revel in the intricate dance of heat and acidity that dances across their palate.
Crafting these pickled chillies at home lets you control the intensity and unique spirit of each jar.
Check out this simple yet powerful condiment and unlock a world of gastronomic excitement that will revolutionize your cooking.
Quick Recipe Overview
What’s Inside Jamie Oliver Pickled Chillies
For Jar and Preparation:For Pickling Liquid Base:For Spices and Flavor Enhancers:Kitchen Tools for This Pickle
Steps for Pickling Chillies Quickly

Spice Up Your Pantry with Homemade Pickled Chillies
Grab a spotless glass jar and sanitize it thoroughly. Wash your chillies and slice them into tempting rounds. Select some fragrant bay leaves to add depth and complexity to your pickle.
Create a flavor-packed brine by combining vinegar, sugar, water, and seasonings in a saucepan. Let the mixture dance and bubble, stirring until every crystal dissolves completely. The liquid will transform into a tangy, aromatic potion that’ll make your taste buds tingle.
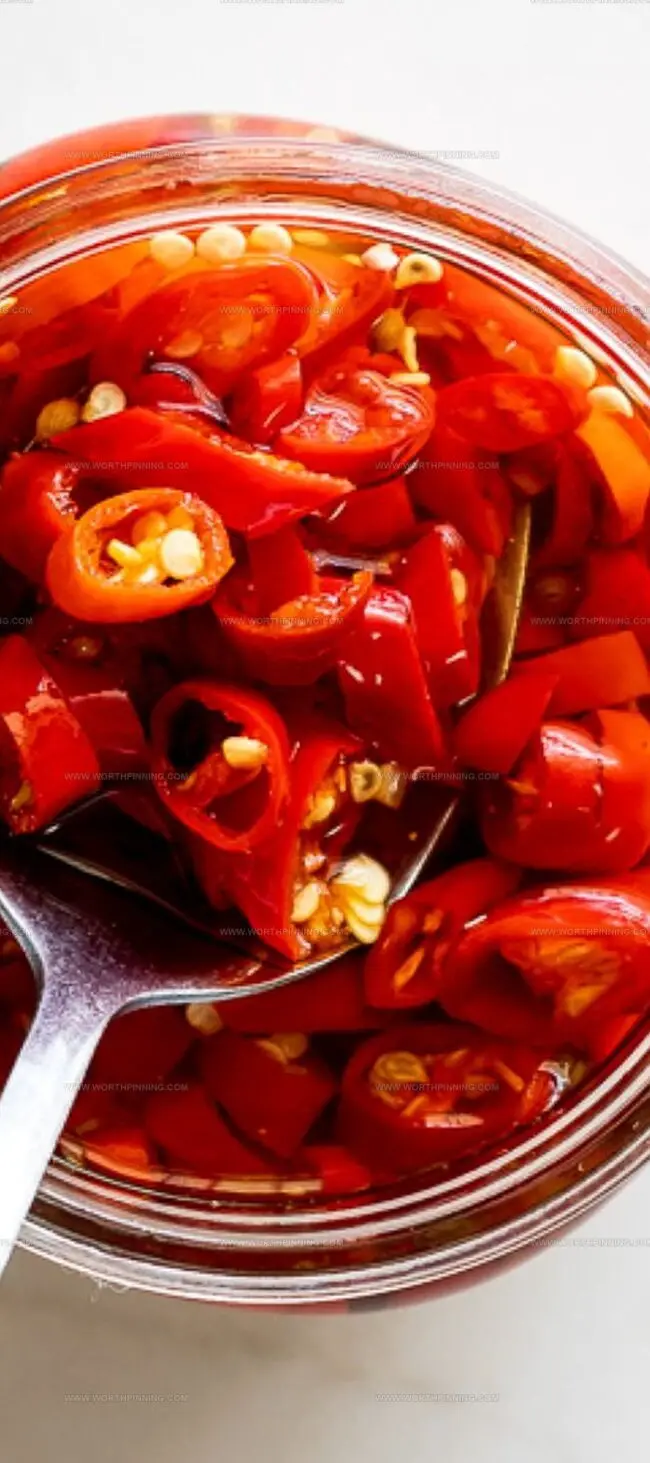
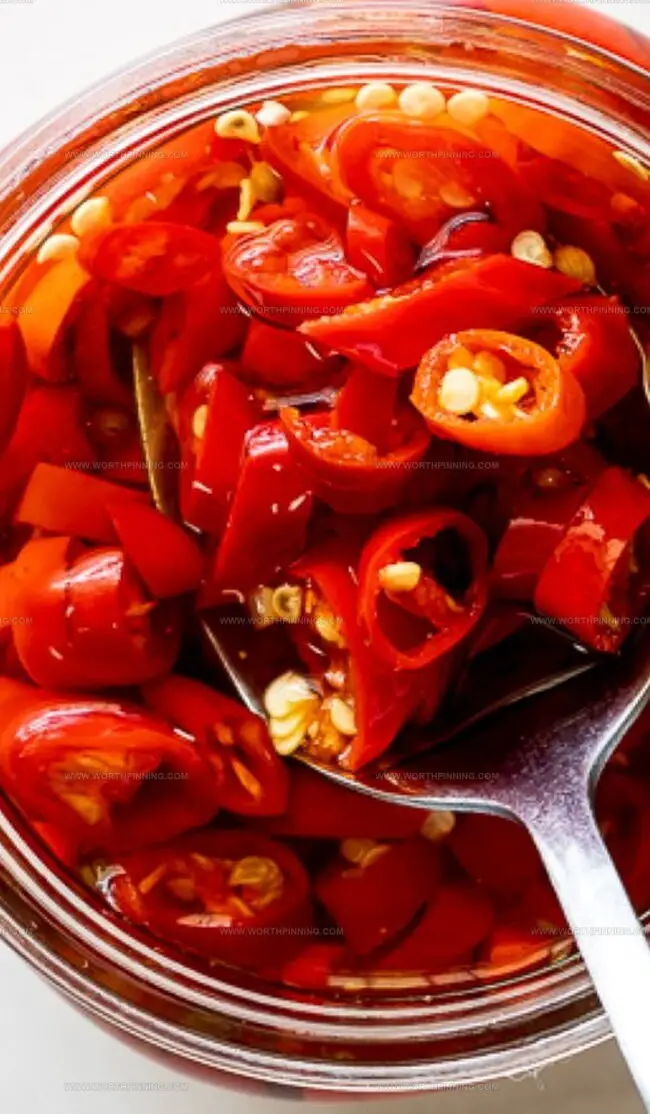
Arrange the chilli slices and bay leaves inside your jar like a spicy work of art. Pack them snugly but leave a little breathing room at the top. The goal is a vibrant, colorful pickle that looks as good as it tastes.
Carefully ladle the sizzling hot liquid over the chillies, making sure they’re completely submerged. Wipe the jar’s rim clean and cap it tightly. Use a kitchen towel to protect your hands from the heat – safety first!
Let the jar cool down to room temperature, then slide it into the refrigerator. Your homemade pickled chillies will be ready to add a kick to sandwiches, tacos, or whatever needs a flavor boost. They’ll stay fresh and zesty for months, waiting to surprise your palate with their vibrant heat.
How to Adjust Spice Levels Easily
Explore vibrant flavor combinations by swapping different pepper varieties like jalapeños, serranos, or habaneros for unique heat levels and tastes.
Enhance the pickling liquid with aromatic ingredients such as garlic cloves, ginger slices, or fresh herbs like thyme and rosemary to create complex flavor profiles.
Use apple cider vinegar instead of white vinegar for a slightly sweeter and tangier result, or experiment with rice vinegar for a milder Asian-inspired twist.
Always use clean, sterilized jars and ensure chillies are completely submerged in the pickling liquid to prevent bacterial growth and maintain maximum freshness and flavor intensity.
Ways to Use Pickled Chillies at Meals
Storing Pickled Chillies Right
Print
Spicy Jamie Oliver Pickled Chillies Recipe
- Total Time: 20 minutes
- Yield: 4 1x
Description
Jamie Oliver’s pickled chillies spark fiery excitement in home kitchens, offering a zesty preservation method that elevates countless dishes. Cooks can easily create these tangy condiments with simple ingredients and basic pickling techniques.
Ingredients
- 500 g (1 lb) chilies or peppers, sliced
- ½ cup white or cider vinegar
- ½ cup water
- ⅓ cup sugar
- 2 tsp salt
- 1 tsp mustard seeds
- 1 tsp coriander seeds
- 2 bay leaves
Instructions
- Sanitization: Meticulously clean and dry a 475 milliliters glass jar to create a sterile environment for pickling chillies.
- Layering: Arrange sliced chili peppers and bay leaves uniformly inside the jar, creating an aesthetically pleasing and evenly distributed arrangement.
- Liquid Preparation: In a medium saucepan, combine white vinegar, granulated sugar, filtered water, kosher salt, and mixed pickling spices, whisking the ingredients into a harmonious blend.
- Boiling Process: Elevate the liquid mixture to high heat, stirring consistently until sugar dissolves completely and the solution reaches a vigorous boil, releasing aromatic spice notes.
- Cooling and Pouring: Remove the saucepan from heat, allowing the pickling liquid to temper for 2-3 minutes, then gently cascade the hot liquid over the chili peppers, maintaining a 6 millimeters headspace for proper sealing.
- Sealing and Cooling: Utilize heat-resistant tongs to securely fasten the jar lid, protecting hands from potential burns, and permit the jar to equilibrate to room temperature for approximately 30 minutes.
- Storage: Transfer the sealed jar to the refrigerator, where the pickled chillies will mature and develop complex flavor profiles, remaining fresh for up to 4 months when stored properly.
Notes
- Sanitize Smartly: Thoroughly clean and dry the glass jar to prevent bacterial growth and ensure food safety.
- Layer with Precision: Distribute chili peppers and bay leaves evenly for consistent flavor and aesthetic appeal.
- Boil with Care: Stir continuously while heating the pickling liquid to completely dissolve sugar and create a balanced brine.
- Cool and Store Safely: Allow the jar to reach room temperature before refrigerating, and consume within 4 months for optimal taste and texture.
- Prep Time: 20 minutes
- Cook Time: 0 minutes
- Category: Snacks, Appetizer
- Method: Boiling
- Cuisine: UK
Nutrition
- Serving Size: 4
- Calories: 96
- Sugar: 19 g
- Sodium: 640 mg
- Fat: 0 g
- Saturated Fat: 0 g
- Unsaturated Fat: 0 g
- Trans Fat: 0 g
- Carbohydrates: 24 g
- Fiber: 1 g
- Protein: 1 g
- Cholesterol: 0 mg
Sophia Rivera
Recipe Developer & Kitchen Tips Specialist
Expertise
Education
Austin Community College
San Antonio Culinary Institute
Sophia’s passion for baking began in her family kitchen, where she spent hours experimenting with new recipes. With a background in baking and pastry arts, she loves making desserts that are as visually stunning as they are delicious.
Sophia is all about using seasonal, locally sourced ingredients to create treats that everyone will enjoy. When she’s not creating mouth-watering desserts, you can find her gardening, making new recipes, or enjoying a relaxing afternoon with her family.