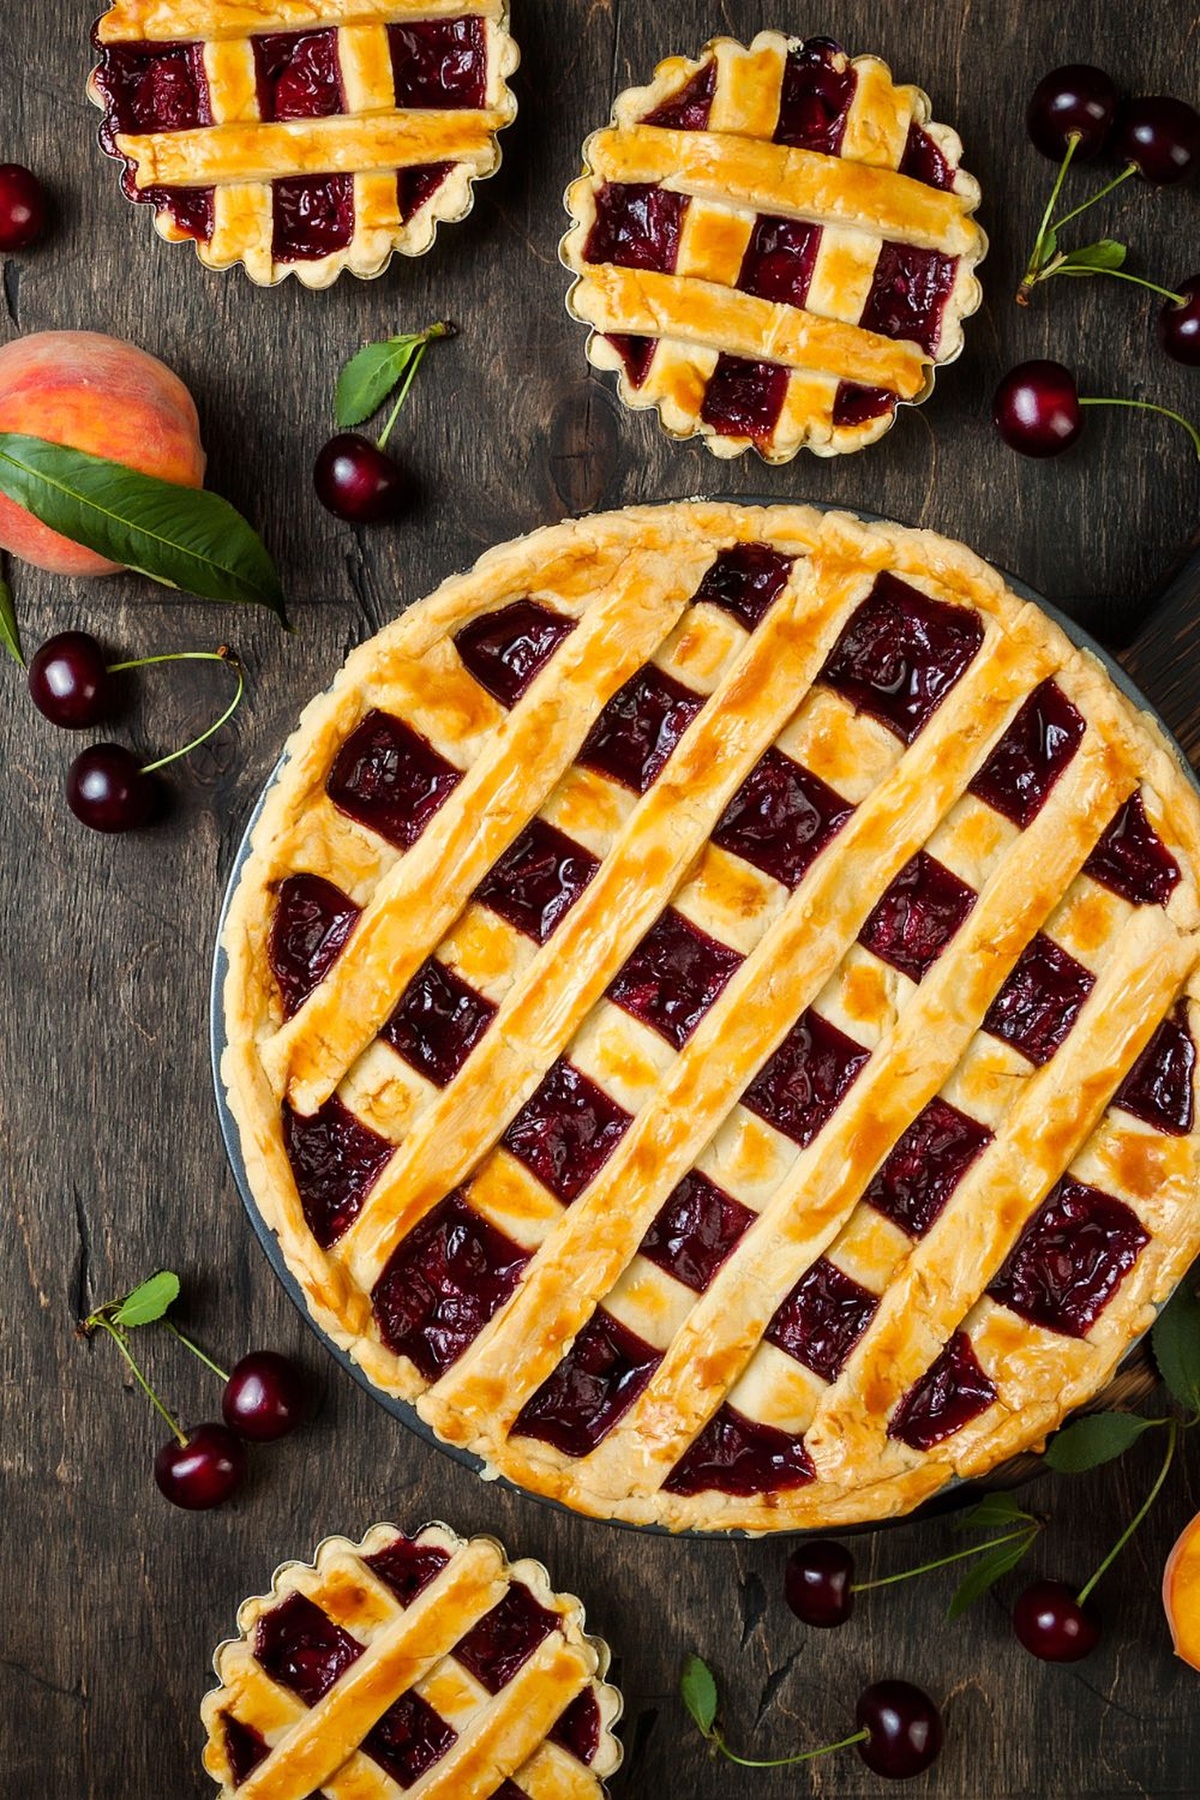
Ina Garten Cherry Pie Recipe: Rustic Homemade Goodness
Sweet cherry pie transports you straight to grandma’s sun-drenched kitchen with its nostalgic charm.
Bursting with ruby-red fruit and encased in buttery, golden pastry, this dessert tells a story of summer’s sweetest memories.
Professional bakers know that magic happens when simple ingredients dance together in perfect harmony.
Each slice reveals a vibrant filling that dances between tart and sugary notes.
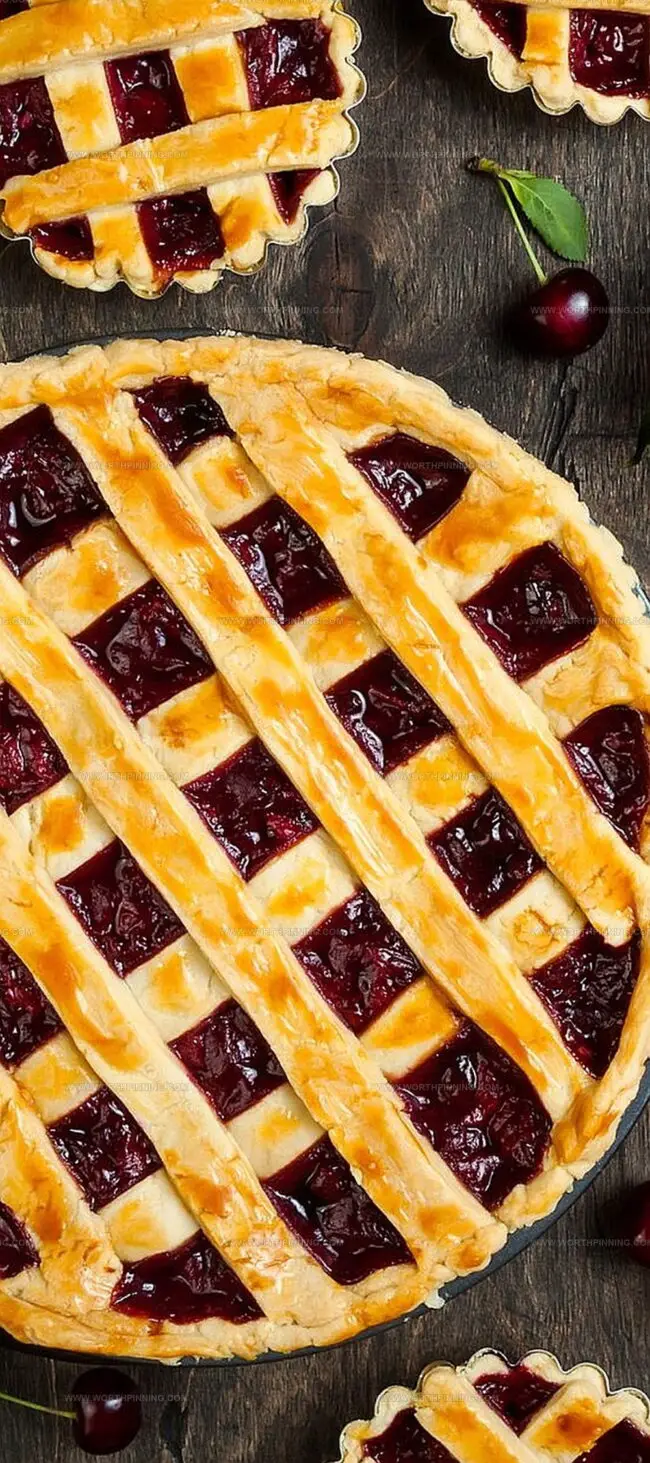
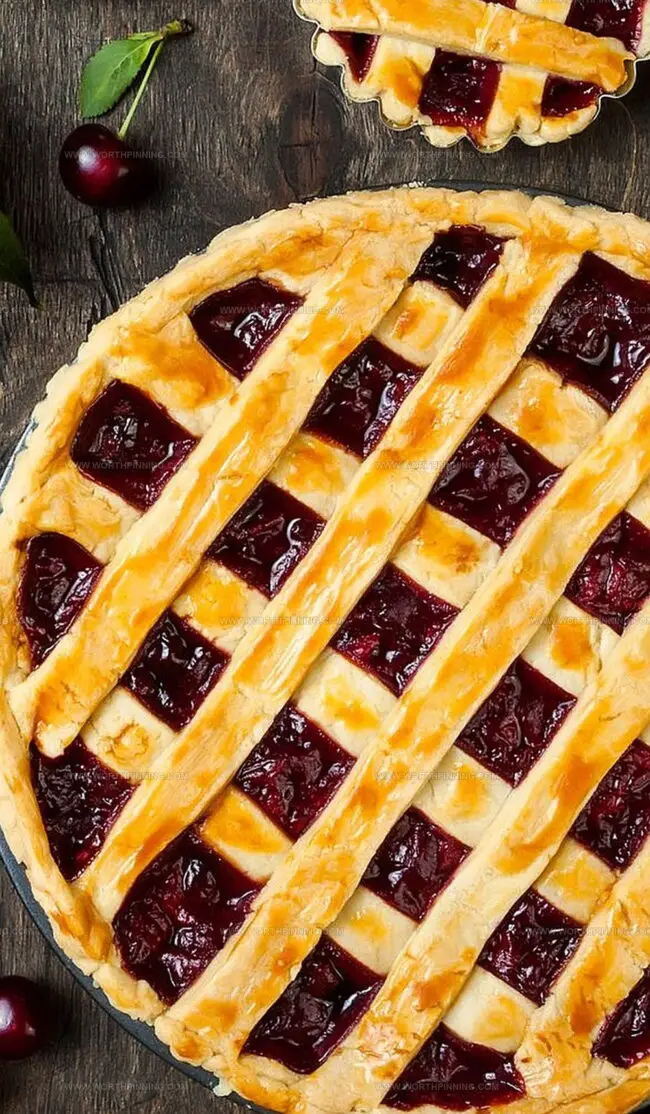
Flaky crusts cradle plump cherries, creating a symphony of textures that melts on your tongue.
Carefully selected fruits and a touch of love transform an ordinary pie into an extraordinary culinary experience.
Quick Recipe Overview
Everything You’ll Need for Ina Garten Cherry Pie
For Fresh Cherries:For Thickening and Sweetening:For Crust and Finishing:Tools to Make Cherry Pie Right
Cherry Pie Instructions You Can Follow
Wash and remove cherry pits. Simmer cherries with lemon splash in a pot until natural juices emerge. Gently separate cherries from liquid, keeping juice simmering.
Whisk cornstarch into cherry juice until smooth. Return mixture to heat, stirring continuously until sauce thickens and becomes glossy. Fold cherries back into sauce.
Roll out bottom pie crust into a smooth circular shape. Gently transfer to baking dish, pressing edges carefully to fit pan contours.
Pour thickened cherry mixture into prepared crust. Distribute evenly, creating gentle mounds across surface. Optional: Sprinkle subtle cinnamon dust for enhanced flavor.
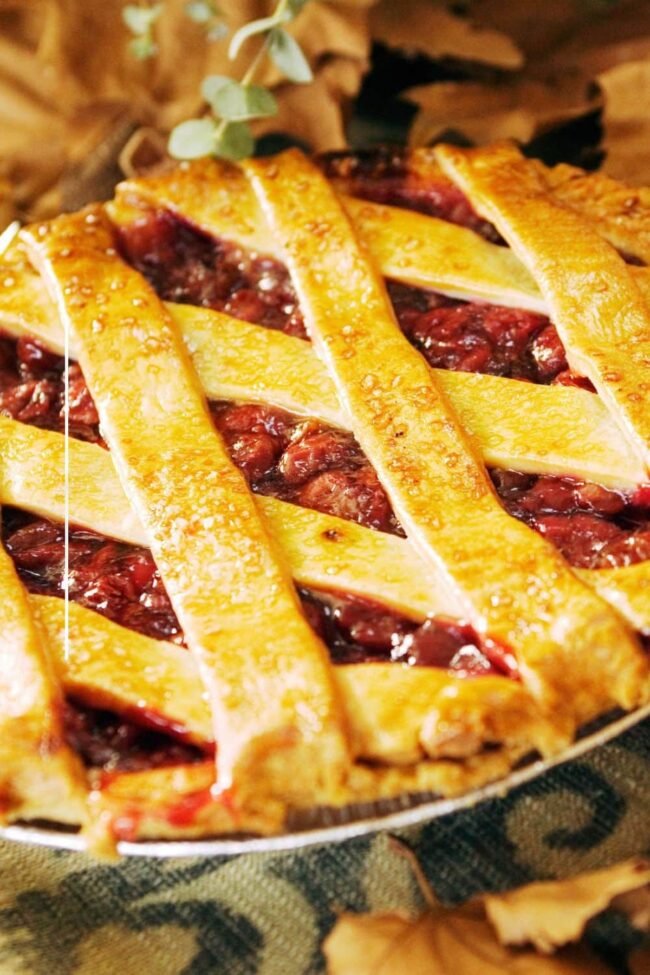
Cover with top crust, creating decorative lattice or full coverage. Crimp edges together, sealing precious filling inside. Brush surface with egg wash for golden shine.
Slide pie into preheated oven. Bake until crust turns golden brown and filling bubbles softly around edges. Shield with foil if crust browns too quickly.
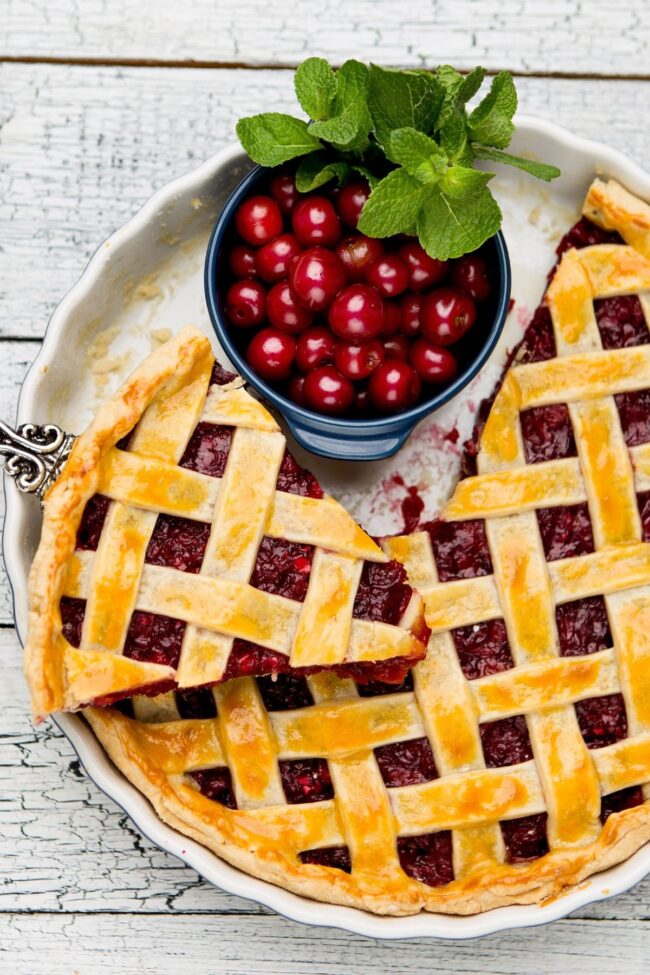
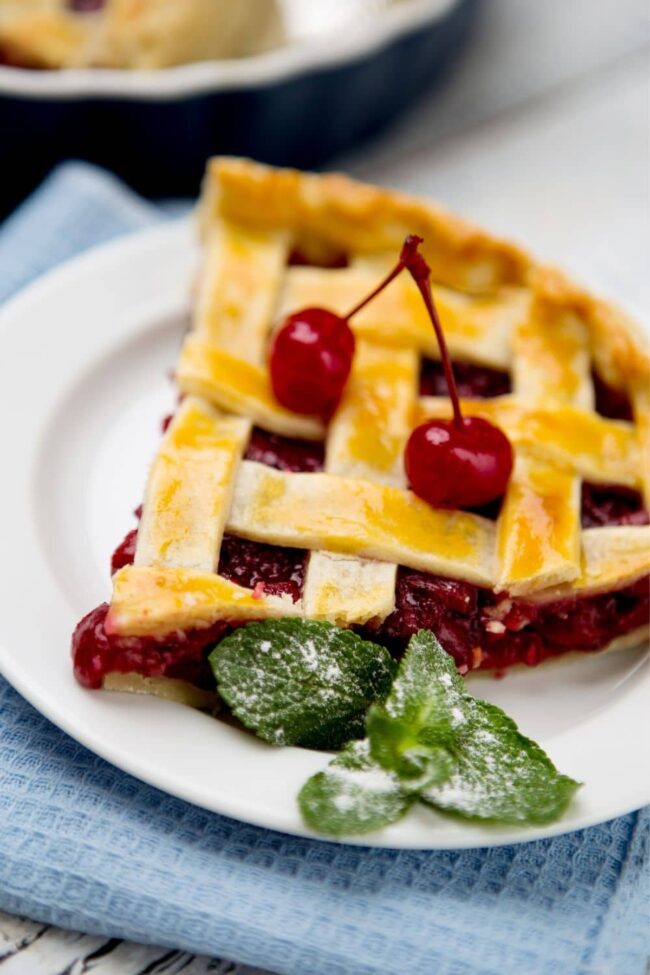
Allow pie to rest and settle for several hours. Slice carefully, revealing beautiful cherry layers. Serve at room temperature with optional vanilla scoop.
Variations to Switch Up Cherry Pie Flavor
Smart Tweaks and Flavor Boosters
Swap fresh cherries with frozen or canned varieties, adjusting sugar levels to match natural sweetness of chosen fruit.
Enhance filling by adding ground cinnamon, nutmeg, or vanilla extract for deeper, more complex flavor profile.
Experiment with different pie crust styles like lattice top, crumble topping, or decorative cutout designs to personalize your dessert.
Prepare cherry filling and pie crust a day in advance, refrigerate separately, then assemble and bake when ready to serve for stress-free entertaining.
How to Present Cherry Pie Perfectly
Cherry Pie Storage Tips

Rustic Cherry Pie Recipe
- Total Time: 1 hour
- Yield: 8 1x
Description
Ina Garten’s cherry pie blends sweet-tart cherries with a buttery, flaky crust that sings of summer’s bounty. Bakers will savor each homemade slice, celebrating classic American dessert traditions with this timeless recipe.
Ingredients
- 1.5 lbs (680 g) cherries, fresh sour or 3 (14.5 oz/410 g) cans or 8 cups frozen
- ¾ cup (150 g) granulated sugar
- ⅓ cup (40 g) cornstarch
- 2 tbsps lemon juice
- 2 tbsps butter
- ½ tsp ground cinnamon
- 1 large egg white, beaten
- homemade or ready-made pie crust
- granulated sugar, for sprinkling on top
Instructions
- Prepare Cherry Mixture: Combine fresh cherries, sugar, and lemon juice in a saucepan. Simmer until cherries release their natural juices, creating a vibrant, aromatic base.
- Create Thickening Agent: Whisk cornstarch with reserved cherry liquid until smooth. Integrate the mixture back into the saucepan, stirring continuously to develop a glossy, luxurious sauce that coats the cherries perfectly.
- Enhance Flavor Profile: Incorporate preserved cherries, additional cornstarch, sugar, butter, and lemon juice. Gently fold cherries into the sauce, allowing flavors to meld and intensify while cooling completely.
- Prepare Pie Crust: Defrost frozen cherries, adjusting cornstarch and sugar levels to balance natural sweetness. Preheat oven to 204 degrees Celsius, rolling out pie crusts to precise dimensions.
- Assemble Pie: Line pie dish with first crust layer, distributing cherry filling evenly. Optional: sprinkle ground cinnamon and dot with butter fragments to elevate taste complexity.
- Craft Decorative Top: Create either an intricate lattice pattern or full crust top. If using complete crust, puncture small steam vents to prevent pressure buildup during baking.
- Finish and Bake: Seal pie edges with an elegant crimped border. Brush with egg white and sprinkle sugar for a golden, glistening exterior. Bake for 40-45 minutes, protecting crust with aluminum foil if browning too quickly.
- Cool and Serve: Allow pie to rest on a wire rack for several hours, ensuring filling sets perfectly. Slice and serve at room temperature or slightly chilled, revealing a luscious, jewel-toned filling.
Notes
- Precision Matters: Measure ingredients accurately using kitchen scales for consistent results.
- Cherry Selection: Choose ripe, firm cherries without bruises for the best flavor and texture.
- Cornstarch Control: Whisk cornstarch thoroughly to prevent lumps and ensure a smooth, glossy filling.
- Temperature Technique: Allow pie to cool completely for at least 3-4 hours to achieve perfect slice stability.
- Prep Time: 15 minutes
- Cook Time: 45 minutes
- Category: Desserts
- Method: Baking
- Cuisine: American
Nutrition
- Serving Size: 8
- Calories: 320
- Sugar: 24 g
- Sodium: 150 mg
- Fat: 12 g
- Saturated Fat: 7 g
- Unsaturated Fat: 3 g
- Trans Fat: 0 g
- Carbohydrates: 49 g
- Fiber: 2 g
- Protein: 2 g
- Cholesterol: 30 mg
Sophia Rivera
Recipe Developer & Kitchen Tips Specialist
Expertise
Education
Austin Community College
San Antonio Culinary Institute
Sophia’s passion for baking began in her family kitchen, where she spent hours experimenting with new recipes. With a background in baking and pastry arts, she loves making desserts that are as visually stunning as they are delicious.
Sophia is all about using seasonal, locally sourced ingredients to create treats that everyone will enjoy. When she’s not creating mouth-watering desserts, you can find her gardening, making new recipes, or enjoying a relaxing afternoon with her family.