Dreamy Barefoot Contessa’s Chocolate Espresso Cake Recipe for Lovers
Decadent chocolate meets bold espresso in a rich, velvety cake that promises pure indulgence.
The Barefoot Contessa chocolate espresso cake recipe blends deep cocoa notes with a subtle coffee kick that awakens every taste bud.
Silky smooth and intensely flavorful, this dessert transforms an ordinary afternoon into a gourmet experience.
Professional home bakers and chocolate lovers will adore the complex layers of intense chocolate and robust espresso.
Each slice delivers a luxurious, moist texture that melts effortlessly on your tongue.
Dark chocolate enthusiasts will fall head over heels for this irresistible treat.
Get ready to serve a show-stopping dessert that will leave everyone craving another bite.
Quick Recipe Overview
Chocolate Espresso Cake Ingredient Line-Up
For Cake Base:For Moisture and Richness:For Frosting:Optional Garnish:What You’ll Need for Chocolate Espresso Cake
Step-by-Step Guide to Chocolate Espresso Cake

Gather all essential tools and ingredients. Set oven temperature to warm and cozy. Prepare cake pans with gentle butter coating and light flour dusting.
Mix dry ingredients in a spacious bowl. Combine flour, rich cocoa, and soft rising agent. Create a smooth, silky powder blend that promises delicious results.
Cream butter with sugars using electric mixer. Whip until mixture looks light and fluffy like soft clouds. Incorporate eggs slowly, allowing each to blend smoothly.
Add brewed espresso to cake mixture. Stir gently until batter becomes silky and uniform. The liquid will create deep, intense flavor notes.
Pour batter into prepared pans. Smooth surface with gentle movements. Bake until cake springs back when touched and edges pull slightly away from pan sides.
Whip butter and cocoa into creamy dream. Gradually add powdered sugar and milk. Beat until frosting becomes light and pillowy, with rich chocolate essence.
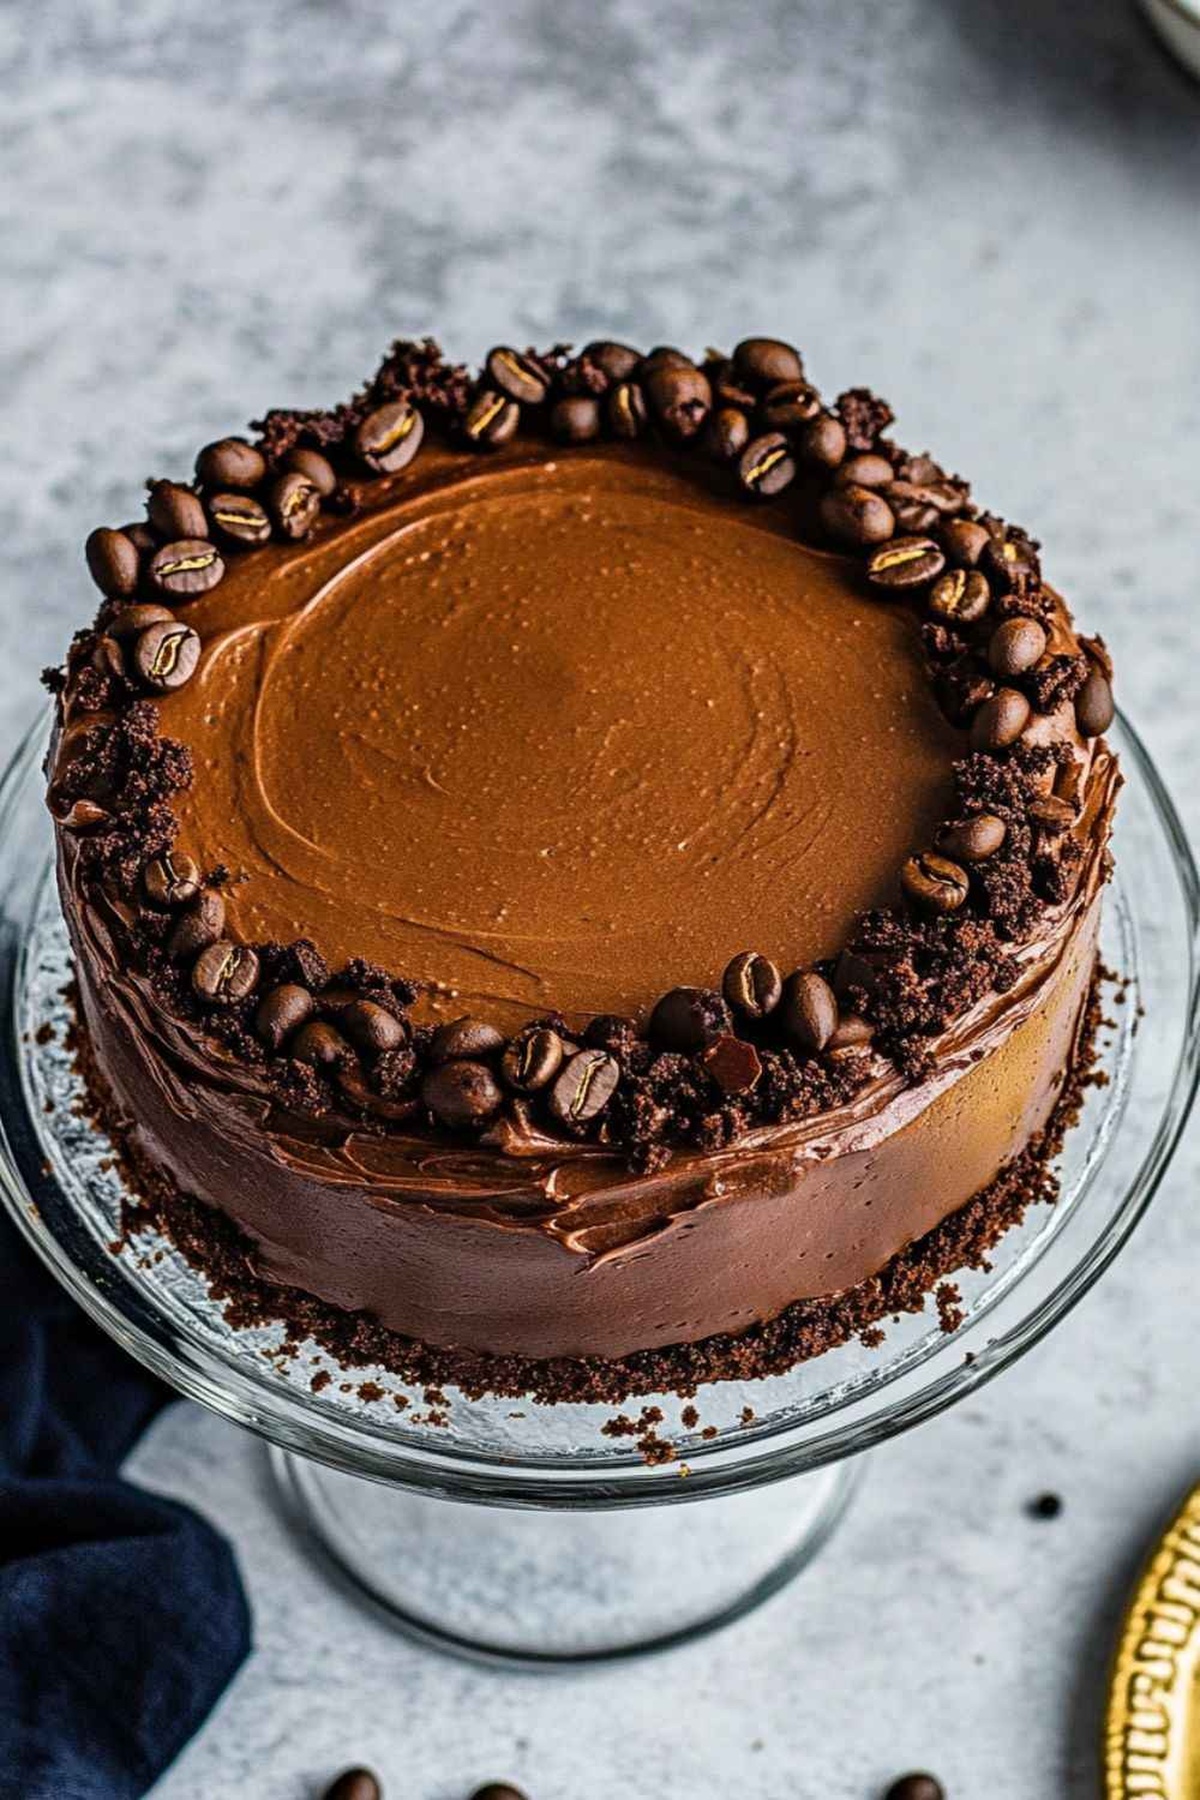
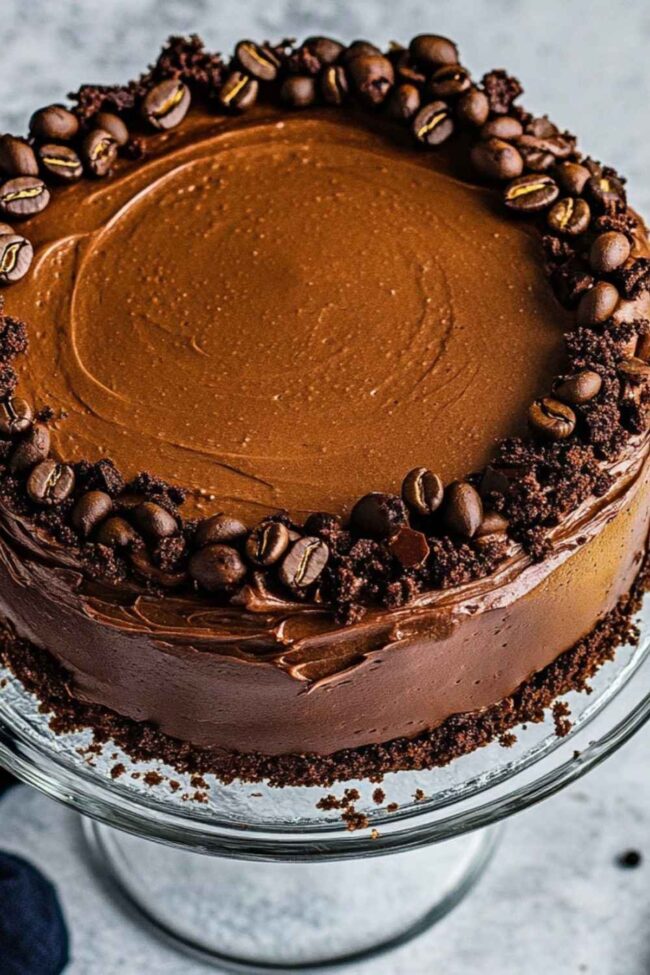
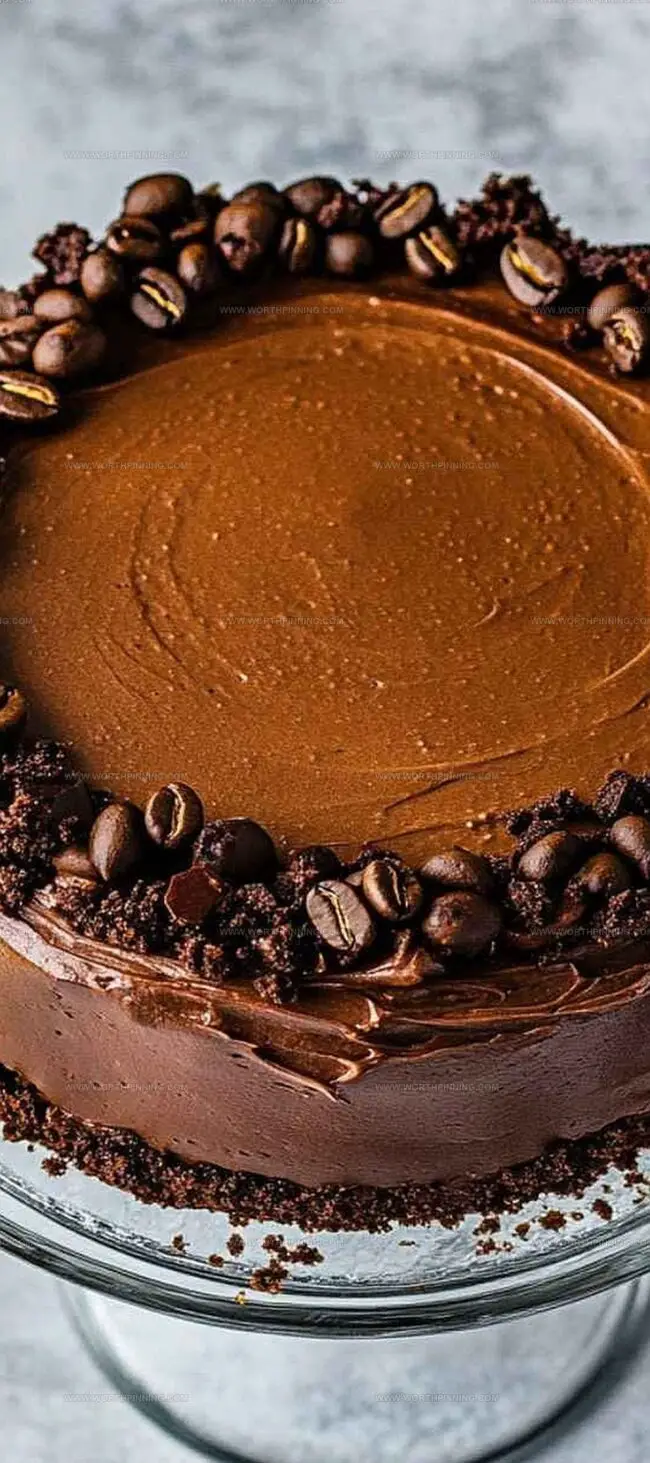
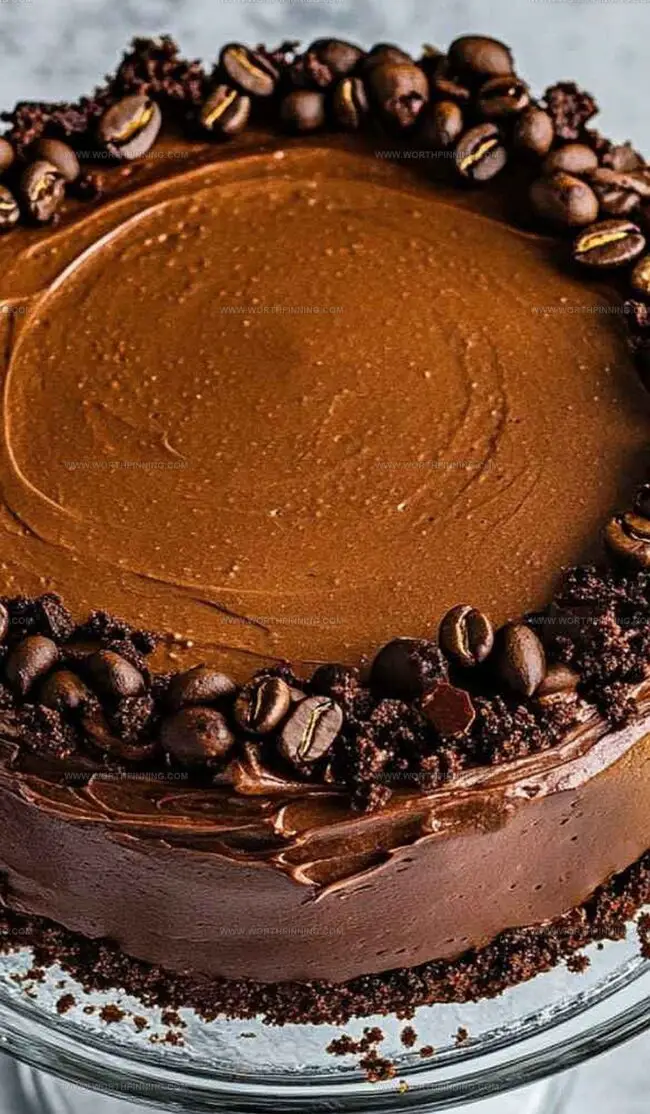
Place first cake layer on elegant serving plate. Spread thick frosting between layers. Cover entire cake with remaining creamy chocolate coating. Decorate with chocolate espresso beans for dramatic finish.
Ideas & Tips to Elevate Chocolate Espresso Cake
Fun Ways to Plate Chocolate Espresso Cake
Planning Ahead for Chocolate Espresso Cake Success
Print
Rich Chocolate Espresso Cake Recipe
- Total Time: 50 minutes
- Yield: 12 1x
Description
Ina Garten’s chocolate espresso cake delivers rich, luxurious flavors that dance between deep cocoa and intense coffee notes. Chocolate enthusiasts and dessert lovers will savor each moist, sophisticated slice of this irresistible treat.
Ingredients
- 3 large eggs
- 225 grams (1 cup) unsalted butter
- 170 grams (¾ cup) unsalted butter
- 240 milliliters (1 cup) freshly brewed espresso or strong coffee
- 200 grams (1 cup) caster sugar
- 100 grams (½ cup) light brown sugar
- 250 grams (2 cups) plain flour
- 50 grams (½ cup) unsweetened cocoa powder
- 100 grams (1 cup) unsweetened cocoa powder
- 120 milliliters (½ cup) whole milk
- 560 grams (4 ½ cups) icing sugar (powdered sugar)
- 2 teaspoons vanilla extract
- 1 teaspoon vanilla extract
- 1 ½ teaspoons bicarbonate of soda (baking soda)
Instructions
- Preheat Preparation: Set oven to 180°C (350°F) and prepare two 20-centimeter cake pans by buttering and lining with parchment paper.
- Dry Ingredient Fusion: Meticulously sift flour, cocoa powder, and bicarbonate of soda into a medium bowl, ensuring a uniform, clump-free mixture.
- Creaming Process: Utilize an electric mixer to whip butter with caster and light brown sugars until the mixture transforms into a pale, voluminous cream.
- Liquid Integration: Gently introduce eggs one at a time, thoroughly blending after each addition. Incorporate vanilla extract to elevate the flavor profile.
- Batter Development: Delicately fold dry ingredients into the wet mixture, stirring minimally to maintain the cake’s tender consistency. Stream in brewed espresso, mixing until fully incorporated.
- Baking Technique: Evenly distribute batter between prepared pans, tapping gently to eliminate air pockets. Slide into preheated oven and bake for 25-30 minutes, verifying doneness with a clean skewer test.
- Cooling Protocol: Rest cakes in pans for 10 minutes, then transfer to a wire rack to cool completely to room temperature.
- Frosting Creation: Whip butter and cocoa powder until smooth, gradually introducing powdered sugar and milk. Blend in vanilla extract, whipping until the mixture becomes light and fluffy.
- Assembly and Decoration: Position first cake layer on serving plate, spread buttercream generously. Carefully place second layer and coat entire cake with remaining frosting. Garnish with chocolate-covered espresso beans or finely chopped chocolate for an elegant finish.
Notes
- Precise Ingredient Temperature: Ensure butter and eggs are at room temperature for smoother mixing and better cake texture.
- Coffee Intensity Matters: Use high-quality, freshly brewed espresso to maximize deep chocolate and coffee flavor complexity.
- Gentle Mixing Technique: Fold dry ingredients carefully to prevent overworking the batter, which can result in a dense, tough cake.
- Pan Preparation Trick: Buttering and parchment-lining pans guarantees easy cake removal and prevents frustrating sticking.
- Prep Time: 20 minutes
- Cook Time: 30 minutes
- Category: Desserts, Snacks, Drinks
- Method: Baking
- Cuisine: American
Nutrition
- Serving Size: 12
- Calories: 500
- Sugar: 60 g
- Sodium: 200 mg
- Fat: 30 g
- Saturated Fat: 18 g
- Unsaturated Fat: 12 g
- Trans Fat: 0 g
- Carbohydrates: 60 g
- Fiber: 3 g
- Protein: 6 g
- Cholesterol: 80 mg
Sophia Rivera
Recipe Developer & Kitchen Tips Specialist
Expertise
Education
Austin Community College
San Antonio Culinary Institute
Sophia’s passion for baking began in her family kitchen, where she spent hours experimenting with new recipes. With a background in baking and pastry arts, she loves making desserts that are as visually stunning as they are delicious.
Sophia is all about using seasonal, locally sourced ingredients to create treats that everyone will enjoy. When she’s not creating mouth-watering desserts, you can find her gardening, making new recipes, or enjoying a relaxing afternoon with her family.