
Try Today: Pioneer Woman White Sandwich Bread Recipe
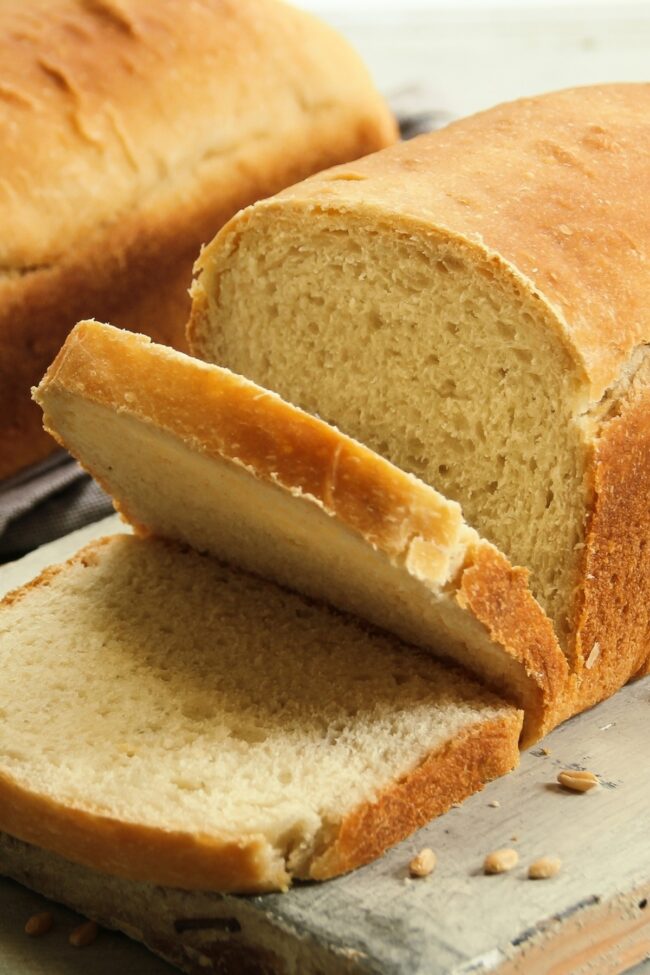
White sandwich bread transforms ordinary meals into comfort-filled experiences with its soft, pillowy texture and homemade warmth.
Crafting this classic staple requires minimal ingredients and a dash of patience.
Bakers appreciate how simple techniques can produce such delightful results.
Kneading dough becomes a meditative process that connects you to culinary traditions passed through generations.
Smooth and tender slices promise to elevate everything from morning toast to afternoon sandwiches.
The aroma of freshly baked bread fills your kitchen with nostalgic memories and welcoming sensations.
White Sandwich Bread That Works Every Time

Ingredients for White Sandwich Bread
Yeast and Liquid Base:Dry Ingredients:Optional Finishing Touches:Steps to Make Sandwich Bread
Step 1: Activate the Yeast
Grab a large mixing bowl and pour in of warm water (around 110°F). Sprinkle the yeast into the water and stir until completely dissolved. Add these ingredients:Mix everything together until well combined.
Step 2: Mix in the Flour
Gradually add flour to the yeast mixture in 3 stages:Step 3: Knead and First Rise
Knead the dough for 10 minutes, working in the remaining flour. The dough should be:Transfer the dough to a greased bowl and cover with plastic wrap. Let it rise in a warm, draft-free spot for 1 hour.
Step 4: Shape the Loaves
After the first rise:Step 5: Bake and Cool
Preheat the oven to 400°F:Remove bread from the oven and transfer to a cooling rack. Let the loaves cool completely before slicing.
Helpful Tips for Better Bread
Store Sandwich Bread Right
Flavors to Try with White Bread
White Bread Recap
Pioneer Woman’s white sandwich bread emerges as pure culinary magic, bringing home bakers closer to authentic bread-making traditions.
Classic ingredients transform simple kitchen moments into memorable experiences.
Home kitchens will sparkle with warm bread aromas wafting through every corner.
Chemical reactions between yeast, flour, and warm water create magical molecular dance partners.
Professional bakers and home cooks can master this straightforward recipe with confidence.
Readers, dive into bread-making adventure, share your golden loaf creations on social media, spark conversations, and spread delicious inspiration with fellow bread enthusiasts.
Print
Pioneer Woman White Sandwich Bread Recipe
- Total Time: 1 hour
- Yield: 12 1x
Description
Hearty Pioneer Woman White Sandwich Bread delivers classic comfort from scratch with simple ingredients. Homemade warmth fills kitchens as golden loaves promise delightful slices perfect for sandwiches and toast.
Ingredients
Bread Base Ingredients:
- 5 ¼ cups (660 grams) all-purpose flour
- 2 cups (480 milliliters) warm water
- 2 ¼ teaspoons (7 grams) active dry yeast
Flavoring and Enriching Ingredients:
- 4 tablespoons (57 grams) butter, melted
- 1 tablespoon (12 grams) sugar
- 2 teaspoons (10 grams) kosher salt
Additional Preparation Ingredients:
- Butter for greasing the bowl and loaf pans
- Additional flour for kneading
Instructions
- Awaken the yeast by dissolving it in 2 cups of warm water (110°F or 43°C), creating a smooth, bubbling base. Incorporate melted butter, sugar, and salt, stirring until the mixture becomes uniform and fragrant.
- Introduce flour gradually, blending one-third at a time with the liquid mixture. Use a wooden spoon to create a cohesive, smooth batter, ensuring no dry flour pockets remain.
- Transfer the developing dough onto a flour-dusted surface. Knead with rhythmic, pressing motions for 8-10 minutes, transforming the sticky mass into a supple, elastic dough that springs back when touched.
- Nestle the kneaded dough into a generously greased bowl, draping it with a clean kitchen towel. Allow the dough to rest and expand in a warm, undisturbed environment for approximately 60 minutes, or until it has dramatically increased in volume.
- Gently deflate the risen dough with careful punches. Divide the dough into two equal portions, shaping each into a smooth, elongated loaf that will fit comfortably in a greased 9-inch by 5-inch (23 centimeters by 13 centimeters) baking pan.
- Position the formed loaves in their respective pans, covering them loosely. Let them undergo a second rising period of 40-45 minutes, watching as they become puffy and nearly double their original size.
- Preheat the oven to 400 degrees Fahrenheit (204 degrees Celsius). Bake the loaves for 30-35 minutes, monitoring their transformation into golden-crusted treasures that emit a hollow sound when gently tapped.
- Carefully extract the baked loaves from the oven, immediately transferring them to a wire cooling rack. Allow the bread to cool completely for at least 1 hour before slicing, preserving its delicate internal structure.
Notes
- Cool the loaf completely on a wire rack to prevent soggy bottoms and maintain a crisp crust texture.
- Slice bread only after it has cooled for at least 30 minutes, allowing internal moisture to stabilize and prevent gummy texture.
- Knead dough until it becomes smooth and elastic, developing gluten structure without overworking the mixture.
- Stop adding flour when the dough feels slightly tacky but doesn’t stick to your hands, ensuring a tender final product.
- Verify yeast’s freshness by checking the expiration date and storing in a cool, dry place to maintain its active properties.
- Measure water temperature precisely between 105°F and 115°F using a digital thermometer to activate yeast without killing it.
- Prep Time: 25 minutes
- Cook Time: 35 minutes
- Category: Breakfast, Lunch, Snacks
- Method: Baking
- Cuisine: American
Nutrition
- Serving Size: 12
- Calories: 200
- Sugar: 2 g
- Sodium: 480 mg
- Fat: 6 g
- Saturated Fat: 4 g
- Unsaturated Fat: 2 g
- Trans Fat: 0 g
- Carbohydrates: 36 g
- Fiber: 1 g
- Protein: 5 g
- Cholesterol: 15 mg
Ethan Miller
Founder & Lead Content Writer
Expertise
Education
Portland Community College
Culinary Institute of the Pacific
Ethan’s culinary journey began in his grandmother’s kitchen, where he first learned to play with flavors and ingredients. With formal training in culinary arts and a deep love for international cuisines, Ethan’s goal is to share the joy of cooking with others.
He believes food is all about creativity and bringing people together, one meal at a time. When he’s not experimenting with new dishes, he enjoys hiking in the Oregon wilderness and discovering fresh, local ingredients.