
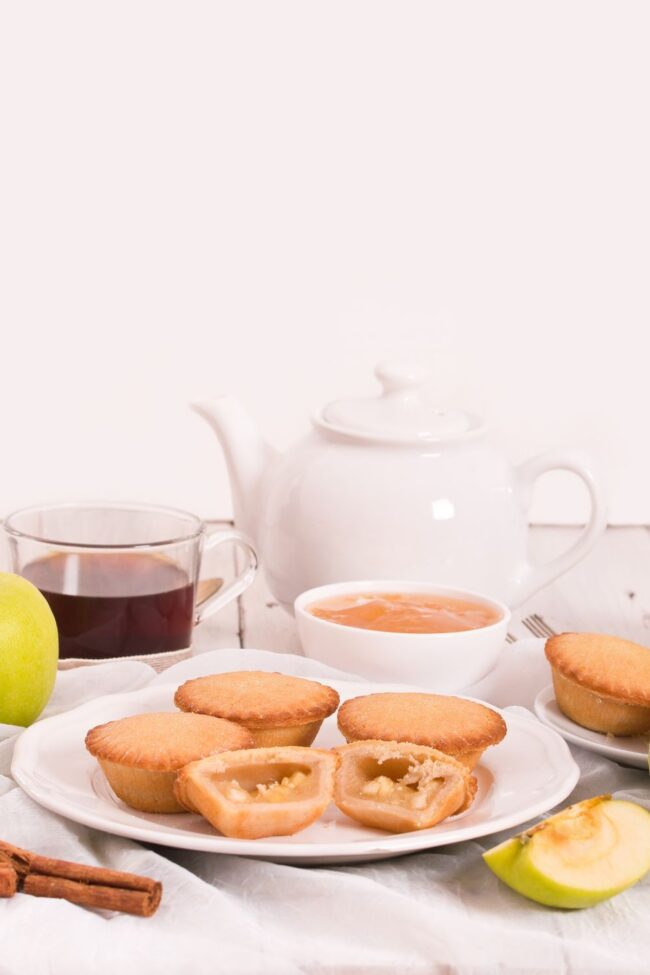
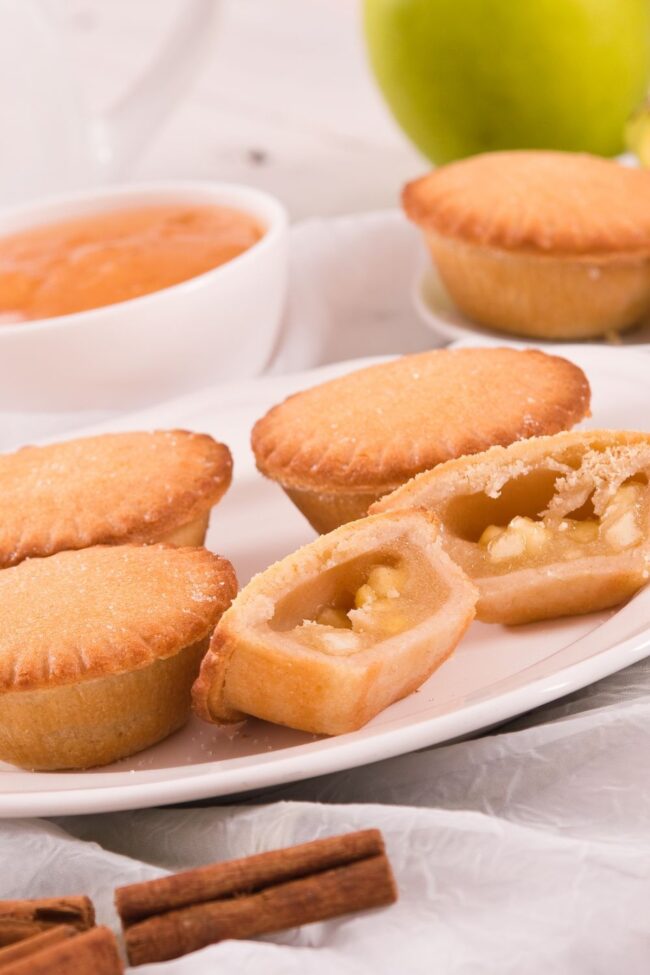
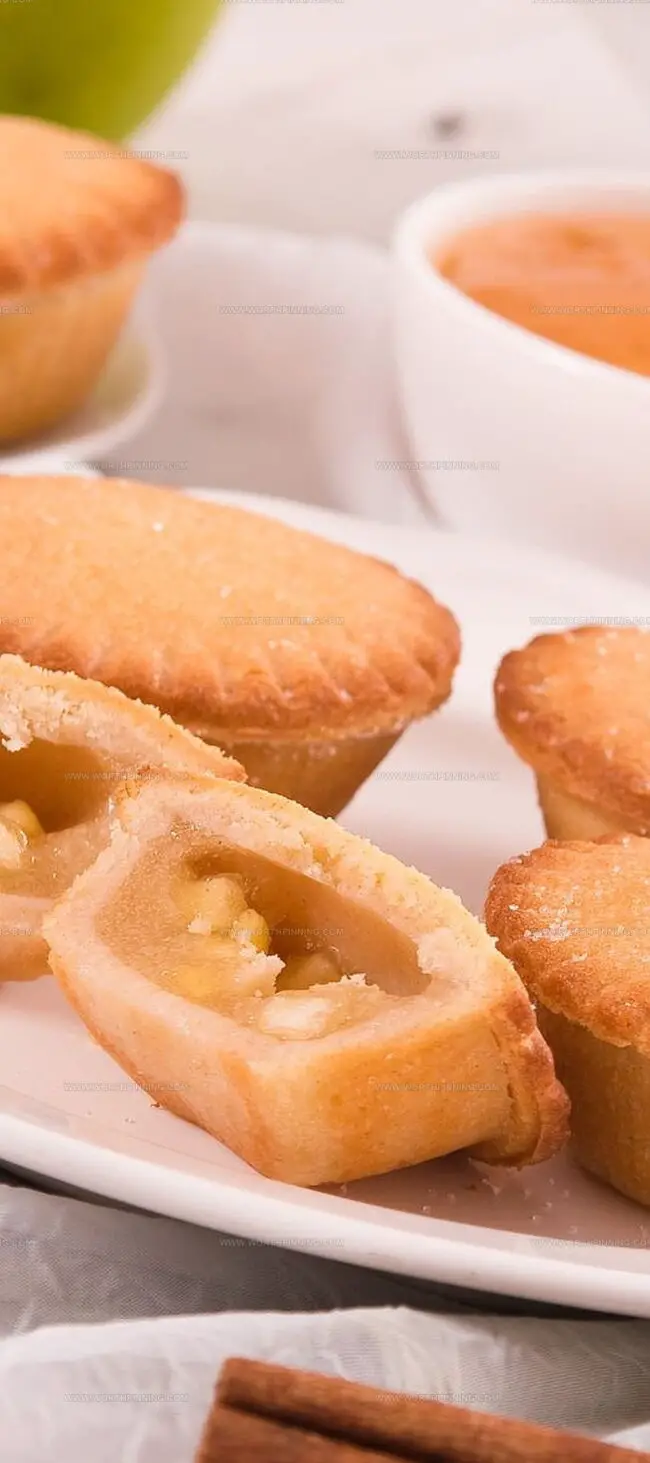
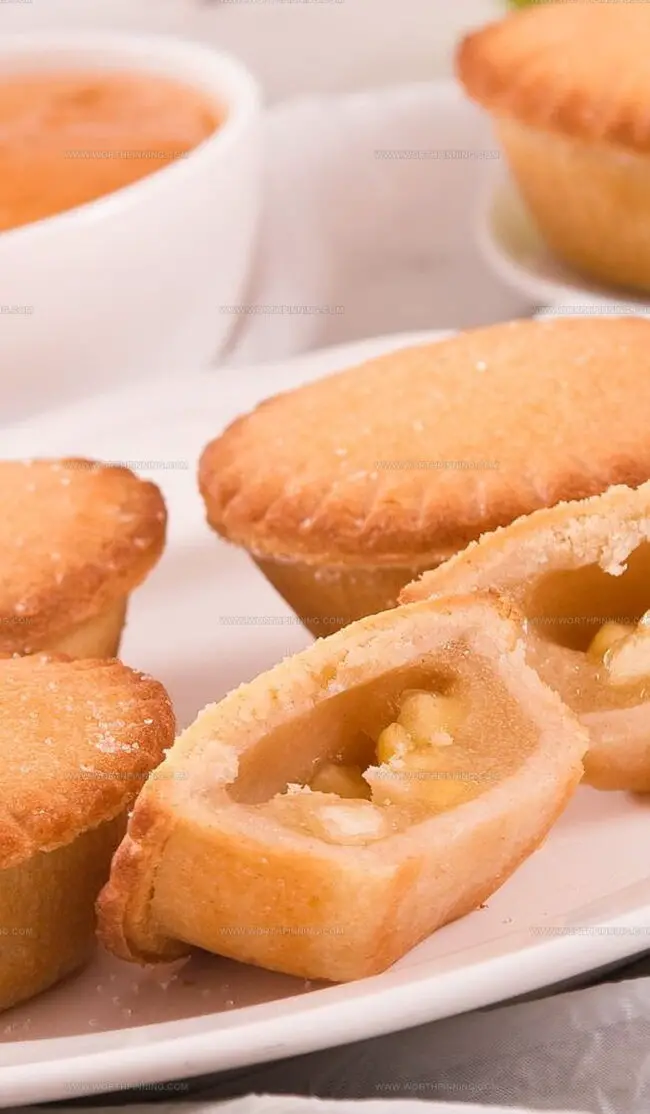
Nostalgic Pioneer Woman Fried Apple Pies Recipe
Pioneer Woman’s fried apple pies sparkle with rustic charm and comfort-food magic.
Sweet, golden pastries carry memories of grandmother’s kitchen and country gatherings.
Crispy edges give way to warm, spiced fruit filling that dances between crunch and softness.
Culinary magic transforms simple ingredients into a nostalgic treat that beckons with irresistible aroma.
Each bite promises a delectable journey through traditional southern baking techniques.
Homemade desserts like these connect generations through shared culinary experiences.
Weekend baking becomes an adventure of flavor and texture that delights everyone around the table.
Why Fried Apple Pies Bring Back Sweet Memories

What You Need for Crispy, Fruity Hand Pies
Sweet Filling Ingredients:Fruit Ingredients:Dough and Frying Ingredients:How to Make Golden, Gooey Fried Apple Pies
Step 1: Create Caramel Apple Base
Melt butter in a large cast-iron skillet over medium heat. Add brown sugar and water. Stir until sugar dissolves and mixture bubbles smoothly.
Step 2: Boost Flavor Profile
Mix in these ingredients:Integrate thoroughly into the bubbling sugar mixture.
Step 3: Prepare Cornstarch Binding
In a small bowl, blend cornstarch with water until a smooth paste forms.
Step 4: Cook Apple Filling
Pour cornstarch mixture into skillet. Add diced apples and cook for 5 minutes, stirring continuously until apples become tender and filling thickens.
Step 5: Cool Apple Mixture
Transfer apple filling to a heat-resistant bowl. Allow to cool completely. For advance preparation, cover and refrigerate.
Step 6: Shape Pie Dough
Roll each biscuit on a floured surface into a 5-inch circle, approximately 1/8 inch thick.
Step 7: Assemble Pie Pockets
Spoon 2 heaping tablespoons of apple filling onto one half of each dough circle. Moisten dough edges with water to help seal.
Step 8: Crimp Pie Edges
Fold dough over filling to create a half-moon shape. Press edges together firmly. Use a fork to crimp and secure the seal.
Step 9: Fry Golden Pockets
Heat vegetable oil in a deep skillet to 350°F. Fry pies in batches, turning every minute until golden and crispy, about 5 minutes per batch. Drain on paper towels.
Step 10: Final Touch
Once pies cool slightly, dust with confectioners’ sugar. Serve warm alongside Cinnamon-Caramel Sauce or your favorite caramel sauce.
Tips for Flaky Crust and Juicy Filling
How to Store Fried Pies and Keep Them Crisp
Fun Additions to Upgrade Fried Apple Pies
Fried Apple Pies That Taste Like Home
Pioneer Woman’s Fried Apple Pies represent pure culinary magic, blending nostalgic comfort with Southern charm.
Crisp golden exteriors hide molten apple centers that dance with cinnamon and sweetness.
Homemade pastries like these connect generations through shared kitchen memories.
Generations of home cooks have perfected this delightful recipe, passing down secrets from grandmother to granddaughter.
Traditional techniques merge with contemporary flair in these irresistible hand pies.
So grab your skillet, gather ingredients, and create deliciousness you can share with cherished friends and family.
Print
Pioneer Woman Fried Apple Pies Recipe
- Total Time: 1 hour 5 minutes
- Yield: 8 1x
Description
Homemade Pioneer Woman Fried Apple Pies deliver classic Southern comfort with crispy golden pastry and warm cinnamon-spiced apple filling. Drizzled with sweet glaze, these nostalgic hand pies invite memories of grandmother’s kitchen and traditional American baking magic.
Ingredients
Main Ingredients:
- 5 Granny Smith apples, peeled and diced
- 2 16-ounce cans refrigerated flaky jumbo biscuits (8 biscuits per can)
- 4 cups vegetable oil, for frying
Filling and Seasoning Ingredients:
- 1 ½ cups packed brown sugar
- 1 stick (8 tablespoons) salted butter
- ½ teaspoon vanilla
- ¼ teaspoon kosher salt
- ¼ teaspoon ground cinnamon
- Juice of ½ lemon
- 1 tablespoon cornstarch
Topping and Sauce Ingredients:
- ½ cup confectioners’ sugar, for sprinkling
- 1 cup Cinnamon-Caramel Sauce
Cinnamon-Caramel Sauce Ingredients:
- 1 cup packed light brown sugar
- ¾ cup half-and-half
- 4 tablespoons (½ stick) salted butter
- 2 pinches of kosher salt
- 1 tablespoon vanilla
- 1 teaspoon ground cinnamon
Instructions
- Transform butter into a silky base by melting it in a spacious cast-iron skillet over medium heat. Incorporate brown sugar and 1 tablespoon (15 milliliters) of water, stirring until the sugar dissolves and creates a bubbling landscape.
- Elevate the flavor profile by introducing vanilla extract, kosher salt, ground cinnamon, and lemon juice into the effervescent sugar mixture, ensuring thorough integration.
- Create a smooth cornstarch emulsion by whisking cornstarch with 1 tablespoon (15 milliliters) of water until a uniform paste forms.
- Transform the filling by introducing the cornstarch mixture into the skillet, stirring continuously. Fold in diced apples and allow them to simmer for approximately 5 minutes, developing tenderness and achieving a harmonious thickness.
- Halt the cooking process by transferring the apple filling to a heat-resistant container. Allow complete cooling, covering and refrigerating if preparing in advance.
- Liberate each biscuit by rolling it on a lightly floured surface into a 5-inch (12.7 centimeters) circular shape, maintaining a delicate 1/8 inch (0.3 centimeters) thickness.
- Construct individual pies by depositing two generous tablespoons of apple filling onto one hemisphere of each dough circle. Moisten the dough’s perimeter with water to facilitate a secure seal.
- Sculpt the pies by folding the dough over the filling, creating a crescent shape. Compress the edges firmly, using a fork to craft an impenetrable boundary.
- Initiate the frying process by heating vegetable oil in a deep skillet to 350 degrees Fahrenheit (176.7 degrees Celsius). Submerge pies in batches, rotating every minute to achieve a golden, crispy exterior, approximately 5 minutes per batch. Transfer to paper towels for excess oil absorption.
- Finalize the presentation by delicately dusting the slightly cooled pies with confectioners’ sugar. Serve while warm, accompanied by Cinnamon-Caramel Sauce or your preferred caramel variant.
Notes
- Southern charm shines through these handheld treasures, transforming simple ingredients into a nostalgic culinary experience.
- Precise dough thickness ensures consistently crispy edges that crackle with each delightful bite.
- Sealing techniques prevent messy leaks, keeping precious apple filling safely tucked inside golden pastry pockets.
- Strategic oil temperature control guarantees a perfect golden-brown exterior without burning delicate dough.
- Cooling and storage tips help maintain the pies’ irresistible texture, extending the deliciousness beyond the first serving.
- Prep Time: 20 minutes
- Cook Time: 45 minutes
- Category: Desserts, Snacks
- Method: Frying
- Cuisine: American
Nutrition
- Serving Size: 8
- Calories: 720
- Sugar: 61 g
- Sodium: 550 mg
- Fat: 40 g
- Saturated Fat: 16 g
- Unsaturated Fat: 22 g
- Trans Fat: 0 g
- Carbohydrates: 87 g
- Fiber: 2 g
- Protein: 6 g
- Cholesterol: 50 mg
Ethan Miller
Founder & Lead Content Writer
Expertise
Education
Portland Community College
Culinary Institute of the Pacific
Ethan’s culinary journey began in his grandmother’s kitchen, where he first learned to play with flavors and ingredients. With formal training in culinary arts and a deep love for international cuisines, Ethan’s goal is to share the joy of cooking with others.
He believes food is all about creativity and bringing people together, one meal at a time. When he’s not experimenting with new dishes, he enjoys hiking in the Oregon wilderness and discovering fresh, local ingredients.