
Fluffy Pioneer Woman 7 Up Biscuits Recipe
Pioneer Woman’s 7-Up biscuits offer a magical twist on traditional bread accompaniments, transforming ordinary ingredients into something extraordinary.
Soft, pillowy textures emerge from an unexpected combination of pantry staples that spark culinary curiosity.
Carbonated magic works its charm, creating incredible lift and remarkable tenderness in each golden morsel.
Southern kitchens have long celebrated innovative baking techniques that surprise and delight hungry families.
Unexpected fizzy ingredients bring surprising lightness and remarkable complexity to these delectable bites.
Combining creamy, buttery elements with effervescent soda creates a mysterious alchemy that elevates simple baking into an art form.
What Makes 7 Up Biscuits So Light and Fluffy
Ingredients That Lift These Biscuits Just Right
Dry Ingredients:Wet Ingredients:Binding and Coating Ingredients:How to Make 7 Up Biscuits with No Fuss

Step 1: Preheat and Prep the Butter
Heat the oven to 425°F (218°C). Place a 9×13-inch baking dish in the oven with butter. Let the butter melt completely for 5-7 minutes, watching carefully to prevent burning.
Step 2: Create the Dough Mixture
Gather ingredients:In a large mixing bowl, combine all ingredients. Stir until the mixture becomes a sticky, unified dough.
Step 3: Prepare the Work Surface
Sprinkle Bisquick mix on a clean countertop. Transfer the sticky dough onto the surface. Dust the top of the dough with another Bisquick mix. Lightly flour your hands to prevent sticking.
Step 4: Shape and Cut the Biscuits
Gently knead the dough, keeping it soft and light. Pat the dough to about 1-inch thickness. Flour a biscuit cutter and carefully cut out round biscuit shapes. Place the biscuit rounds directly into the butter-filled baking dish.
Step 5: Bake to Golden Perfection
Slide the baking dish into the preheated oven. Bake for 12-14 minutes until the biscuits rise and turn a beautiful golden brown color.
Step 6: Serve and Savor
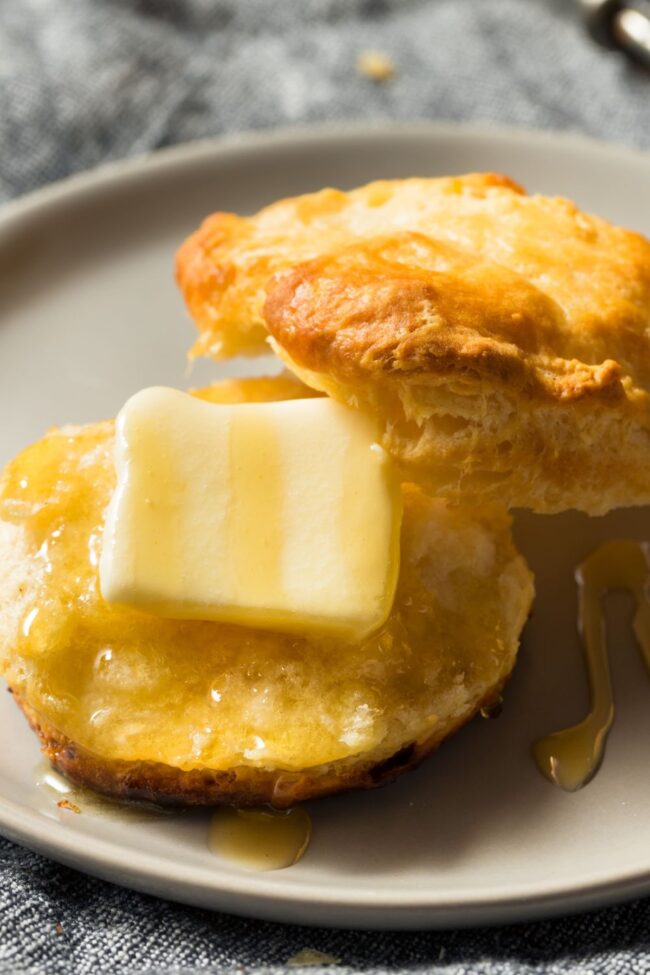
Remove the biscuits from the oven. Let them cool for a few minutes. Serve warm and enjoy the fluffy, buttery goodness straight from the pan. Pair with jam, honey, or enjoy them plain!
Tips That Give You Golden, Pillowy Biscuits

How to Store Biscuits and Keep Them Soft

Preserve: Wrap individual 7-Up biscuits tightly in plastic wrap or aluminum foil to lock in moisture and prevent drying out. Keep them in an airtight container at room temperature for maximum 2 days, ensuring they stay soft and delectable.
Revive: Warm refrigerated biscuits in the microwave for 10-15 seconds or place them in a preheated oven at 350°F for 3-5 minutes. Brush with melted butter to restore their original moist and flaky texture, making them taste freshly baked.
Cool Down: Never store warm biscuits in a sealed container, as trapped steam creates condensation and makes them soggy. Allow biscuits to cool completely on a wire rack before storing to maintain their crisp exterior and tender interior.
Flavorful Spins for Your Next Biscuit Batch
A Bubbly End to Your Biscuit Baking Session
Southern kitchens buzz with excitement over these legendary 7 Up biscuits, where carbonation meets culinary magic.
Bisquick and soda combine in an unexpected symphony of flavor and texture that defies classic baking norms.
Butter-soaked bottoms create crisp exterior edges while maintaining cloud-like interiors that melt instantly.
Classic comfort emerges from simple ingredients, proving gourmet experiences can start with everyday pantry staples.
Pioneer Woman’s recipe transforms ordinary moments into memorable kitchen celebrations.
Linger longer with these irresistible biscuits – share this delectable discovery, comment with your baking twist, and spread deliciousness across your favorite social platforms.
Print
Pioneer Woman 7 Up Biscuits Recipe
- Total Time: 25 minutes
- Yield: 8 1x
Description
Fluffy 7 Up biscuits bring Southern comfort to your table with a magical fizzy twist. Creamy buttermilk and crisp carbonation create irresistible layers that melt in your mouth, delivering pure homestyle happiness you’ll crave again and again.
Ingredients
Main Ingredients:
- 4 ½ cups (or more) Bisquick baking mix
- 1 cup sour cream
- 1 cup 7up
Dairy Components:
- ½ cup (113 grams) butter
Instructions
- Preheat the oven to 425 degrees Fahrenheit (218 degrees Celsius). Position the rack in the center of the oven for even baking.
- Place the butter in a 9×13-inch (23×33 centimeters) baking dish. Slide the dish into the preheated oven and allow the butter to melt completely, taking 5 to 7 minutes. Monitor closely to prevent browning or burning.
- In a spacious mixing bowl, thoroughly combine Bisquick, 7-Up, and sour cream. Stir until the ingredients are fully integrated, creating a sticky dough consistency.
- Liberally dust a clean work surface with additional Bisquick. Transfer the sticky dough onto the floured area. Lightly coat the top of the dough with more Bisquick and powder your hands to prevent excessive sticking.
- Carefully fold and knead the dough, maintaining a soft texture. Gently work the dough until it reaches approximately 1-inch (2.5 centimeters) thickness. Dust a biscuit cutter with Bisquick to prevent adhesion.
- Cut uniform biscuit rounds from the dough. Arrange the rounds neatly in the baking dish, positioning them directly on the melted butter.
- Bake the biscuits for 12 to 14 minutes. Look for a golden-brown exterior and risen appearance, indicating they are fully cooked.
- Remove the baking dish from the oven. Allow the biscuits to rest and cool slightly before serving. Serve warm and enjoy with preferred accompaniments.
Notes
- Experiment with various sodas to discover unique flavor twists on this classic Southern biscuit.
- Gluten-free Bisquick offers an easy alternative for those with dietary restrictions.
- Freezing biscuits provides convenient make-ahead meal prep for busy households.
- Warm biscuits shine brightest when served alongside savory dishes or topped with sweet spreads.
- Gentle handling keeps dough pillowy and prevents tough, dense results.
- Professional-looking edges come from using a sharp biscuit cutter with clean, swift movements.
- Prep Time: 10 minutes
- Cook Time: 15 minutes
- Category: Breakfast, Snacks
- Method: Baking
- Cuisine: American
Nutrition
- Serving Size: 8
- Calories: 284
- Sugar: 2 g
- Sodium: 356 mg
- Fat: 19 g
- Saturated Fat: 12 g
- Unsaturated Fat: 7 g
- Trans Fat: 0 g
- Carbohydrates: 29 g
- Fiber: 1 g
- Protein: 3 g
- Cholesterol: 64 mg
Sophia Rivera
Recipe Developer & Kitchen Tips Specialist
Expertise
Education
Austin Community College
San Antonio Culinary Institute
Sophia’s passion for baking began in her family kitchen, where she spent hours experimenting with new recipes. With a background in baking and pastry arts, she loves making desserts that are as visually stunning as they are delicious.
Sophia is all about using seasonal, locally sourced ingredients to create treats that everyone will enjoy. When she’s not creating mouth-watering desserts, you can find her gardening, making new recipes, or enjoying a relaxing afternoon with her family.