The Perfect Yorkshire Pudding Recipe: Quick Joy of Cooking
Yorkshire pudding transforms simple ingredients into a culinary masterpiece that elevates any traditional meal.
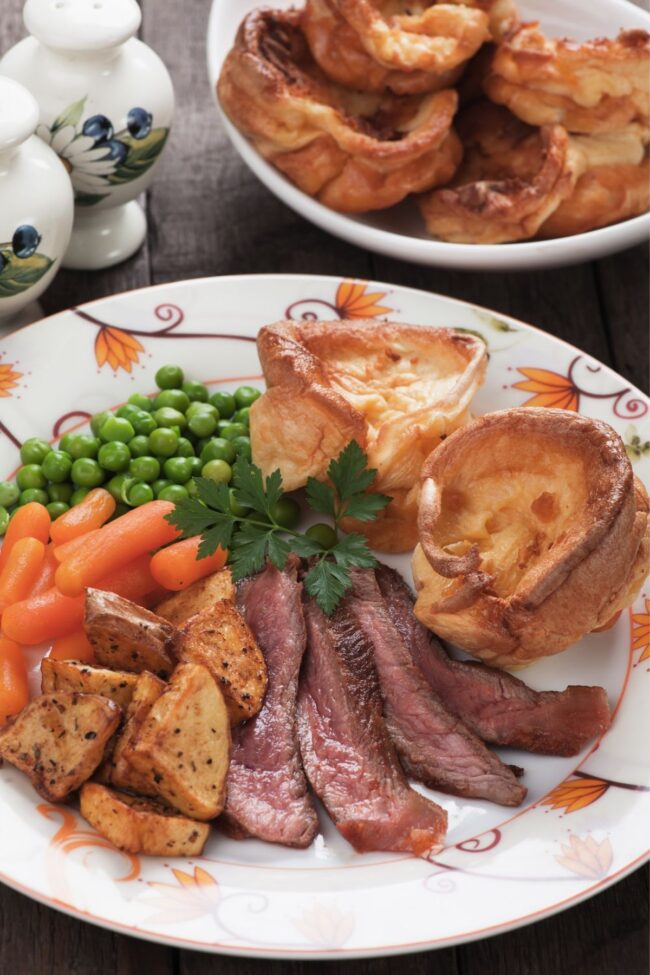
British kitchens have long celebrated this crispy, golden delicacy as a remarkable side dish with incredible versatility.
Skilled cooks understand the delicate balance required to create its signature puffy texture and rich flavor profile.
Generations of families have passed down techniques for crafting these remarkable pastry companions that complement roasted meats perfectly.
Kitchen enthusiasts appreciate how minimal ingredients can produce such an impressive result with precise preparation methods.
The magic happens when temperature, mixing technique, and timing converge into a spectacular outcome that delights dinner guests.
Individual cooks can unlock the secret to creating a sensational accompaniment that impresses even the most discerning palates: practice and passion make perfect.
What Makes Yorkshire Pudding Special
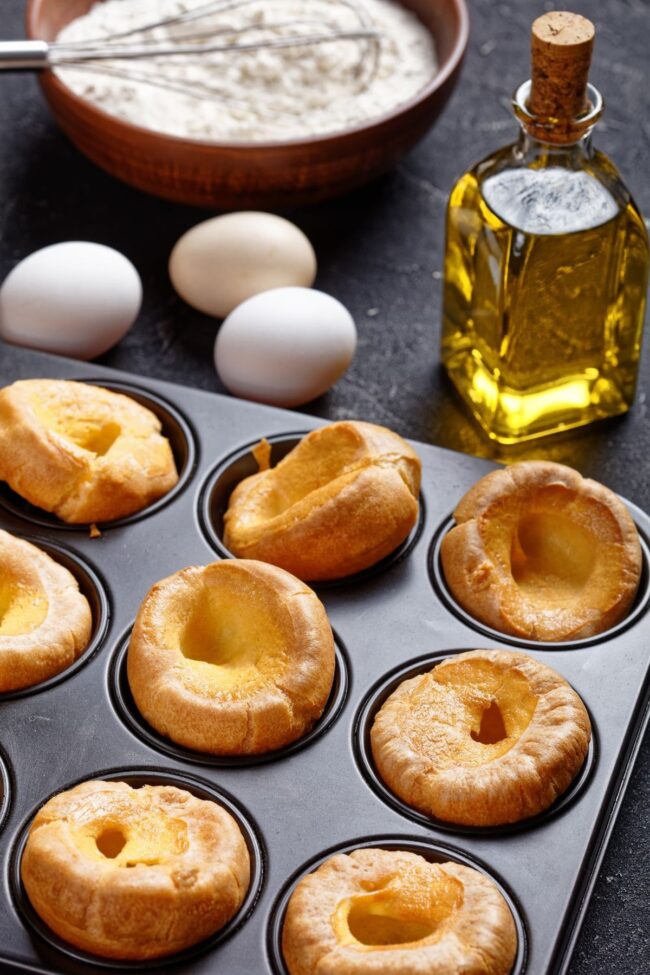
Key Ingredients for Yorkshire Pudding
Dry Ingredients:Liquid Ingredients:Fat Ingredients:Yorkshire Pudding Cooking Directions
Step 1: Gather Ingredients At Room Temperature
Collect all ingredients and let them sit at room temperature for about 30 minutes until they reach approximately 75°F (24°C).
Step 2: Create Dry Mixture
Mix thoroughly in a large mixing bowl.
Step 3: Blend Liquid Ingredients
Whisk until the mixture becomes light and frothy.
Step 4: Incorporate Eggs
Crack eggs into the mixture and continue beating until noticeable bubbles form.
Step 5: Rest The Batter
Cover the bowl and refrigerate for 1 hour to allow ingredients to meld together.
Step 6: Prepare Batter For Cooking
Remove batter from refrigerator and let it return to room temperature (around 70°F/21°C). Whisk again briefly to reincorporate air.
Step 7: Preheat Oven
Set oven temperature to 400°F (204°C).
Step 8: Prepare Baking Pan
Place a 12-cup metal cupcake pan in the oven for 5 minutes to get extremely hot.
Step 9: Add Fat To Pan
Carefully add 1/4 inch of liquid butter or hot beef drippings to each cupcake cavity.
Step 10: Fill Baking Cavities
Pour 1/2 inch of batter into each cupcake hole.
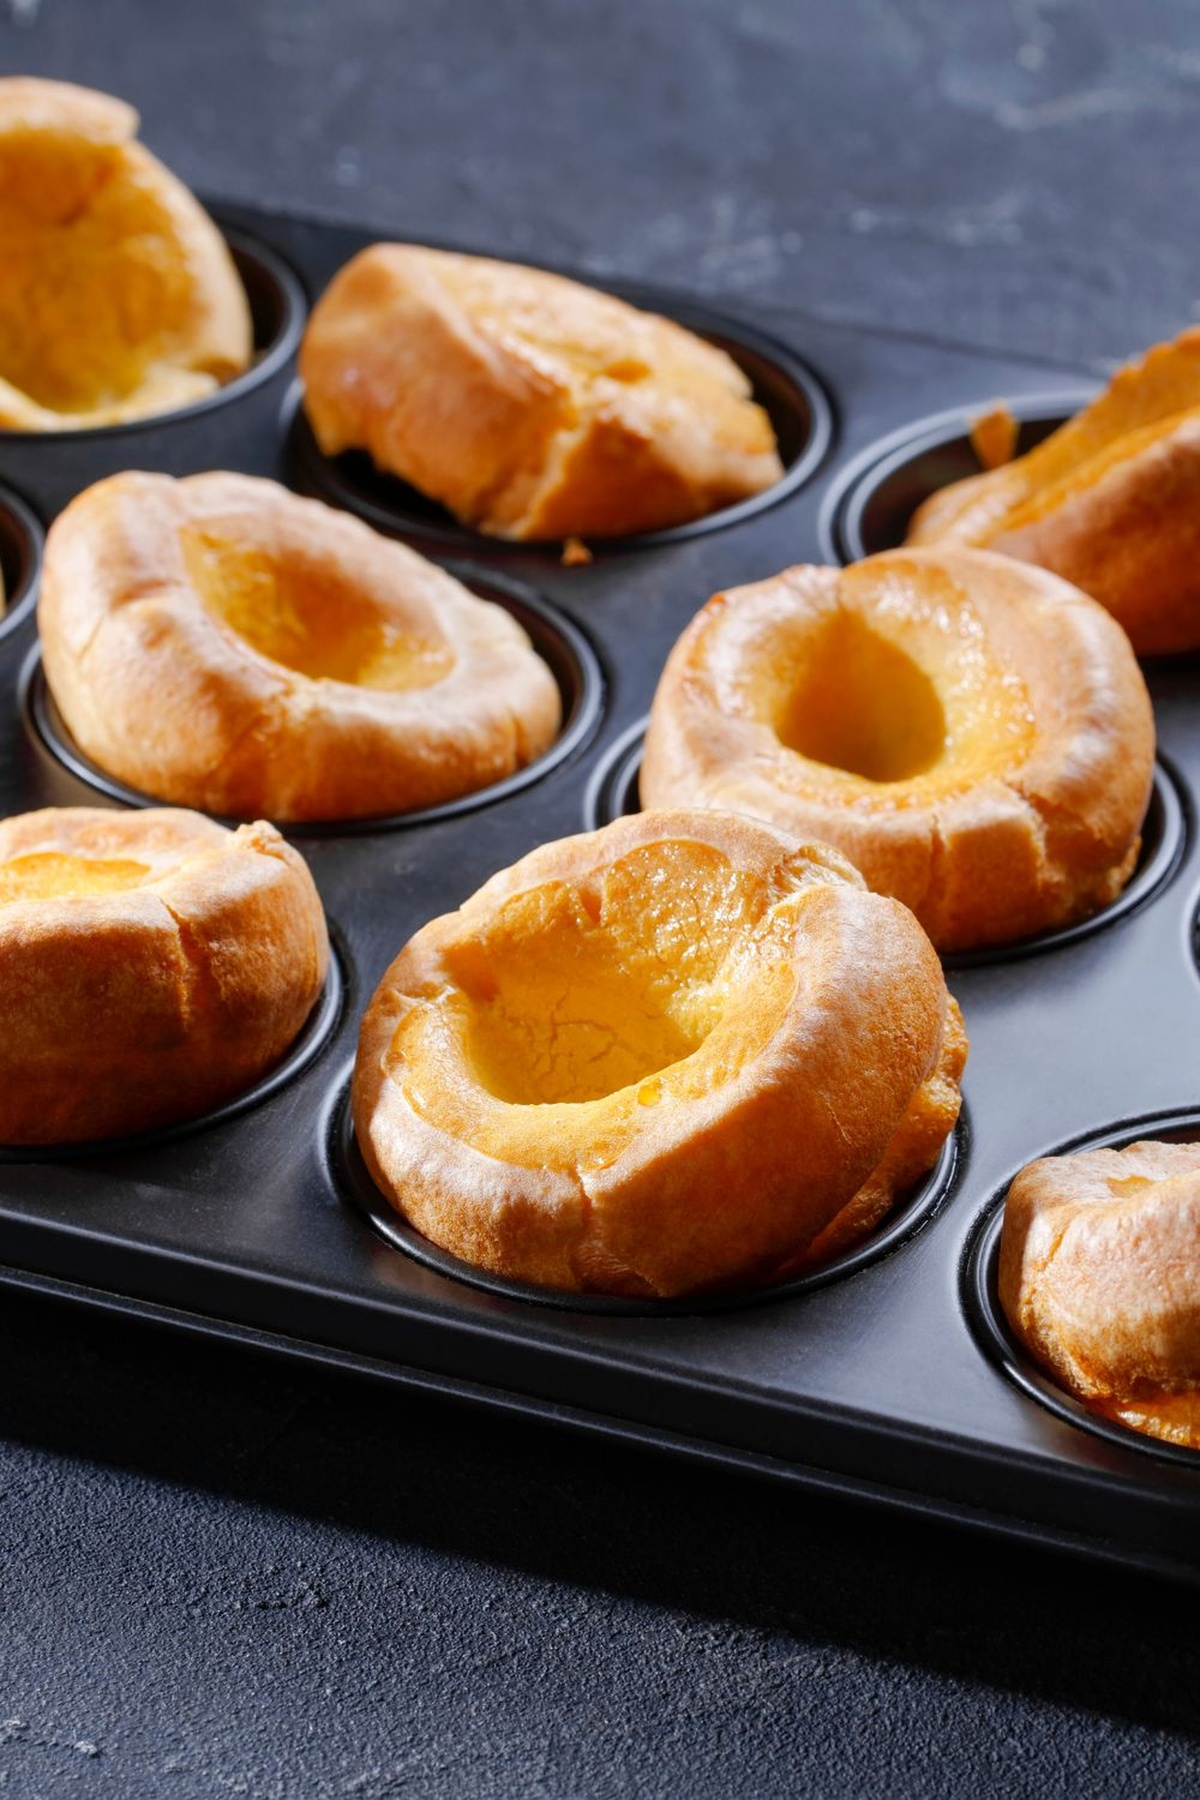
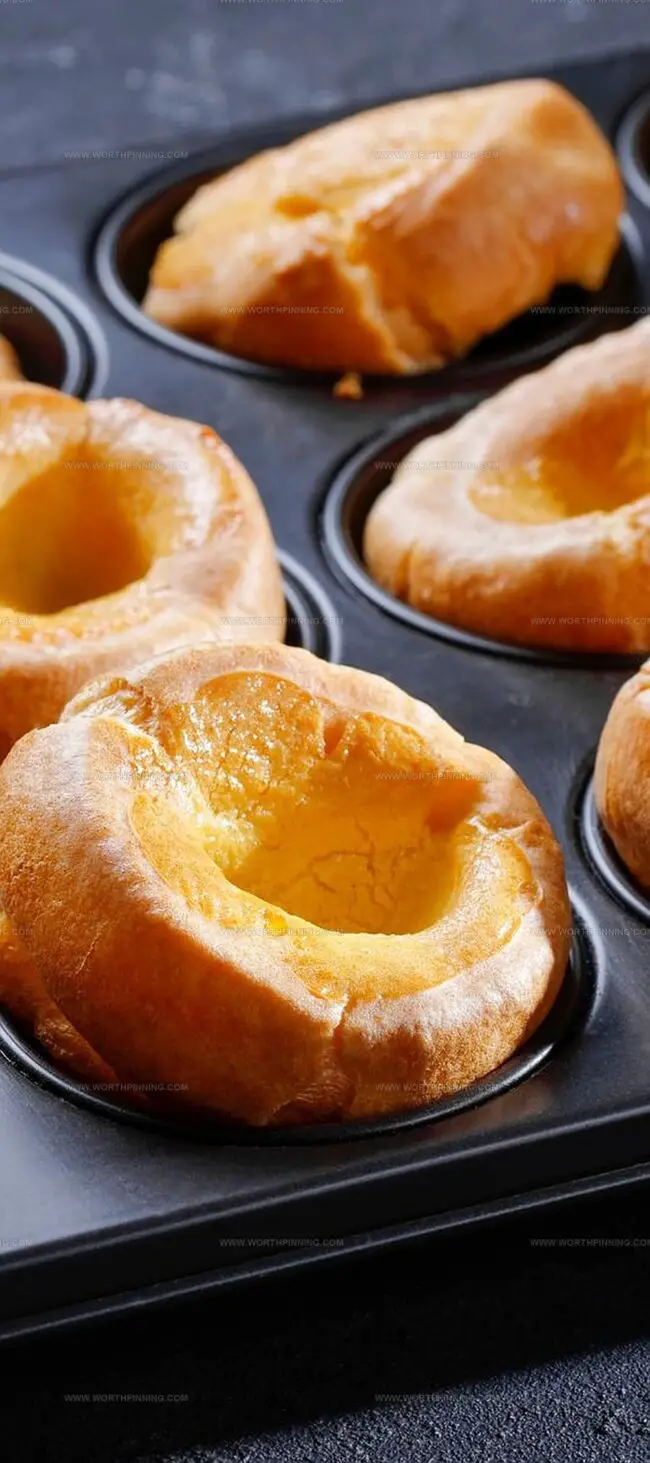
Step 11: Bake Yorkshire Pudding
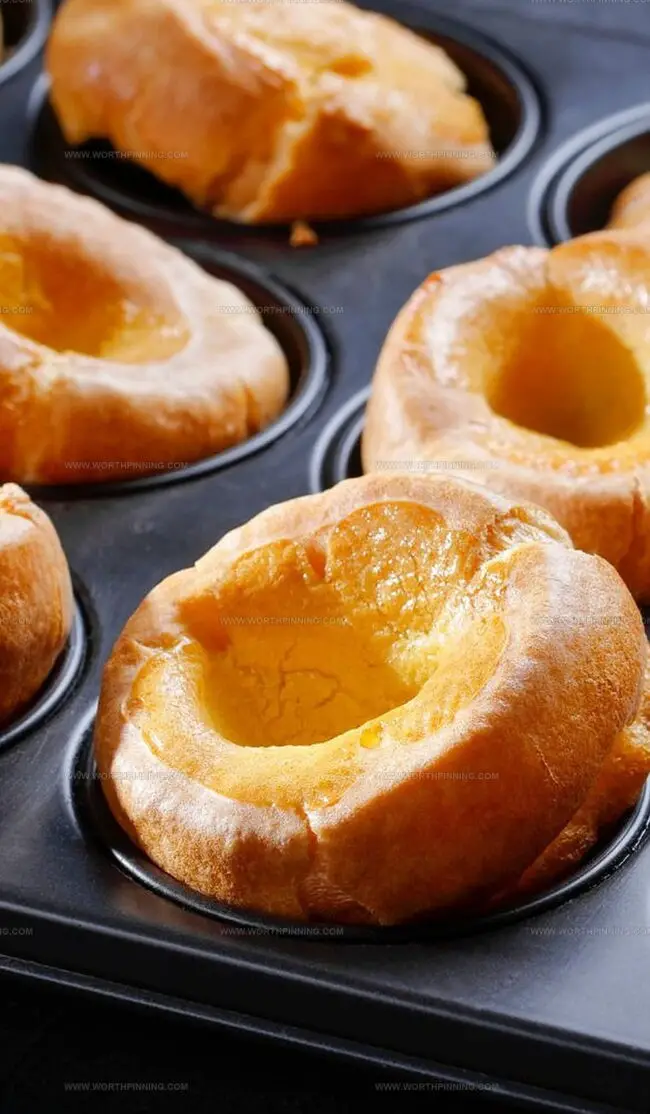
Bake at 400°F for 20 minutes, then reduce temperature to 350°F (177°C) and continue baking for 15 additional minutes. Look for golden brown color and puffy texture. Total baking time is approximately 35-40 minutes.
Step 12: Serve Immediately
Remove from oven and serve hot for the best texture and flavor.
Helpful Tips for Yorkshire Pudding
Expert Advice on Yorkshire PuddingStorage
Yorkshire Pudding Recipe Variations
Yorkshire Pudding Recap
Culinary magic unfolds with Yorkshire pudding, classic British delight that whispers elegance from traditional kitchens.
Silky batter transforms into crisp golden pillows rising from humble ingredients.
Generations of home cooks have perfected this delicate side dish celebrating simplicity and technique.
Historical roots run deep through English countryside kitchens, connecting modern tables with generations past.
Crisp exterior and tender interior create sensational contrast making mouths water with anticipation.
Complex yet straightforward, this recipe promises delightful results you can confidently craft – so grab those ingredients, embrace tradition, share your masterpiece with friends, snap that winning photo, spark conversation about your culinary adventure, and let passionate cooking enthusiasm shine through your delectable creation.
Print
Joy Of Cooking Yorkshire Pudding Recipe
- Total Time: 50 minutes
- Yield: 4 1x
Description
Classic Yorkshire pudding celebrates British culinary heritage with crispy, golden edges and a pillowy center. Roast beef’s perfect companion rises from simple ingredients, creating a delightful side dish that brings warmth to your table.
Ingredients
Main Ingredients:
- 2 eggs
- 7/8 cup (210 ml) flour
- ½ cup (120 ml) milk
- ½ cup (120 ml) water
Seasoning:
- ½ teaspoon salt
Optional Addition:
- ¼ cup (60 ml) melted butter
Instructions
- Allow all ingredients to equilibrate to room temperature (68-75 degrees Fahrenheit or 20-24 degrees Celsius) for optimal mixing and consistency.
- In a spacious mixing bowl, thoroughly combine flour and salt using a whisk to ensure even distribution of dry ingredients.
- Gradually incorporate milk and water into the flour mixture, whisking continuously to create a smooth, lump-free batter with a light, airy texture.
- Introduce eggs one at a time, beating vigorously until the mixture develops prominent air bubbles and becomes silky.
- Cover the batter with plastic wrap and refrigerate for a minimum of 60 minutes to allow gluten to relax and flavors to meld.
- Remove batter from refrigerator and let it rest at ambient temperature for 15-20 minutes, then gently re-whisk to reincorporate any settled ingredients.
- Position oven rack in the lower-middle section and preheat to 400 degrees Fahrenheit (204 degrees Celsius).
- Place a 12-cup metal muffin tin in the preheated oven for 5 minutes to generate intense heat.
- Carefully remove heated pan and distribute 1/4 inch (6 millimeters) of melted butter or beef drippings into each cupcake compartment.
- Fill each section approximately halfway with prepared batter, ensuring even distribution.
- Bake at 400 degrees Fahrenheit (204 degrees Celsius) for 20 minutes, then reduce temperature to 350 degrees Fahrenheit (177 degrees Celsius) and continue baking for an additional 15-20 minutes until popovers achieve a rich, golden-brown exterior and have dramatically risen.
- Serve immediately to preserve maximum crispness and texture.
Notes
- Chilling overnight allows gluten strands to relax, creating more tender crumb.
- Warm cast-iron skillet guarantees crispy exterior with dramatic rise.
- Room temperature eggs help batter incorporate smoothly without lumps.
- High-protein flour ensures stronger structure and more reliable puff.
- Whisking ingredients vigorously prevents clumping and develops better texture.
- Avoid overmixing to maintain light, airy consistency in final product.
- Immediate serving captures maximum height and dramatic presentation.
- Using fresh eggs provides better volume and structural integrity.
- Preheated pan creates instant steam, helping popovers dramatically expand.
- Resist opening oven door during baking to prevent sudden temperature drops.
- Prep Time: 15 minutes
- Cook Time: 35 minutes
- Category: Dinner, Appetizer
- Method: Baking
- Cuisine: American
Nutrition
- Serving Size: 4
- Calories: 119
- Sugar: 1 g
- Sodium: 40 mg
- Fat: 4 g
- Saturated Fat: 2 g
- Unsaturated Fat: 2 g
- Trans Fat: 0 g
- Carbohydrates: 17 g
- Fiber: 0.5 g
- Protein: 5 g
- Cholesterol: 62 mg
Ethan Miller
Founder & Lead Content Writer
Expertise
Education
Portland Community College
Culinary Institute of the Pacific
Ethan’s culinary journey began in his grandmother’s kitchen, where he first learned to play with flavors and ingredients. With formal training in culinary arts and a deep love for international cuisines, Ethan’s goal is to share the joy of cooking with others.
He believes food is all about creativity and bringing people together, one meal at a time. When he’s not experimenting with new dishes, he enjoys hiking in the Oregon wilderness and discovering fresh, local ingredients.