
Quick & Easy Joy Of Cooking Thumbprint Cookies Recipe
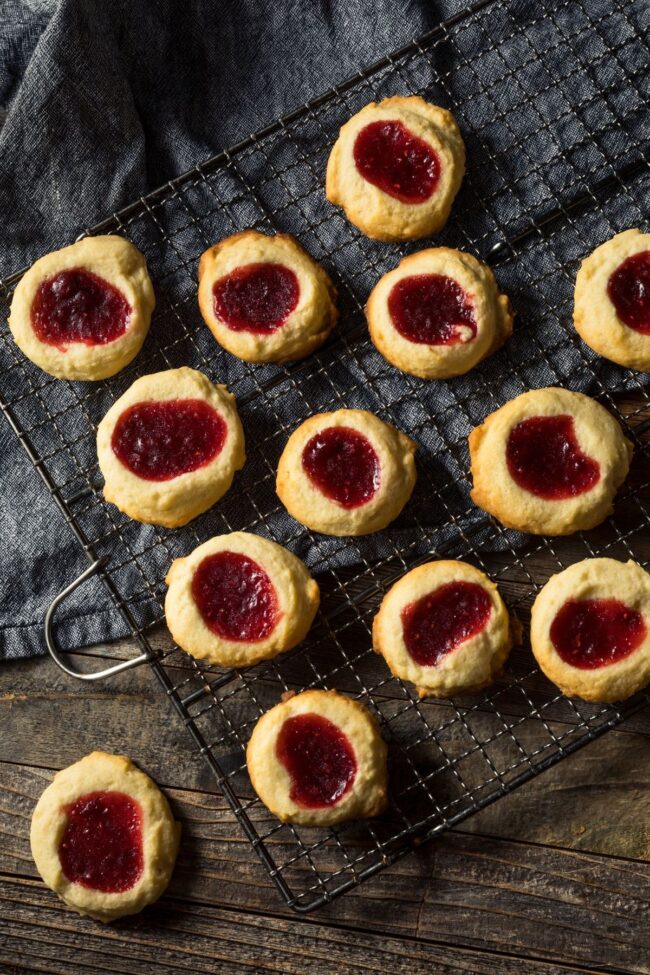
Joy of Cooking’s thumbprint cookies represent a nostalgic dessert that whispers sweet memories of childhood kitchens.
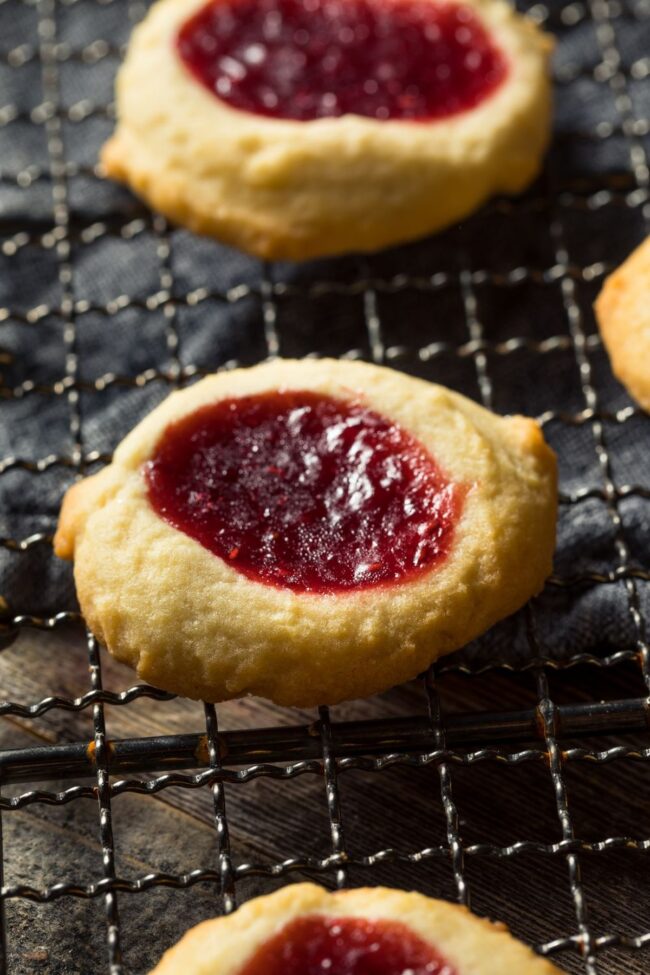
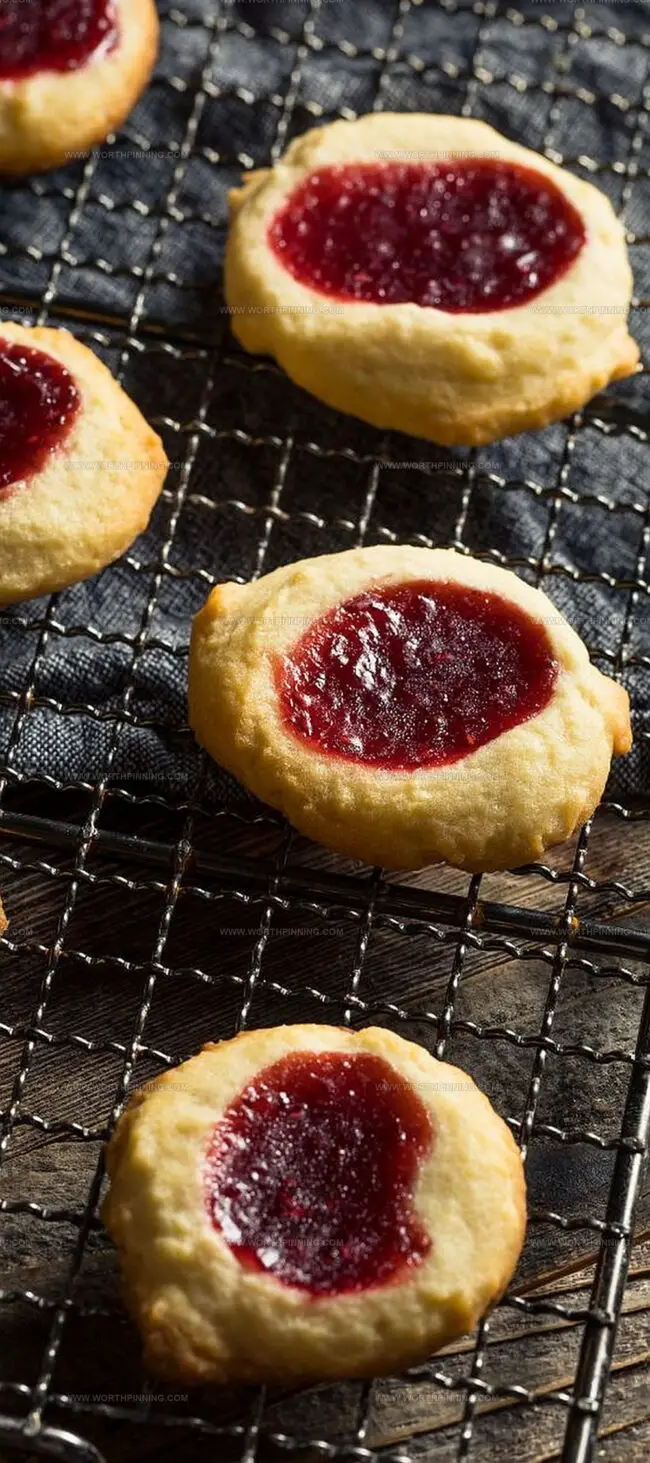
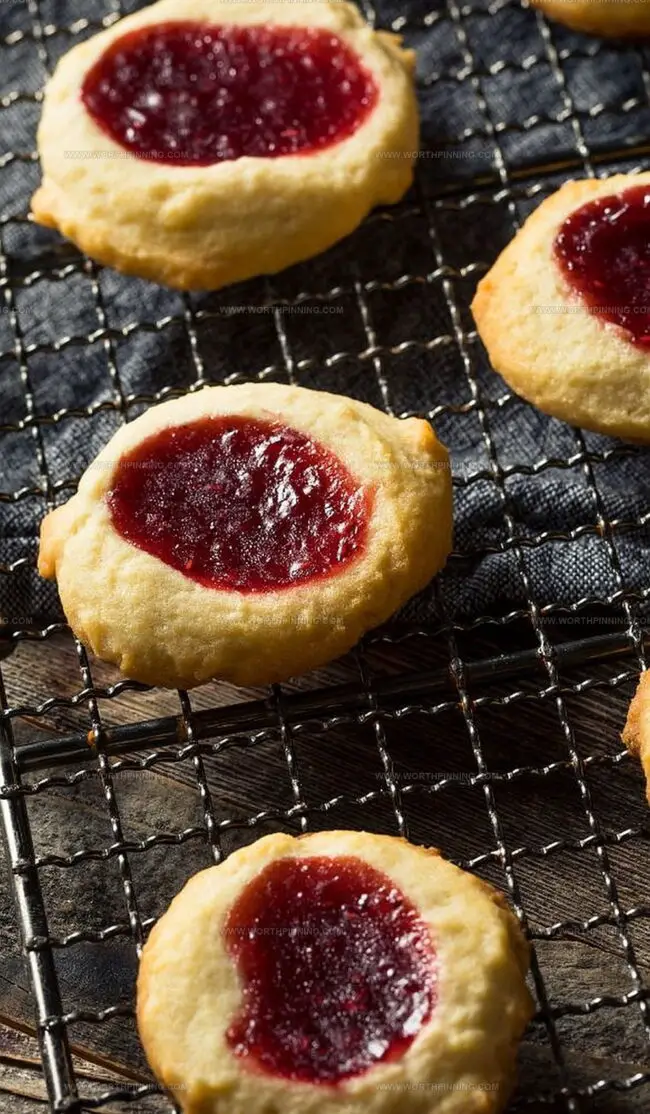
Soft, buttery pastry cradles vibrant fruit preserves in delicate indentations made by gentle thumb presses.
These delectable morsels transform simple ingredients into an irresistible confection with minimal effort.
Bakers love how quickly these cookies come together, requiring just a few pantry staples and basic mixing techniques.
Rich, crumbly textures merge with bright fruity notes, creating a perfect balance of flavor and visual appeal.
Walnut pieces add a subtle crunch that elevates the entire sensory experience of these classic treats.
Each cookie promises a moment of pure, unadulterated happiness that invites you to savor every single bite: get ready to fall in love.
Fall For The Delightful Charm Of Thumbprint Cookies
Essential Ingredients For Thumbprint Cookies
Base Ingredients:Dry Ingredients:Coating and Filling Ingredients:How To Bake Thumbprint Cookies
Step 1: Prepare Baking Space
Adjust oven rack to center position. Preheat oven to 350°F (180°C). Line baking sheet with parchment paper.
Step 2: Cream Butter Smoothly
Use electric stand mixer with paddle attachment (or hand mixer). Beat butter until completely smooth and creamy.
Step 3: Mix Sweet Base
Add sugar and blend thoroughly. Incorporate egg yolk and vanilla essence. Mix until well combined. Scrape bowl sides to ensure even mixing.
Step 4: Create Cookie Dough
In separate bowl, combine:Mix dry ingredients well. Gently fold into butter mixture until just combined. If dough feels soft, refrigerate 30-60 minutes.
Step 5: Prepare Coating Station
In small bowl, whip egg whites until foamy. Spread finely chopped nuts on separate plate. Portion dough into 15-gram balls (about 1-inch/2.5 cm diameter).
Step 6: Roll and Coat Cookies
Dip each dough ball in egg white, then roll in chopped nuts. Place on baking sheet, leaving 2 inches (5 cm) between cookies.
Step 7: Create Jam Center
Press gentle indentation in cookie center using thumb or wooden spoon tip. Fill each depression with 1/2 spoonful of jam.
Step 8: Bake to Perfection
Bake for 12 minutes until cookies set and nuts turn golden brown. Remove from oven and transfer to wire rack for cooling.
Handy Advice For Thumbprint Cookies
Storage Tips For Thumbprint Cookies
Creative Twists On Thumbprint Cookies
Parting Thoughts On Thumbprint Cookies
Thumbprint cookies embody pure nostalgia with nutty charm and sweet jam centers.
Home bakers can craft these delightful treats using simple ingredients and classic technique.
Rich butter and fragrant vanilla create memorable flavor profiles that connect generations of family kitchens.
Delicate nut-crusted exteriors contrast magnificently with smooth jam centers, making each bite a sensory experience.
Kitchen enthusiasts will appreciate how quickly these cookies come together with minimal preparation.
Snap gorgeous photos, share your culinary creation on social media, and watch friends marvel at your baking prowess – these little cookies are guaranteed conversation starters that spark joy and connection.
Print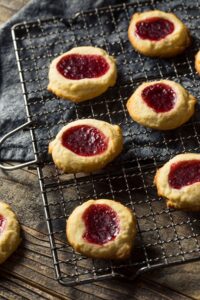
Joy Of Cooking Thumbprint Cookies Recipe
- Total Time: 35 minutes
- Yield: 24 1x
Description
Classic thumbprint cookies bring German holiday charm to your kitchen. Buttery shortbread filled with vibrant raspberry jam creates sweet nostalgia that delights family and friends with each delectable bite.
Ingredients
Main Ingredients:
- 1 cup (130 grams) all-purpose flour
- ½ cup (113 grams) unsalted butter, at room temperature
- ¾ – 1 cup (75 – 100 grams) walnuts, toasted and finely chopped (can also use pecans, almonds, or hazelnuts)
Sweeteners and Flavorings:
- ¼ cup (50 grams) granulated white sugar
- ¼ cup (70 grams) raspberry jam (can use other flavors of jam)
- ½ teaspoon (2 grams) pure vanilla extract
Additional Ingredients:
- 1 large (50 grams) egg, separated
- ¼ teaspoon (1 gram) salt
Instructions
- Position the oven rack centrally and preheat to 350 degrees Fahrenheit (180 degrees Celsius). Line a baking sheet with parchment paper.
- In an electric mixer, cream the butter until uniformly smooth using the paddle attachment or a hand mixer.
- Incorporate sugar and mix thoroughly. Add egg yolk and vanilla extract, blending until well integrated. Periodically scrape down the bowl’s sides to ensure even mixing.
- In a separate bowl, thoroughly combine flour and salt. Gently fold the dry ingredients into the butter mixture until just combined. If the dough feels too soft, refrigerate for 30 to 60 minutes to firm up.
- Whisk egg whites in a small bowl until slightly foamy. Finely chop the nuts and spread them on a plate. Portion the dough into 15-gram (0.5 ounces) balls.
- Dip each dough ball first into the egg white, then roll completely in chopped nuts. Place on the prepared baking sheet, spacing them approximately 2 inches (5 centimeters) apart.
- Create a small indentation in the center of each cookie using your thumb or a wooden spoon handle. Fill each depression with approximately half a tablespoon of jam.
- Bake for 12 to 14 minutes, or until cookies are set and nuts are golden brown. Remove from the oven and transfer to a wire cooling rack.
Notes
- Softening butter is crucial; let it sit at room temperature for even mixing and smoother texture.
- Overmixing can lead to tough cookies, so gently combine ingredients until just incorporated.
- Check jam’s consistency before adding to prevent runny centers that might leak during baking.
- Kitchen scales ensure precise dough measurements for consistently sized, perfectly baked treats.
- Refrigerating dough for 30-60 minutes helps firm up soft mixtures, making shaping easier.
- Experiment with alternative nut types or jam flavors to personalize your cookie experience.
- Room temperature ingredients blend more smoothly and create better overall cookie texture.
- Allow cookies to cool completely on baking sheets to maintain structural integrity.
- Non-stick parchment paper prevents sticking and ensures easy cookie removal.
- Store in airtight containers to maintain freshness and prevent moisture absorption.
- Prep Time: 20 minutes
- Cook Time: 15 minutes
- Category: Desserts, Snacks
- Method: Baking
- Cuisine: American
Nutrition
- Serving Size: 24
- Calories: 143
- Sugar: 5.5 g
- Sodium: 40 mg
- Fat: 9.1 g
- Saturated Fat: 3.8 g
- Unsaturated Fat: 4.6 g
- Trans Fat: 0 g
- Carbohydrates: 15.6 g
- Fiber: 0.6 g
- Protein: 1.5 g
- Cholesterol: 20 mg
Ethan Miller
Founder & Lead Content Writer
Expertise
Education
Portland Community College
Culinary Institute of the Pacific
Ethan’s culinary journey began in his grandmother’s kitchen, where he first learned to play with flavors and ingredients. With formal training in culinary arts and a deep love for international cuisines, Ethan’s goal is to share the joy of cooking with others.
He believes food is all about creativity and bringing people together, one meal at a time. When he’s not experimenting with new dishes, he enjoys hiking in the Oregon wilderness and discovering fresh, local ingredients.