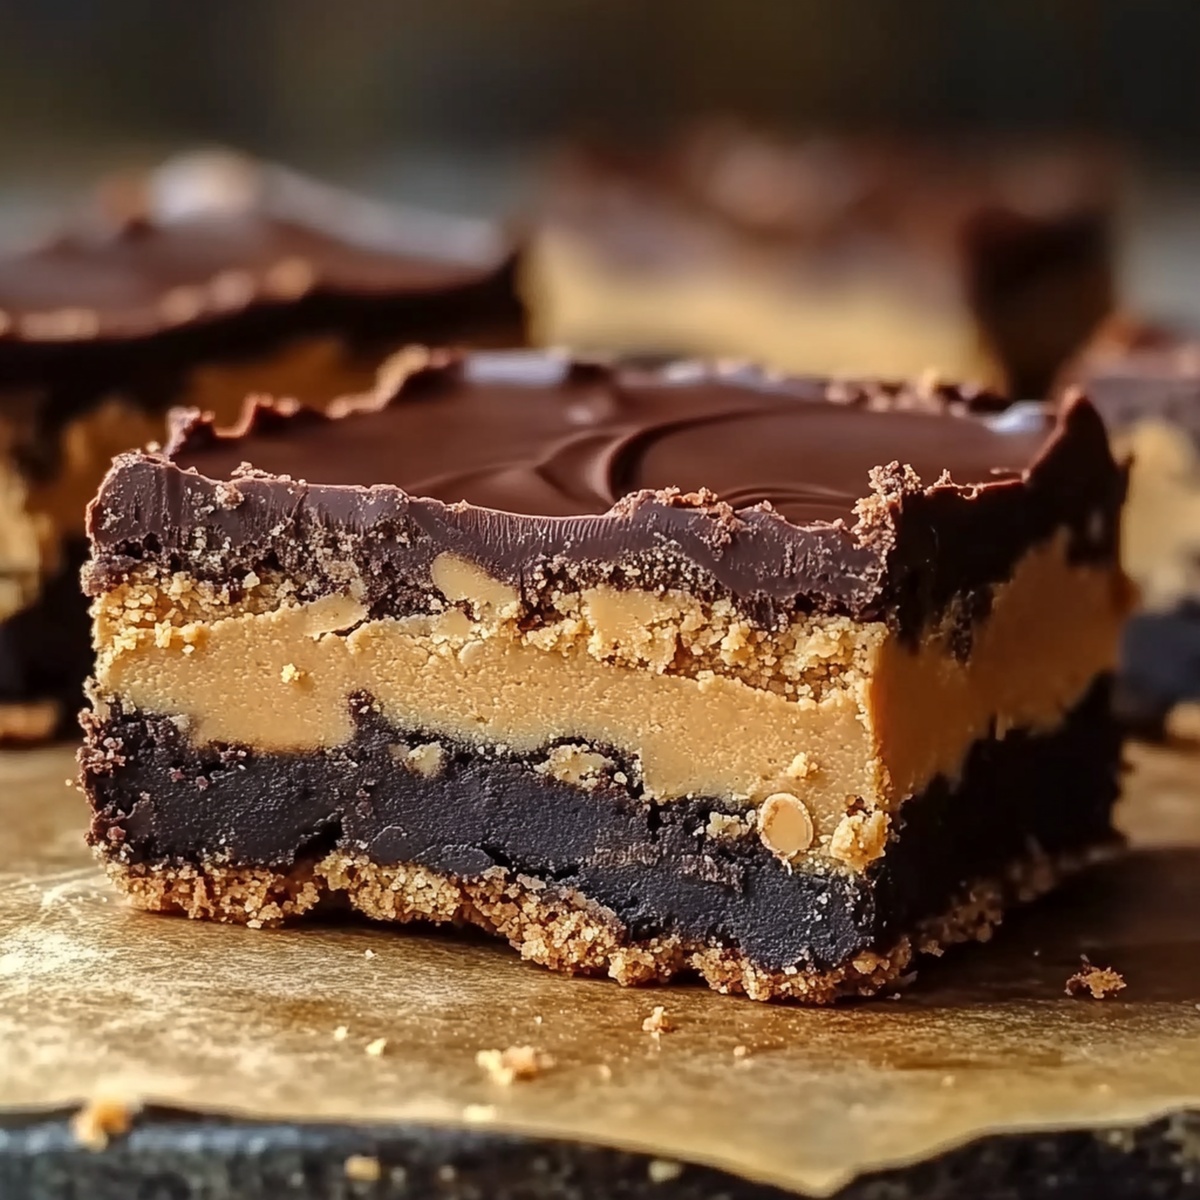
Chocolate Peanut Butter Dream Bars Recipe for Ultimate Indulgence
Sweet dreams dance with decadent chocolate peanut butter dream bars that melt effortlessly on your tongue.
Creamy layers promise pure indulgence with minimal kitchen effort.
Nutty undertones complement rich chocolate, creating a symphony of irresistible flavors.
Childhood memories resurface through each delightful bite of this nostalgic treat.
Dessert enthusiasts adore these no-bake delights for their simplicity and intense satisfaction.
Home cooks appreciate how quickly these bars come together without complicated techniques.
Seriously, one taste and you’ll understand why these bars become instant favorites.
Prepare to experience pure bliss in every single heavenly square.
Chocolate Peanut Butter Dream Bars to Indulge In
Ingredients in Chocolate Peanut Butter Dream Bars
Crust:Creamy Layers:Pudding and Topping:Make Chocolate Peanut Butter Dream Bars with Ease
Step 1: Craft the Crispy Crust
Crush graham crackers or chocolate cookies into fine crumbs. Melt butter and mix with cookie crumbs until well combined. Press the mixture firmly into a rectangular baking pan lined with parchment paper. Make sure the base is compact and even. Place the pan in the refrigerator to set and firm up for about 15 minutes.
Step 2: Whip Up Creamy Peanut Butter Layer
In a mixing bowl, combine:Beat these ingredients until they become silky and perfectly blended. Gently fold in whipped cream or whipped topping to create a light, airy texture. Spread this luscious mixture evenly over the chilled crust, creating a smooth and consistent layer.
Step 3: Pour Decadent Chocolate Pudding
Grab instant chocolate pudding mix and cold milk. Whisk these ingredients together for approximately 2 minutes until the mixture thickens and becomes glossy. Carefully spread the chocolate pudding over the peanut butter layer, ensuring full coverage.
Step 4: Create Dreamy Topping
Cover the chocolate pudding layer with remaining whipped cream or whipped topping. Sprinkle generously with:Step 5: Chill and Set
Place the entire dessert in the refrigerator. Allow it to set and firm up for a minimum of 4 hours or overnight for best results.
Step 6: Slice and Serve
Remove from refrigerator, lift out using parchment paper, and slice into delectable squares. Serve chilled and enjoy your homemade Chocolate Peanut Butter Dream Bars!
Dream Bar Tips for the Perfect Bite
Save and Serve Dream Bars the Next Day
Pair Chocolate Peanut Butter Dream Bars With These
Flavor Variations for Dream Bar Fans
FAQs About Chocolate Peanut Butter Dream Bars
You can substitute graham crackers, chocolate cookies, or shortbread cookies for the original recipe base. Just make sure to crush them finely and mix with melted butter for the right consistency.
Not automatically. You’ll need to use gluten-free cookies for the crust and check that your pudding mix and other ingredients are certified gluten-free to make the entire dessert safe for gluten-sensitive individuals.
Greek yogurt or mascarpone can work as substitutes, but they might slightly change the texture and flavor of the peanut butter layer. Cream cheese provides the best creamy consistency for this recipe.
Whisk the pudding mix and milk for exactly 2 minutes until it thickens and becomes smooth. The mixture should have a creamy, pudding-like consistency without any lumps.
Print
Chocolate Peanut Butter Dream Bars Recipe
- Total Time: 4 hours 20 minutes
- Yield: 12 1x
Description
Sweet chocolate and creamy peanut butter dream bars offer pure indulgence in every heavenly bite. Rich layers of decadent flavors promise a delightful escape you won’t want to miss.
Ingredients
Main Ingredients:
- 1 cup creamy peanut butter
- 1 (3.9 ounces / 110 grams) package instant chocolate pudding mix
- 8 ounces (226 grams) cream cheese, softened
- 24 chocolate sandwich cookies (like Oreos), finely crushed
Dairy and Sweet Ingredients:
- 1 ½ cups whipped topping
- 1 cup whipped topping (like Cool Whip or homemade)
- ½ cup powdered sugar
- 1 ½ cups cold milk
- 1 teaspoon vanilla extract
Garnish Ingredients:
- ¼ cup chopped peanuts (optional)
- Chocolate shavings or mini chocolate chips (optional)
- 5 tablespoons unsalted butter, melted
Instructions
- Crush chocolate cookies into fine crumbs and blend with melted butter. Press mixture firmly into a parchment-lined baking dish, creating an even foundation. Chill in the refrigerator for approximately 15 minutes to solidify the base.
- Combine creamy peanut butter, softened cream cheese, powdered sugar, and vanilla extract in a mixing bowl. Whip until the mixture achieves a smooth, velvety consistency. Gently fold in whipped topping to create a light, airy texture.
- Spread the peanut butter mixture evenly across the chilled cookie crust, ensuring a uniform layer that covers the entire surface.
- Prepare chocolate pudding by whisking the dry mix with cold milk for two minutes until it thickens and becomes glossy. Carefully pour and spread the pudding over the peanut butter layer.
- Crown the dessert with a generous layer of whipped topping, creating a cloud-like finish. Optionally, sprinkle chopped peanuts and chocolate chips or delicate chocolate shavings across the top for added crunch and visual appeal.
- Refrigerate the assembled dessert for a minimum of four hours, allowing all layers to set completely and flavors to meld together.
- When ready to serve, slice into neat squares and enjoy the chilled, decadent treat straight from the refrigerator.
Notes
- Swap graham crackers with gluten-free cookies to create a celiac-friendly version that maintains the same delicious texture and taste.
- Use reduced-fat cream cheese and sugar-free pudding mix for a lighter dessert option without compromising flavor intensity.
- Enhance the chocolate layer by adding a splash of strong coffee or espresso to deepen the rich chocolate notes and create more complex flavor profiles.
- Customize toppings with alternative garnishes like toasted coconut, caramel drizzle, or crushed pretzels for unique texture and personalized flair.
- Prep Time: 20 minutes
- Cook Time: 4 hours
- Category: Desserts, Snacks
- Method: None
- Cuisine: American
Nutrition
- Serving Size: 12
- Calories: 350
- Sugar: 5 g
- Sodium: 700 mg
- Fat: 20 g
- Saturated Fat: 8 g
- Unsaturated Fat: 10 g
- Trans Fat: 0 g
- Carbohydrates: 15 g
- Fiber: 4 g
- Protein: 25 g
- Cholesterol: 70 mg
Ethan Miller
Founder & Lead Content Writer
Expertise
Education
Portland Community College
Culinary Institute of the Pacific
Ethan’s culinary journey began in his grandmother’s kitchen, where he first learned to play with flavors and ingredients. With formal training in culinary arts and a deep love for international cuisines, Ethan’s goal is to share the joy of cooking with others.
He believes food is all about creativity and bringing people together, one meal at a time. When he’s not experimenting with new dishes, he enjoys hiking in the Oregon wilderness and discovering fresh, local ingredients.