
Fun Beach Party Jello Cups Recipe: Colorful Summer Treats
Sparkling summer memories dance through these vibrant beach party jello cups that capture seaside excitement in every colorful bite.
Layers of tropical flavors blend like sunshine and ocean waves.
Cool gelatin shimmers with playful hues that remind you of sandy shores and carefree moments.
Festive desserts like these bring instant smiles and nostalgic vibes to any gathering.
Swirling blues and greens create edible seascapes that burst with fruity excitement.
Kids and adults alike will adore these whimsical treats that feel like a mini vacation on a plate.
Grab a spoon and let the beach party begin!
Beach Party Jello Cups That Bring the Ocean Vibe
What Goes Into Beach Party Jello Cups
Main Ingredients:
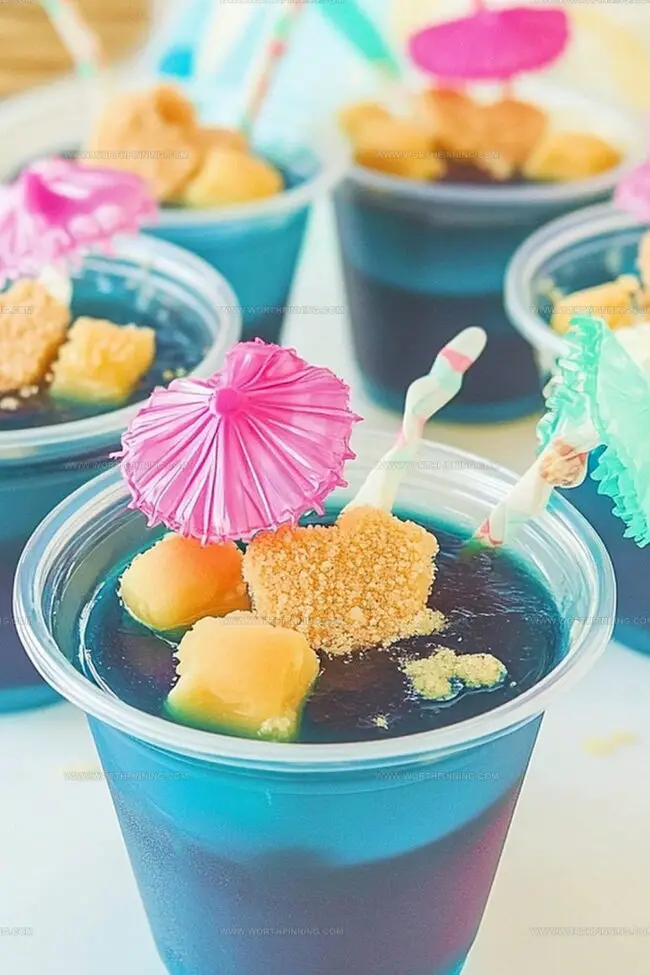
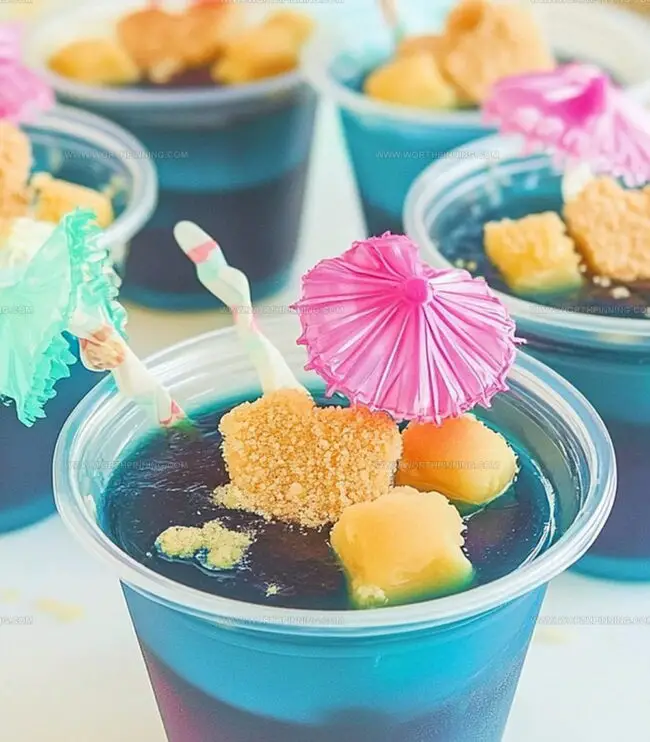
Jell-O: A classic gelatin dessert that creates the ocean-like base with vibrant color and fun texture. Blue is best for ocean theme, but any color works. Comes in various flavors.
Boiling Water: Essential for completely dissolving the Jell-O powder and creating a smooth mixture. Use fresh, clean water.
Cold Water: Helps cool down and set the Jell-O, creating the right consistency. Tap or filtered water is fine.
Decorative Ingredients:
Gummy Fish or Sharks: Fun ocean-themed candy that adds playful character to the dessert. Choose soft, colorful varieties.
Cookie Crumbs: Creates a sandy beach layer on top of the Jell-O. Graham crackers or vanilla wafers work perfectly.
Whipped Topping: Optional ingredient that mimics ocean waves and adds creamy texture. Cool Whip or homemade whipped cream are good options.
Serving Decorations:
Cocktail Umbrellas: Cute beach-themed toothpick decorations that instantly transform the dessert. Small plastic varieties work best.
Clear Plastic Cups: Transparent containers that showcase the layered ocean effect. Sturdy disposable cups recommended.
How to Put Together Beach Party Jello Cups
Step 1: Melt Colorful Jelly Crystal
Grab a spacious mixing bowl and sprinkle jelly powder. Pour steaming hot water and whisk energetically until crystals completely vanish into liquid.
Step 2: Create Cool Liquid Base
Add chilled water and blend thoroughly. Allow mixture to rest and slightly cool down for several moments.
Step 3: Pour Ocean Layers
Transfer jelly liquid into transparent serving cups, filling approximately two-thirds of each container.
Step 4: Transform Into Solid Treat
Refrigerate jelly cups until completely firm and solid, typically requiring two to three hours.
Step 5: Design Beach Scene
Crush graham crackers or vanilla cookies to simulate sandy coastline.
Step 6: Craft Underwater Landscape
Decorate each jelly cup with playful marine elements.
Step 7: Chill And Serve
Keep jelly cups refrigerated until ready to present your delightful ocean-themed dessert.
Tips for Serving Beach Party Jello Cups
Store and Chill Beach Party Jello Cups the Right Way
What to Pair with Beach Party Jello Cups
Makeover Ideas for Beach Party Jello Cups
Everything You’ve Wondered About Beach Party Jello Cups
Blue raspberry or ocean blue flavors are perfect for creating a beach-themed look, giving the jello cups a realistic water-like appearance.
Absolutely! Kids can help mix the Jell-O, add decorations, and place gummy fish or sharks, making it a fun family activity.
Use clear plastic cups with smooth sides and let the Jell-O set completely before adding toppings to ensure easy removal and clean presentation.
You can use graham cracker crumbs for sand, Swedish fish candies instead of gummy fish, and cocktail umbrellas or small paper flags as decorative alternatives.
Print
Beach Party Jello Cups Recipe
- Total Time: 3 hours 15 minutes
- Yield: 8 1x
Description
Colorful beach party jello cups bring summer vibes to any gathering, combining playful tropical flavors with whimsical ocean-inspired layers. Guests will dive into these refreshing, eye-catching desserts that promise cool sweetness and nostalgic beach memories.
Ingredients
Main Ingredients:
- 2 boxes (3 ounces / 85 grams) blue raspberry Jell-O
- 4 cups boiling water
- 2 cups cold water
Decoration/Topping Ingredients:
- 1 cup whipped topping
- 8 vanilla wafers or golden Oreos, crushed
Garnish Ingredients:
- 8–10 gummy fish or sharks
- 8–10 mini drink umbrellas or beach-themed decorations
- 8 small clear plastic cups
Instructions
- Vigorously whisk blue Jell-O powder with scalding water in a spacious mixing vessel until completely liquefied, ensuring no granular residue remains.
- Incorporate chilled water into the azure liquid, stirring methodically to maintain uniform temperature and consistency.
- Allow the translucent mixture to cool and slightly thicken for approximately 10-15 minutes, preventing immediate gelatin solidification.
- Carefully distribute the ocean-hued liquid into transparent serving containers, filling each receptacle approximately two-thirds full to create ample space for embellishments.
- Transfer the prepared vessels into refrigeration unit, permitting complete solidification over 2-3 hours until a firm, glossy surface develops.
- Crush graham crackers or chocolate cookies into fine, granular texture resembling beach sand, then delicately sprinkle across the gelatin’s crystalline surface.
- Playfully position gummy marine creatures – such as sharks or tropical fish – artfully within each cup, creating whimsical underwater landscape.
- Optionally crown each dessert with a miniature cocktail umbrella or nautical-themed decorative element to enhance the beach party aesthetic.
- Garnish with a dollop of white whipped cream, simulating gentle ocean waves, just before serving.
- Chill until moments before presentation to maintain optimal texture and visual appeal.
Notes
- Select blue or light blue Jell-O for the most realistic ocean color, creating a vibrant underwater scene.
- Crush graham crackers or vanilla wafers finely to achieve a smooth, authentic “sand” texture that looks natural in your beach-themed dessert.
- Use gelatin-free gummy candies if catering to vegetarian guests, ensuring everyone can enjoy the playful ocean treat.
- Cool Jell-O mixture at room temperature before refrigerating to prevent cloudy or uneven setting, guaranteeing a crystal-clear ocean effect.
- Prep Time: 15 minutes
- Cook Time: 3 hours
- Category: Desserts, Snacks, Drinks
- Method: Boiling
- Cuisine: American
Nutrition
- Serving Size: 8
- Calories: 230
- Sugar: 14 g
- Sodium: 180 mg
- Fat: 10 g
- Saturated Fat: 4 g
- Unsaturated Fat: 5 g
- Trans Fat: 0 g
- Carbohydrates: 32 g
- Fiber: 2 g
- Protein: 3 g
- Cholesterol: 15 mg
Ethan Miller
Founder & Lead Content Writer
Expertise
Education
Portland Community College
Culinary Institute of the Pacific
Ethan’s culinary journey began in his grandmother’s kitchen, where he first learned to play with flavors and ingredients. With formal training in culinary arts and a deep love for international cuisines, Ethan’s goal is to share the joy of cooking with others.
He believes food is all about creativity and bringing people together, one meal at a time. When he’s not experimenting with new dishes, he enjoys hiking in the Oregon wilderness and discovering fresh, local ingredients.