Easy 7 Layer Dip Cups Recipe: A Fun Party Treat
Layered party dips have never tasted as adorable as these charming 7 layer dip cups that promise bite-sized excitement.
Small mason jars create the perfect portable container for this crowd-pleasing appetizer.
Guests will love picking up their personal portion without messy sharing.
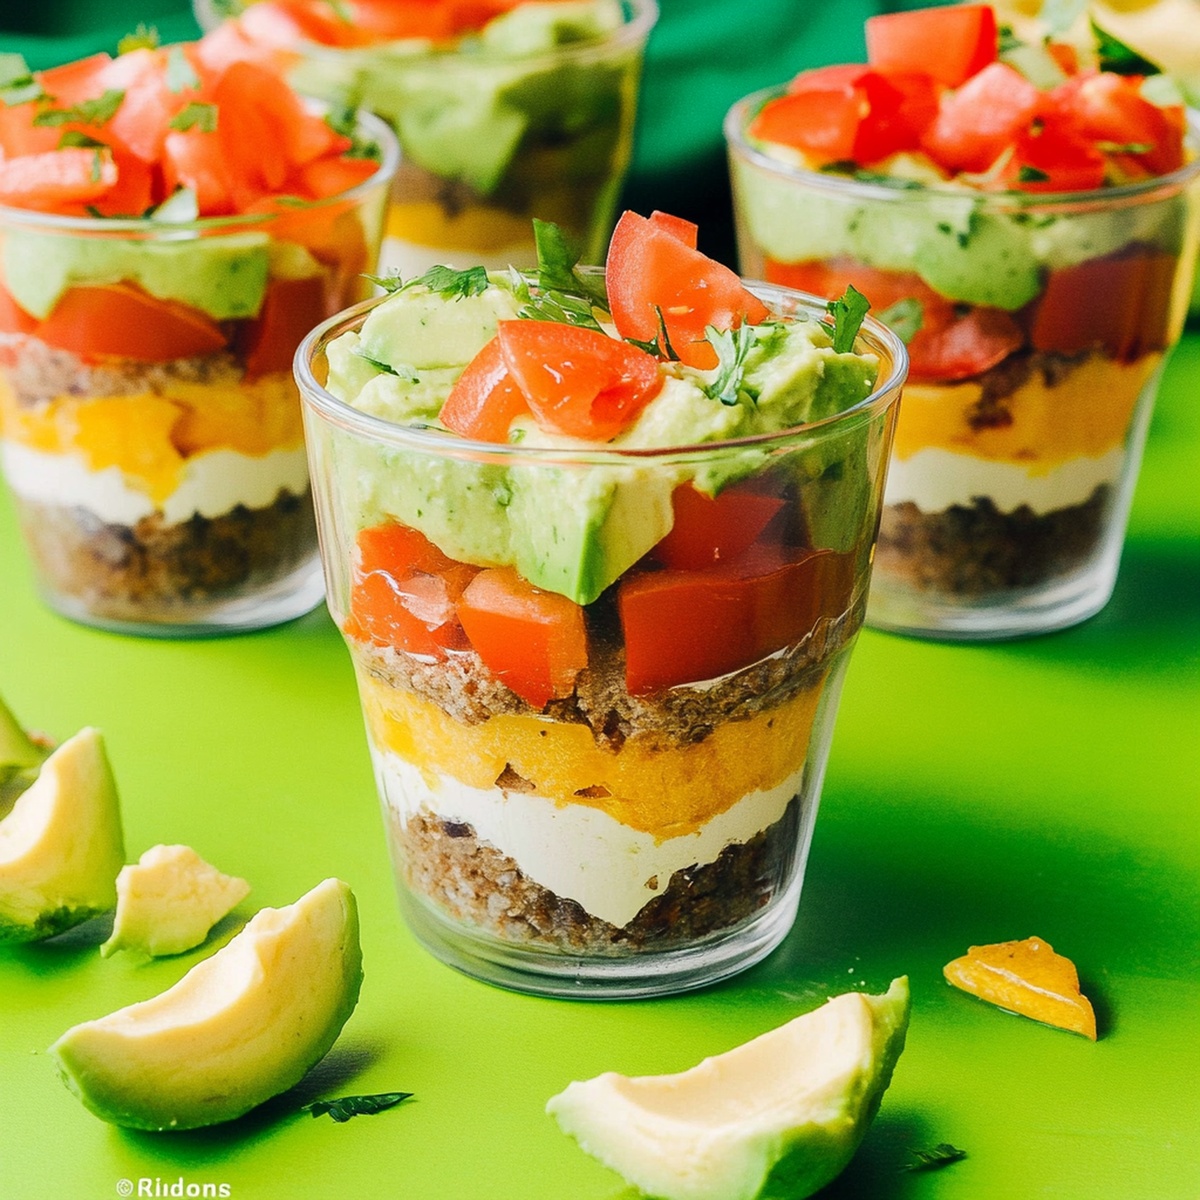
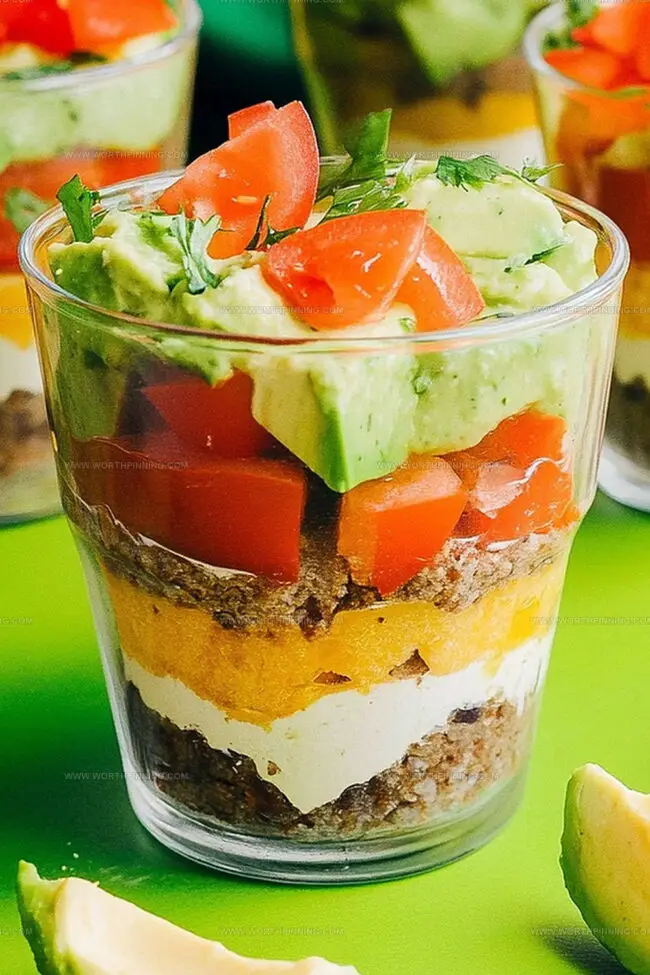
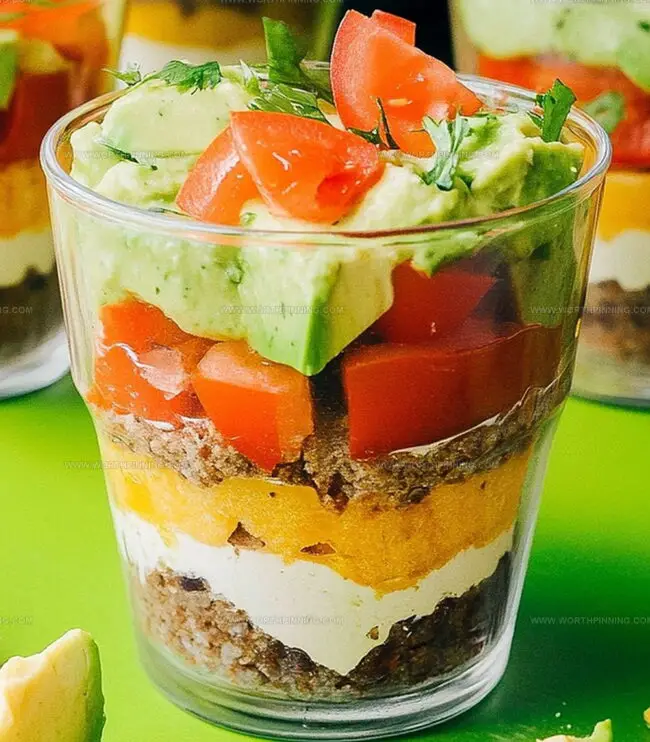
Colorful ingredients stack beautifully, creating a visual feast before the first taste.
Mexican-inspired flavors combine in a compact presentation that makes snacking effortless.
Creamy beans, zesty salsa, and crisp toppings mingle together for maximum deliciousness.
You can totally impress everyone at your next gathering with these individual masterpieces.
7 Layer Dip Cups Made for Party Snacking
Everything You Need for 7 Layer Dip Cups
Base Layer Ingredients:Creamy Layer Ingredients:Topping Ingredients:Assembly Steps for 7 Layer Dip Cups
Step 1: Spice Up the Beans
Mix refried beans with taco seasoning in a mixing bowl until the flavors are thoroughly blended and the beans are evenly coated.
Step 2: Build Your Dip Cup Foundation
Grab clear plastic or glass cups and start creating your delicious layers:Step 3: Chill and Serve
Refrigerate the dip cups for about 30 minutes to let the flavors meld together. This allows the ingredients to settle and become more cohesive.
Step 4: Garnish and Enjoy
Right before serving, you can add a few extra green onion sprinkles on top for a fresh pop of color and flavor. Serve with tortilla chips or crispy corn chips for scooping.
Tips to Keep 7 Layer Dip Cups Neat and Tasty
Store 7 Layer Dip Cups Without Losing Flavor
What to Serve with 7 Layer Dip Cups
Layered Dip Cup Variations Worth Trying
Answers to 7 Layer Dip Cup Questions
Chill the dip cups in the refrigerator for about 15 minutes between each layer. This helps set the layers and keeps them distinct and neat.
Yes, you can prepare them up to 24 hours in advance. Cover with plastic wrap and store in the refrigerator until ready to serve. Just add the final toppings like green onions right before serving.
Clear plastic cups or glass shooter glasses work best. They allow you to see the beautiful layered colors and make for an attractive presentation. Make sure they’re around 3-4 ounces in size.
Simply omit the cheese or use a plant-based cheese alternative. Ensure your refried beans are vegetarian, and all other ingredients remain the same for a delicious vegetarian version of the dip cups.
Print
7 Layer Dip Cups Recipe
- Total Time: 20 minutes
- Yield: 8 1x
Description
Mexican-inspired 7 layer dip cups deliver a compact flavor explosion of creamy refried beans, zesty salsa, tangy sour cream, and fresh toppings. Guests can enjoy individual portions with bold southwestern flair, perfect for parties or game day gatherings.
Ingredients
Primary Layer Ingredients:
- 1 (16 ounces/454 grams) can refried beans
- 1 ½ cups guacamole (store-bought or homemade)
- 1 ½ cups sour cream
Cheese and Topping Ingredients:
- 1 ½ cups shredded cheddar cheese (or Mexican blend)
- ½ cup sliced black olives
- ½ cup chopped green onions
Seasoning and Salsa Ingredients:
- 1 tablespoon taco seasoning
- 1 cup chunky salsa or pico de gallo (drained slightly)
Additional Serving Item:
- Tortilla chips, for serving
- 8–10 small clear plastic cups (8 ounces/237 milliliters size)
Instructions
- Prepare the seasoned beans by vigorously stirring taco seasoning into refried beans until thoroughly integrated, creating a flavorful base for the layered appetizer.
- Select clear serving cups and establish a solid foundation by carefully spreading a uniform layer of the spiced bean mixture along the bottom of each container.
- Craft a smooth, creamy guacamole layer directly atop the seasoned beans, ensuring even distribution across the entire surface of the cup.
- Delicately spread a rich, velvety sour cream layer over the guacamole, maintaining a consistent thickness throughout each individual serving.
- Gently spoon fresh salsa across the sour cream, allowing the vibrant colors and textures to create an appealing visual dimension.
- Generously sprinkle a cascade of shredded cheese, covering the salsa layer completely and adding a tantalizing dairy-rich element.
- Enhance the visual and flavor profile by scattering finely chopped black olives across the cheese layer, providing a contrasting dark accent.
- Finish the dip cups with a garnish of freshly sliced green onions, adding a crisp, sharp note that complements the layered ingredients.
- Chill the assembled dip cups for at least 30 minutes to allow flavors to meld and develop before serving with tortilla chips or crackers.
Notes
- Choose soft, creamy avocados for the smoothest guacamole base that spreads easily in the cup.
- Drain salsa thoroughly to prevent excess liquid from making the layers soggy and compromising the dip’s structural integrity.
- Prepare ingredients in advance and chill the cups for at least an hour to let flavors meld and enhance the overall taste profile.
- Customize the layers for dietary needs by using Greek yogurt instead of sour cream, or swap cheese with a vegan alternative for plant-based guests.
- Prep Time: 10 minutes
- Cook Time: 10 minutes
- Category: Appetizer, Snacks
- Method: None
- Cuisine: Mexican
Nutrition
- Serving Size: 8
- Calories: 300
- Sugar: 1 g
- Sodium: 500 mg
- Fat: 10 g
- Saturated Fat: 3 g
- Unsaturated Fat: 5 g
- Trans Fat: 0 g
- Carbohydrates: 30 g
- Fiber: 1 g
- Protein: 25 g
- Cholesterol: 80 mg
Ethan Miller
Founder & Lead Content Writer
Expertise
Education
Portland Community College
Culinary Institute of the Pacific
Ethan’s culinary journey began in his grandmother’s kitchen, where he first learned to play with flavors and ingredients. With formal training in culinary arts and a deep love for international cuisines, Ethan’s goal is to share the joy of cooking with others.
He believes food is all about creativity and bringing people together, one meal at a time. When he’s not experimenting with new dishes, he enjoys hiking in the Oregon wilderness and discovering fresh, local ingredients.