
Flaky Pioneer Woman Pie Crust Recipe
The Pioneer Woman’s pie crust stands as a legendary culinary treasure that transforms ordinary baking into an extraordinary experience.
Flaky, tender, and remarkably consistent, this recipe has earned its reputation among home bakers nationwide.
Professional and amateur chefs appreciate its simple ingredients and foolproof technique.
Generations of families have relied on this method to create delectable desserts that spark joy and conversation.
Crumbly yet structured, the dough promises a perfect foundation for sweet and savory creations.
Passionate bakers understand that mastering this crust represents a significant milestone in their cooking journey.
The magic lies in precise proportions and careful handling, ensuring a consistently delightful result: get ready to elevate your pie-making skills.
Why Pie Crust Recipe Is a Kitchen Staple

Essential Ingredients for the Pioneer Woman Pie Crust Recipe
Flour and Fat Base:Liquid and Binding Ingredients:Preparation Extras:Pie Crust Recipe Instructions That Work Every Time

Step 1: Prepare The Dough
Mix flour and Crisco in a large bowl using a pastry cutter for 3-4 minutes until crumbly. In a separate small bowl, beat 1 egg with a fork. Add egg to flour mixture along with:Stir gently until ingredients are fully combined.
Step 2: Shape And Chill The Dough
Divide dough into:Roll each portion into a ball and place inside large zip-top bags. Flatten each ball to 1/2-inch thickness. Seal bags and freeze for 20 minutes.
Step 3: Prepare Dough For Rolling
Remove dough from freezer and let thaw for 15 minutes. Sprinkle flour on clean countertop and rolling surface. Roll dough from center outward, adding flour if sticky. Use metal spatula to lift and prevent sticking. Roll until dough extends 1/2 inch beyond pie pan edge.
Step 4: Transfer Dough To Pie Pan
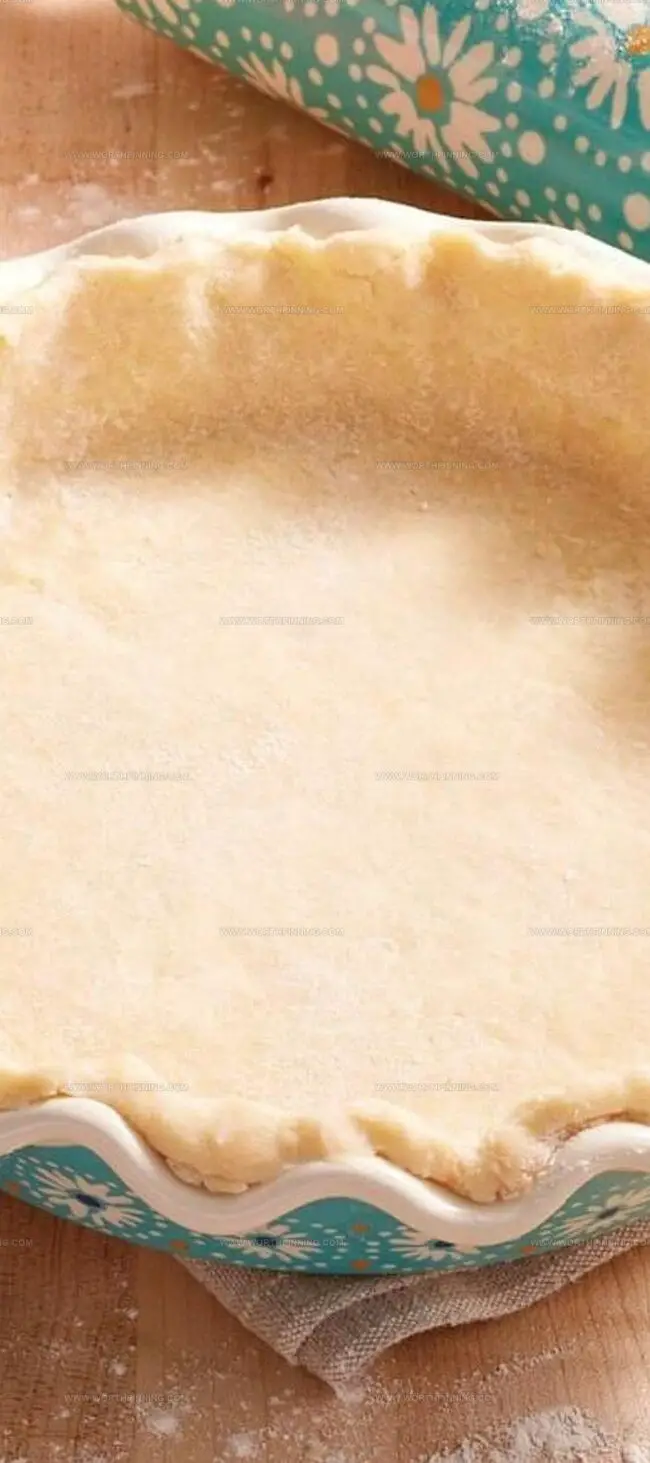
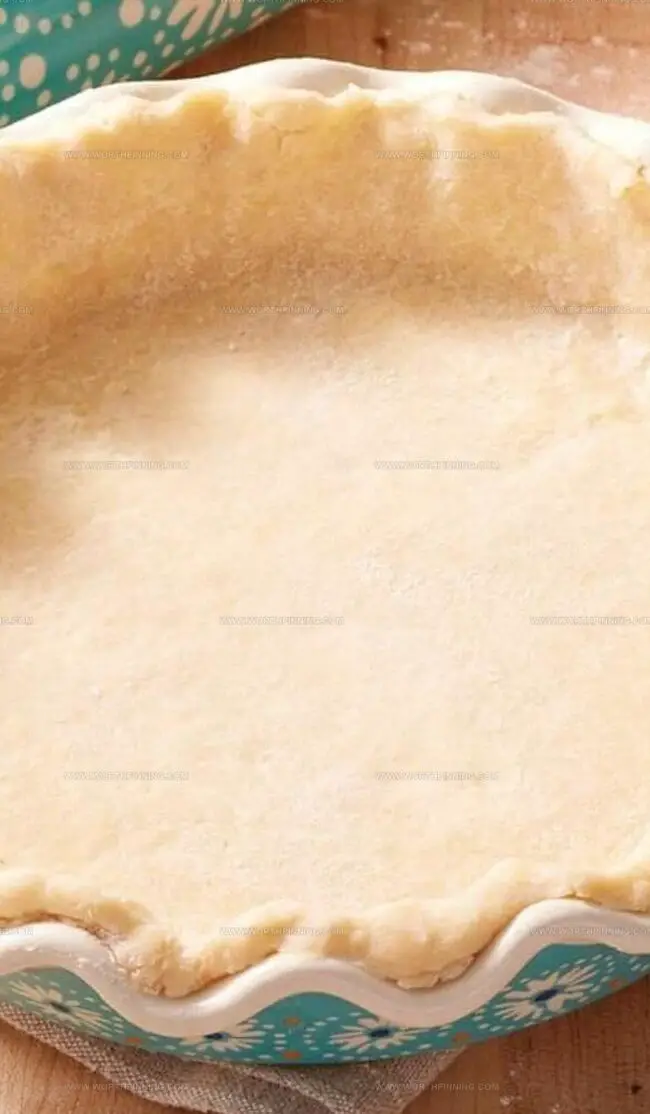
Carefully move rolled dough into pie pan using spatula. Press dough gently against pan bottom and sides. Trim excess dough around edges. Create decorative rim by pinching edges.
Step 5: Pre-Bake Crust Option
For recipes requiring pre-baked crust:Tips for Flaky Pie Crust Recipe Results
Best Ways to Store Your Pie Crust Recipe Dough
Easy Pie Crust Recipe Variations to Try
Ending Slice on the Pie Crust Recipe
Pioneer Woman’s pie crust masterpiece whispers culinary magic from generations past.
Flaky layers tell stories of family gatherings and cherished moments shared around warm kitchen tables.
Crisco and flour dance together, creating a tender canvas for sweet and savory creations.
Delicate edges pinched with care reveal passion behind every recipe detail.
Homemade perfection emerges from simple ingredients and time-honored techniques.
Bakers who explore this recipe unlock generations of delicious tradition – you’ll want to capture this moment, snap a photo, share the love, and inspire fellow kitchen adventurers to embrace their inner pastry artist.
Print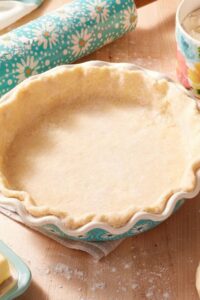
Pioneer Woman Pie Crust Recipe
- Total Time: 45 minutes
- Yield: 2 1x
Description
Flaky, buttery Pioneer Woman Pie Crust delivers ultimate baking magic with simple ingredients. Crisp edges and tender center make delicious pies irresistible when crafted with this classic recipe.
Ingredients
Primary Ingredients:
- 3 cups (360 g) all-purpose flour
- 1 ½ cups (360 g) Crisco (vegetable shortening)
Secondary Ingredients:
- 1 large egg
- 5 tablespoons (75 ml) cold water
- 1 tablespoon (15 ml) white vinegar
Seasoning:
- 1 teaspoon (5 g) salt
Instructions
- Create the foundational mix by combining flour with chilled vegetable shortening in a spacious mixing bowl. Using a pastry blender, thoroughly incorporate the ingredients until the texture resembles coarse, uneven breadcrumbs, which should take approximately 3-4 minutes.
- In a separate small container, whisk the egg thoroughly. Pour the beaten egg into the flour mixture, then add cold water, white vinegar, and salt. Gently combine all ingredients until a cohesive, uniform dough forms without overmixing.
- Portion the dough into either two or three equal-sized spherical portions, depending on desired crust thickness. Place each dough ball into individual large resealable plastic bags, gently flattening each to approximately 1/2-inch (1.3 centimeters) thickness.
- Transfer the bagged dough portions into the freezer and chill for a minimum of 20 minutes. This resting period helps relax the gluten and ensures easier rolling and handling later.
- Remove the dough from the freezer and allow it to soften slightly for about 15 minutes if completely frozen. Dust a clean work surface with flour to prevent sticking.
- Using a rolling pin, methodically roll the dough from the center outward, rotating periodically to maintain an even circular shape. Sprinkle additional flour as needed to prevent adhesion to the surface or rolling pin.
- Carefully lift the rolled dough using a metal spatula or by gently folding it in half, then transfer it into the pie pan. Delicately press the dough against the pan’s bottom and sides, trimming any excess around the edges.
- Create an decorative crimped edge by pinching the dough’s perimeter, which not only enhances appearance but also helps seal the crust.
- For recipes requiring a pre-baked crust, puncture the bottom with a fork to prevent bubbling. Bake in a preheated oven at 400°F (204°C) for 12-15 minutes until achieving a light golden brown color. Allow to cool completely on a wire rack before adding filling.
Notes
- Prevent dough from becoming tough by handling it minimally during preparation, which keeps the crust light and flaky.
- Cold ingredients are crucial for achieving the perfect pie crust texture, so keep butter and water thoroughly chilled before mixing.
- Shortening or butter creates delicate layers that make your pastry melt in your mouth, giving that heavenly homemade feel.
- Resting the dough in the refrigerator allows gluten to relax, making rolling easier and preventing shrinkage during baking.
- Crumbly dough means you need more liquid, so add cold water slowly and gently mix until the dough just comes together.
- Practice makes perfect – don’t get discouraged if your first few pie crusts aren’t magazine-worthy; each attempt improves your skill.
- Trimming excess dough around the pie pan’s edges ensures a clean, professional look and prevents burning during baking.
- Working on a cool surface like marble or a chilled countertop helps maintain the dough’s temperature and prevents premature melting.
- Flour your work surface lightly to prevent sticking, but avoid adding too much, which can make the crust tough.
- Cutting fat into flour creates tiny pockets that transform into delicious, flaky layers during baking.
- Prep Time: 20 minutes
- Cook Time: 25 minutes
- Category: Desserts
- Method: Baking
- Cuisine: American
Nutrition
- Serving Size: 2
- Calories: 300
- Sugar: 0 g
- Sodium: 200 mg
- Fat: 20 g
- Saturated Fat: 5 g
- Unsaturated Fat: 15 g
- Trans Fat: 0 g
- Carbohydrates: 30 g
- Fiber: 1 g
- Protein: 3 g
- Cholesterol: 15 mg
Ethan Miller
Founder & Lead Content Writer
Expertise
Education
Portland Community College
Culinary Institute of the Pacific
Ethan’s culinary journey began in his grandmother’s kitchen, where he first learned to play with flavors and ingredients. With formal training in culinary arts and a deep love for international cuisines, Ethan’s goal is to share the joy of cooking with others.
He believes food is all about creativity and bringing people together, one meal at a time. When he’s not experimenting with new dishes, he enjoys hiking in the Oregon wilderness and discovering fresh, local ingredients.