
Velvety Pioneer Woman Peanut Butter Fudge Recipe
Pioneer Woman’s peanut butter fudge stands as a decadent sweet marvel that promises pure indulgence.
Smooth, rich textures meld together in a classic confectionery delight that tempts every dessert lover.
Creamy ingredients transform into a luxurious treat that melts effortlessly on your tongue.
Sophisticated yet simple, this confection delivers intense flavor without complicated techniques.
Chocolate and peanut butter dance in perfect harmony, creating a sensational combination that feels both nostalgic and innovative.
Home bakers can craft this delectable dessert with minimal kitchen skills and basic pantry staples.
Why Peanut Butter Fudge Is So Hard to Resist
Everything That Goes Into Creamy Fudge
Base Ingredients:Peanut Butter Components:Topping and Decoration Ingredients:Preparation Support Ingredients:Steps for Smooth, Rich Peanut Butter Fudge

Step 1: Prepare Baking Canvas
Line an 8-inch square pan with parchment paper, letting it hang 2 inches over edges. Lightly spray with nonstick cooking spray for easy removal.
Step 2: Create Sweet Base
Gather ingredients:Heat ingredients in medium saucepan over medium heat. Stir constantly until mixture starts boiling. Continue cooking until temperature reaches 234°F to 240°F (soft ball stage), which takes about 2 to 2.5 minutes.
Step 3: Blend Creamy Goodness
Remove pan from heat. Quickly mix in:Stir until mixture becomes silky smooth.
Step 4: Pour and Rest
Transfer mixture into prepared pan. Spread evenly. Let fudge cool completely at room temperature for 2 hours until firm.
Step 5: Chocolate Drizzle Magic
Melt chocolate chips in microwave-safe bowl:Microwave in 30-second intervals, stirring between each. Continue until chocolate is completely smooth.
Step 6: Final Flourish
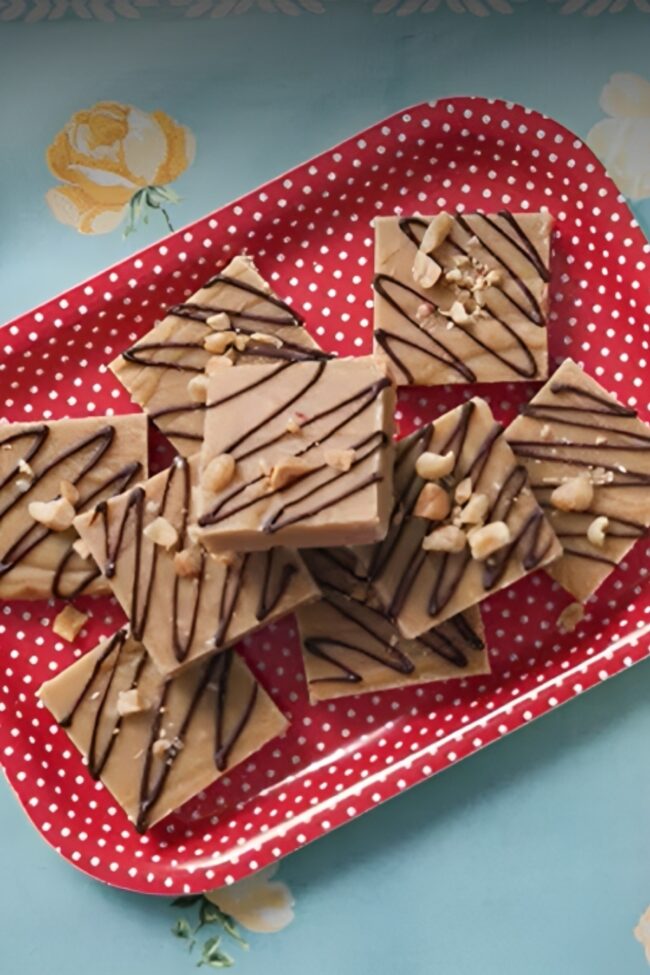
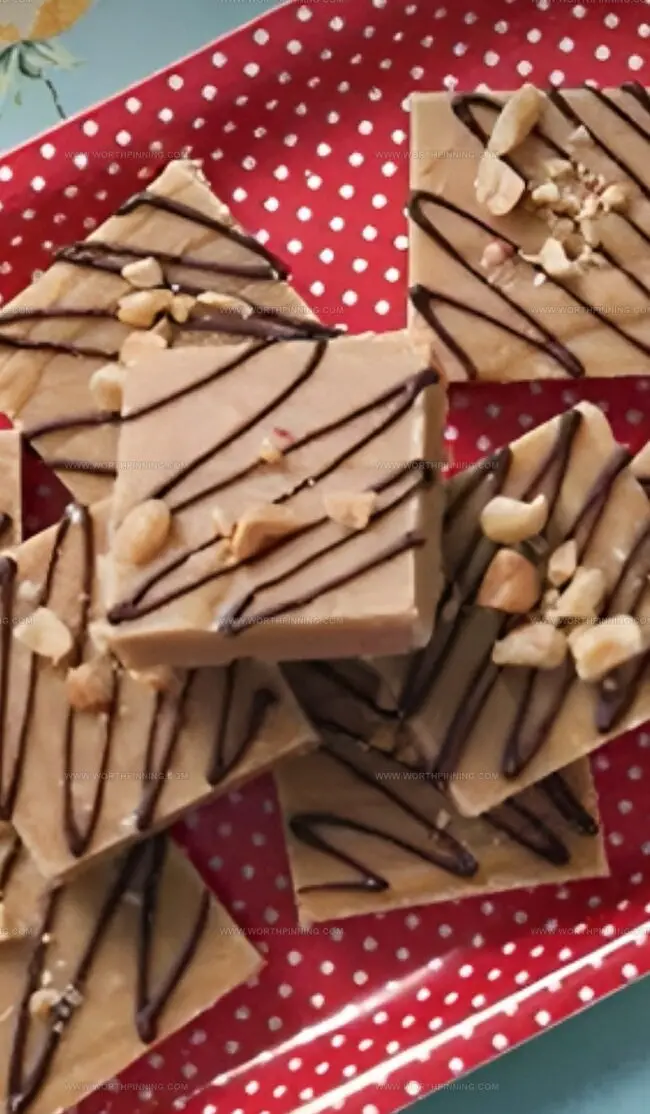
Drizzle melted chocolate over set fudge. Sprinkle with chopped peanuts. Allow chocolate to harden for 20 minutes.
Step 7: Slice and Serve
Cut into squares. Enjoy your homemade peanut butter fudge masterpiece!
Tips for Easy Fudge Every Time

Storing Fudge Without It Getting Crumbly
Twist Up Your Fudge with Fun Add-Ins
Peanut Butter Fudge That Hits the Sweet Spot
Sweet memories of childhood comfort merge with Pioneer Woman’s classic peanut butter fudge recipe.
Rich peanut butter layers intertwine with smooth chocolate drizzles, creating delectable nostalgia on each plate.
Classic ingredients dance together in perfect harmony, promising irresistible indulgence.
Kansas culinary traditions shine through this simple yet elegant dessert masterpiece.
Southern charm radiates from each chocolate-kissed square, inviting passionate bakers into delightful kitchen adventures.
Creamy textures and bold flavors will spark conversation, inspire sharing, and connect hearts – click that share button, tag passionate friends, and spread deliciousness across social media networks.
Print
Pioneer Woman Peanut Butter Fudge Recipe
- Total Time: 10 minutes
- Yield: 16 1x
Description
Creamy Pioneer Woman Peanut Butter Fudge delivers rich, melt-in-your-mouth goodness straight from southern kitchens. Sugary squares promise sweet comfort that draws friends and family together for indulgent moments of pure delight.
Ingredients
Main Ingredients:
- 2 cups granulated sugar
- 1 cup creamy peanut butter
- ½ cup whole milk
- ¼ cup bittersweet chocolate chips
Flavor Enhancers:
- ½ teaspoon kosher salt
- 1 teaspoon vanilla extract
Garnish:
- 2 tablespoons lightly salted roasted peanuts, chopped
- Nonstick cooking spray
Instructions
- Meticulously line an 8-inch (20.3 centimeters) square baking pan with parchment paper, ensuring a generous 2-inch (5 centimeters) overhang on all sides. Lightly coat the paper with nonstick cooking spray to prevent sticking.
- In a medium saucepan, combine granulated sugar, whole milk, and salt. Activate medium heat, continuously stirring the mixture until it reaches a rolling boil. Maintain constant stirring while monitoring the temperature with a candy thermometer, aiming for the soft ball stage between 234°F to 240°F (112°C to 116°C), which typically takes 2 to 2½ minutes.
- Once removed from heat, swiftly incorporate creamy peanut butter and pure vanilla extract, whisking until the mixture transforms into a silky, homogeneous consistency.
- Gently transfer the peanut butter mixture into the prepared pan, utilizing a spatula to distribute it evenly across the surface. Allow the fudge to settle and solidify at room temperature for approximately 2 hours.
- For the chocolate topping, place milk chocolate chips in a microwave-safe bowl. Employ a gradual melting technique by heating in 30-second increments, pausing to stir between each interval. Continue until the chocolate achieves a nearly complete liquid state with minimal solid remnants.
- Elegantly drizzle the molten chocolate across the set fudge, creating an artistic pattern. Sprinkle roughly chopped peanuts over the surface for added texture and visual appeal. Permit the chocolate to completely harden, which typically requires around 20 minutes at room temperature.
Notes
- Use a precise candy thermometer to nail the perfect sugar syrup temperature between 234°F and 240°F for smooth, creamy fudge texture.
- Prep your baking pan by lining it with parchment paper and greasing the sides to ensure easy fudge removal without any sticky mess.
- Continuously stir the sugar mixture while cooking to prevent burning and distribute heat evenly, creating a consistent base for your delicious treat.
- Gently melt chocolate in the microwave, stirring frequently to avoid overheating and maintaining a silky, glossy consistency.
- Allow the fudge to cool completely and set fully before cutting, which prevents crumbling and ensures clean, perfect slices.
- Slice the fudge using a sharp knife, dipping it in hot water and drying between cuts to create smooth, professional-looking pieces that won’t stick or break.
- Prep Time: 5 minutes
- Cook Time: 5 minutes
- Category: Desserts, Snacks
- Method: Boiling
- Cuisine: American
Nutrition
- Serving Size: 16
- Calories: 204
- Sugar: 13 g
- Sodium: 29 mg
- Fat: 10 g
- Saturated Fat: 2 g
- Unsaturated Fat: 8 g
- Trans Fat: 0 g
- Carbohydrates: 24 g
- Fiber: 1 g
- Protein: 5 g
- Cholesterol: 2 mg
Ethan Miller
Founder & Lead Content Writer
Expertise
Education
Portland Community College
Culinary Institute of the Pacific
Ethan’s culinary journey began in his grandmother’s kitchen, where he first learned to play with flavors and ingredients. With formal training in culinary arts and a deep love for international cuisines, Ethan’s goal is to share the joy of cooking with others.
He believes food is all about creativity and bringing people together, one meal at a time. When he’s not experimenting with new dishes, he enjoys hiking in the Oregon wilderness and discovering fresh, local ingredients.