
Easy Joanna Gaines Pie Crust Recipe for Perfect Homemade Pies
Joanna Gaines’s pie crust stands as a culinary cornerstone for bakers seeking perfection in their pastry creations.
Crafting this delicate foundation requires minimal ingredients and maximum passion for baking.
Butter plays a crucial role in developing that signature flaky texture we all crave.
Homemade crusts transform ordinary desserts into extraordinary experiences with their rich, golden layers.
Professional and home bakers appreciate the simplicity behind this remarkable recipe.
Mastering pie crust techniques can elevate your baking skills from amateur to impressive in just a few steps.
Delectable pies await those willing to embrace the art of pastry making: dive in and unleash your inner baker!
Why Joanna Gaines’ Pie Crust Is a Game-Changer
What You Need for Joanna Gaines’ Pie Crust
Joanna Gaines’ Pie Crust Made Easy
Step 1: Gather Ingredients
Collect all necessary ingredients before starting. You’ll need:Ensure ingredients are measured and ready to go.
Step 2: Create Crumbly Dough Mixture
In a large mixing bowl, combine:Use a fork or pastry blender to mix ingredients until they resemble coarse crumbs. The texture should look like small pebbles. Gradually add ice-cold water, at a time, mixing lightly with a fork until the dough just begins to hold together.
Step 3: Prepare Work Surface
Sprinkle a clean countertop or pastry cloth with a light dusting of flour. This prevents the dough from sticking and makes rolling easier.
Step 4: Roll Out Perfect Dough Circle
Gently roll the dough into a circular shape. Aim for a circle approximately 1 inch larger than your pie plate’s diameter. Use smooth, even strokes with your rolling pin to create an even thickness.
Step 5: Transfer Dough to Pie Plate
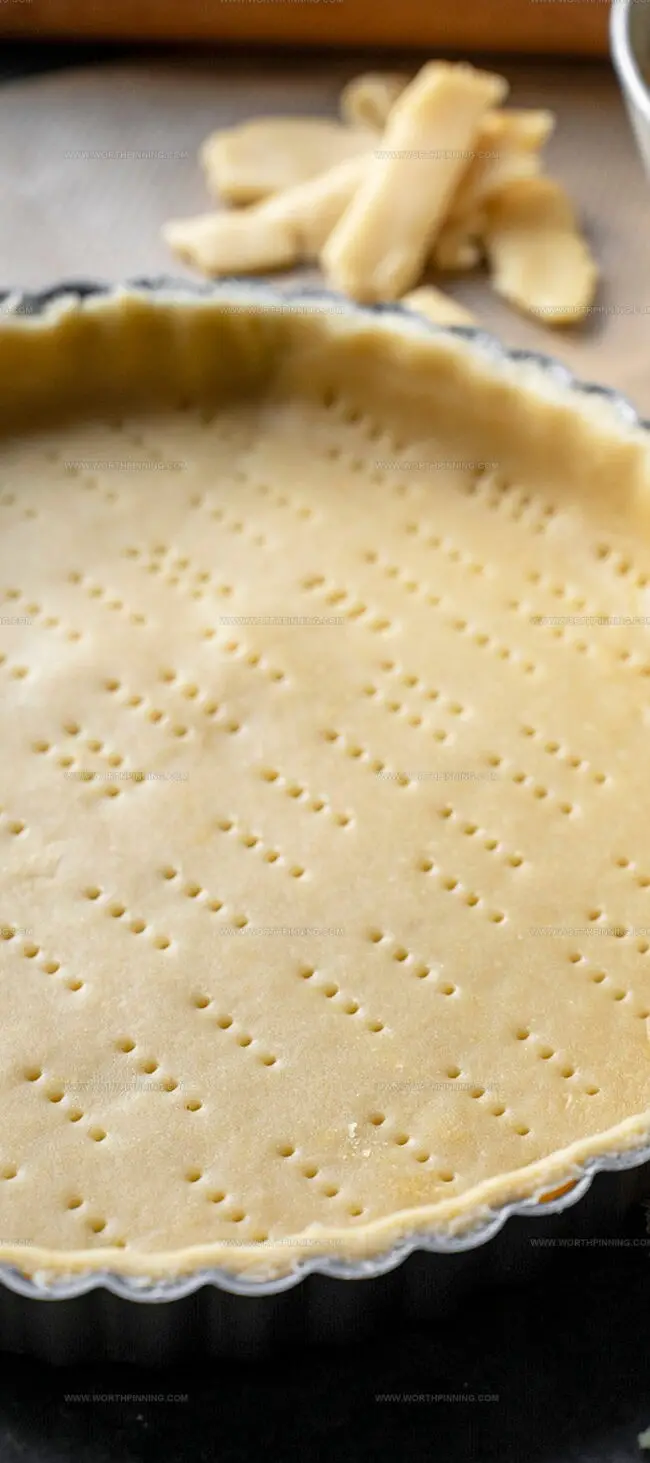
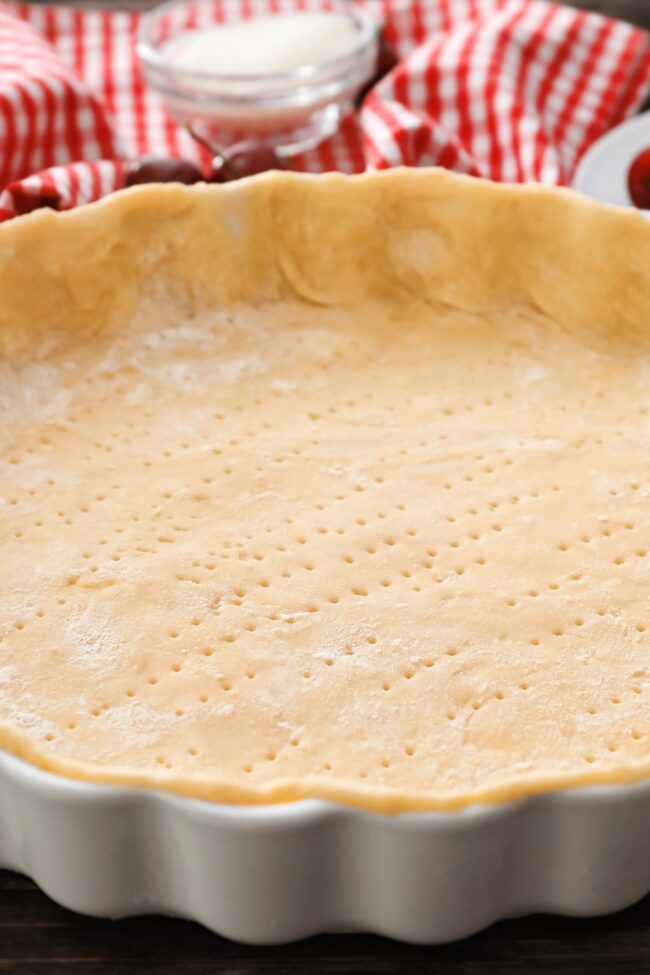
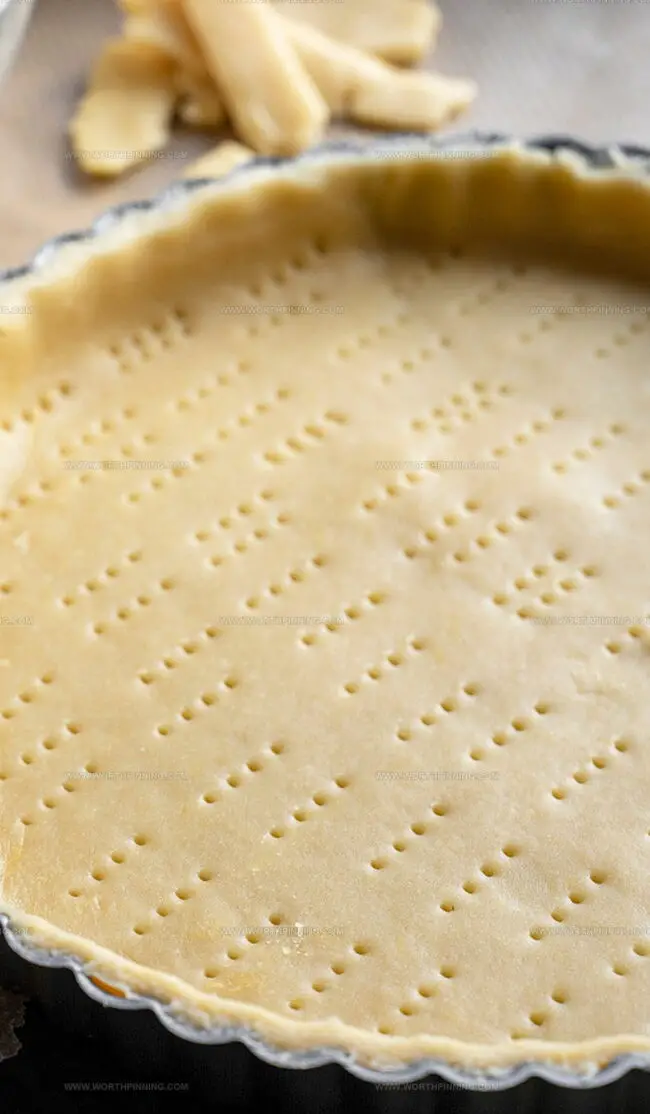
Carefully fold the rolled dough in half. Lift and place it gently into the pie plate, then unfold. Softly press the dough into the pan’s corners and sides, ensuring a smooth fit without stretching.
Step 6: Finish Pie Crust Edges
For a single-crust pie, trim the dough, leaving a 1/2 inch overhang around the plate’s edge. Fold the excess dough upward and pinch the edges together, creating a beautiful raised border. This technique helps seal the crust and provides an attractive finish.
Crust Tips from Joanna Gaines
Storing Pie Crust Like Joanna Gaines
Customize Your Joanna Gaines Pie Crust
A Flaky Farewell to Joanna Gaines’ Pie Crust
Joanna Gaines’ pie crust recipe emerges as pure culinary poetry, blending simplicity with southern charm.
Her method transforms basic ingredients into flaky, golden perfection that whispers comfort and tradition.
Bakers seeking authentic homestyle elegance will find this technique both accessible and rewarding.
Kitchen novices and seasoned professionals can master this technique with confidence and grace.
Regional ingredients and careful technique create a foundation for spectacular desserts that celebrate home cooking.
Your pastry skills will soar to new heights with this foolproof approach – so grab those ingredients, channel your inner baker, and let deliciousness unfold.
Snap a photo of your masterpiece, share this recipe with friends, drop a comment below, and spread the joy of homemade magic!
Print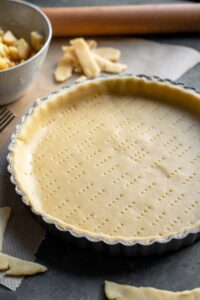
Joanna Gaines Pie Crust Recipe
- Total Time: 30 minutes
- Yield: 8 1x
Description
Joanna Gaines’ pie crust recipe delivers flaky, buttery perfection for home bakers seeking classic comfort. Southern charm meets culinary expertise in this simple yet elegant pastry that elevates any pie from ordinary to extraordinary.
Ingredients
Main Ingredients:
- 1.5 cups all-purpose flour
- 0.5 cup vegetable shortening
- 0.5 cup cold water
Seasoning:
- 0.5 teaspoon salt
Instructions
- Prepare the workspace by arranging all measured ingredients within easy reach, ensuring a clean and organized surface for pie crust preparation.
- In a spacious mixing bowl, combine cold shortening, all-purpose flour, and salt. Utilize a pastry blender or fork to incorporate ingredients until the mixture resembles coarse, pea-sized crumbs with a sandy texture.
- Gradually introduce ice-cold water (approximately 59 to 89 milliliters / 4 to 6 tablespoons) into the flour mixture. Gently fold and press the ingredients, working just until the dough coheres without overworking the mixture.
- Dust a clean countertop or pastry mat generously with flour. Transfer the dough onto the floured surface and shape it into a compact disk using gentle hand pressure.
- Using a rolling pin, methodically roll the dough into a circular shape, rotating periodically to maintain an even thickness. Aim for a diameter approximately 2.5 centimeters / 1 inch larger than your selected pie plate.
- Carefully fold the delicate dough in half, then lift and position it over the pie plate. Unfurl the dough gently, allowing it to settle naturally into the plate’s contours without stretching.
- Softly press the dough into the plate’s edges and bottom, eliminating any air pockets. Trim the excess dough, leaving a 1.25 centimeters / ½ inch overhang around the rim.
- Create a decorative edge by folding the overhang upward and pinching it between your thumb and forefinger, forming an elevated, crimped border that adds both visual appeal and structural integrity to the pie crust.
Notes
- Stash your shortening in the freezer for maximum flakiness, ensuring it stays rock-solid before mixing into the dough.
- Gentle hands win when combining ingredients – mix only until the dough barely comes together, avoiding tough pastry disaster.
- Ice-cold water is your secret weapon for creating a tender, easily rollable pie crust that won’t crumble.
- Dust your work surface sparingly with flour, preventing a dry and crumbly texture that can ruin your beautiful crust.
- Pop the shaped crust into the refrigerator for a quick 15-minute chill, stopping unwanted shrinkage during baking and maintaining its gorgeous shape.
- Prep Time: 20 minutes
- Cook Time: 10 minutes
- Category: Desserts
- Method: Blending
- Cuisine: American
Nutrition
- Serving Size: 8
- Calories: 782
- Sugar: 0g
- Sodium: 719mg
- Fat: 44g
- Saturated Fat: 14g
- Carbohydrates: 87g
- Fiber: 0g
- Protein: 10g
- Cholesterol: 0mg
Ethan Miller
Founder & Lead Content Writer
Expertise
Education
Portland Community College
Culinary Institute of the Pacific
Ethan’s culinary journey began in his grandmother’s kitchen, where he first learned to play with flavors and ingredients. With formal training in culinary arts and a deep love for international cuisines, Ethan’s goal is to share the joy of cooking with others.
He believes food is all about creativity and bringing people together, one meal at a time. When he’s not experimenting with new dishes, he enjoys hiking in the Oregon wilderness and discovering fresh, local ingredients.